
My kids must be eating their color pencils. Or that or I really don’t know where they’re constantly disappearing. I gave it another chance last Christmas and I made each of my girls a roll-up pencil case.

And we don’t just have pencils that need storage, so check out also this Recycled Shoebox Suitcase for creative supplies!
Table of Contents

 Gather your Supplies
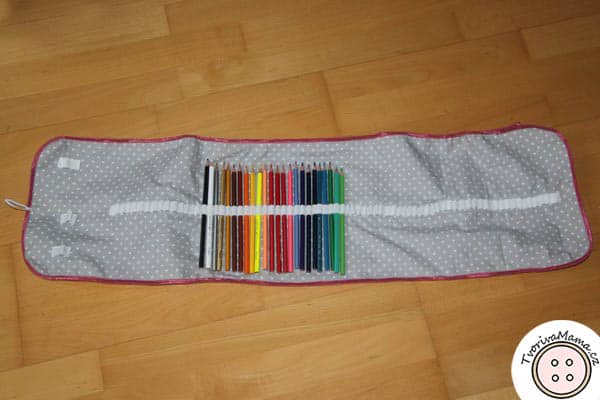
Our pencil cases are for 72 pencils each but you can adjust the size according to you liking.
However, if you want your roll-up pencil case larger and smaller, don’t forget to adjust the length of the bias elastic tape and the flat elastic band.
- Cotton canvas – 2 rectangles 25 x 80 cm/9.8 x 31.5 in
- Fusible fleece (thin is enough) – 1 rectangles 25 x 80 cm/9.8 x 31.5 in
- Bias elastic approx.. 210 cm/82.7 in
- Flat elastic band, width 1 cm/0.4 in, length approx.. 80 cm/31.5 in
- Flat elastic band, width 0,5 cm/0.2 in, length approx.. 5 cm/2 in
- Pins
- Scissors
- A button
Cut the Fabrics for the Pencil Case
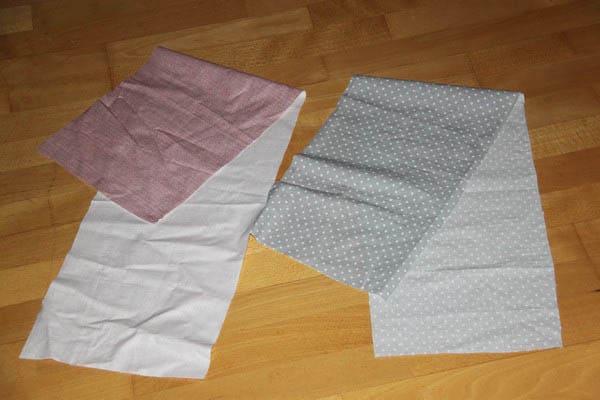
As mentioned in the supplies, you need to cut two long rectangles from the cotton canvas and one from the fusible fleece. Or you can iron one of the canvas pieces onto the fleece and then cut it (in the upcoming steps, I find this easier).
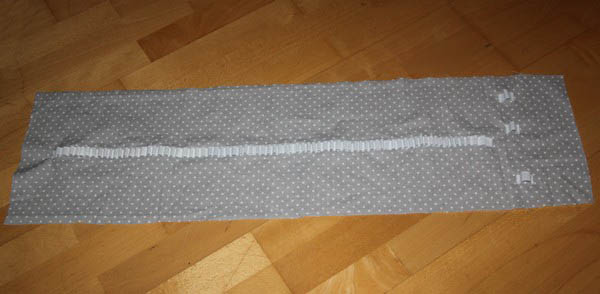
Sew together the Edges and Create the Pencil Compartments

Now comes a lengthy part of the job, you’ll have to pin the long flat elastic band. Measure the center of one of the long rectangles, that’s where the elastic will be. Stitch one end of the elastic to the canvas about 5 cm/2 in from the edge using the zigzag stitch. Then it’s time to make the loops for the pencils.
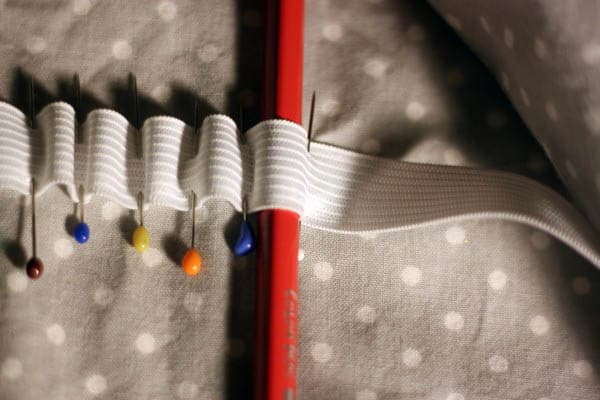
My tip is to place a pencil under the elastic and pin it to the canvas in a position that prevents the pencil from slipping out. In time, especially if you’re making a lot of loops, you’ll learn the trick to pin it correctly without using the pencil. Quit pinning some 10 cm/4 in from the other edge of the rectangle.
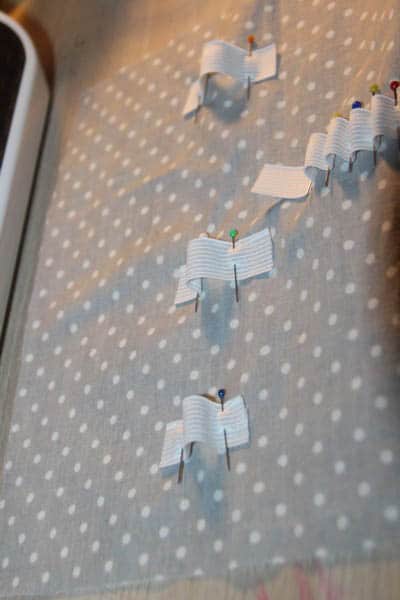
You can use the rest of the space to pin individual loops for an eraser and a pencil sharpener.
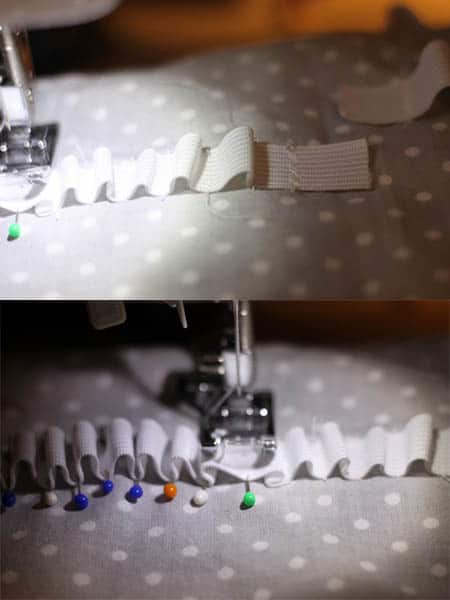
And I bet you guessed what comes next. Yes, it’s the stitching. All those places you have pinned have to be stitched and don’t forget to backstitch! As I mentioned before, I recommend stitching the ends of the elastic with a zigzag.
The difficult part is over!
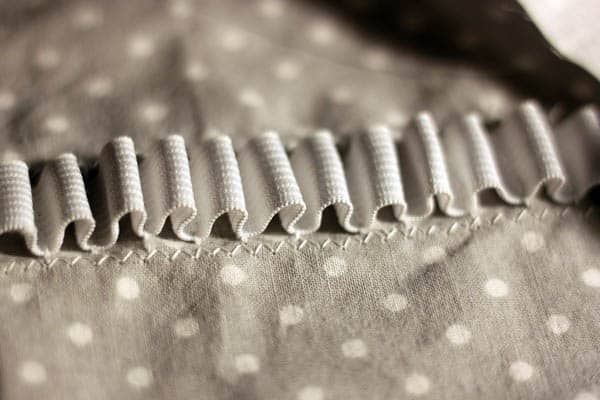
Now zigzag around the loops, it will prevent the stitches from loosening and it will look better.
Working the Pencil Case’s Outside
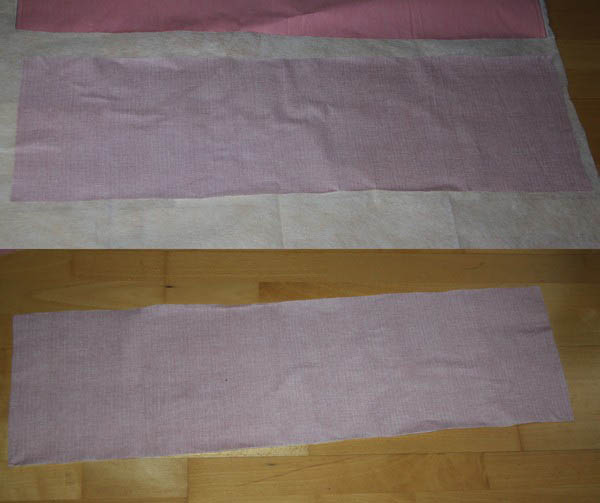
Let’s pay attention to the other canvas rectangle now. Iron it onto the fusible fleece and cut the fleece to match the canvas.
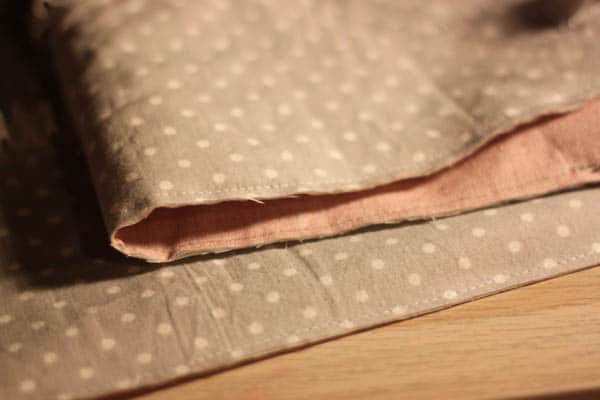
Turn the piece with the fleece side facing up and place the rectangle with the loops on it wrong side down. Topstitch around the edges. Round the edges.
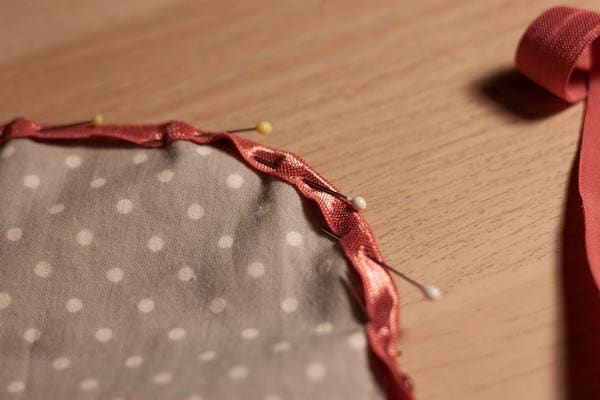
Now stitch the bias tape around the edges. I pin only the beginning and then just hold it with my hand as I stitch. It’s important not to pull of the bias too much because then the bias and the canvas under it will become wavy.
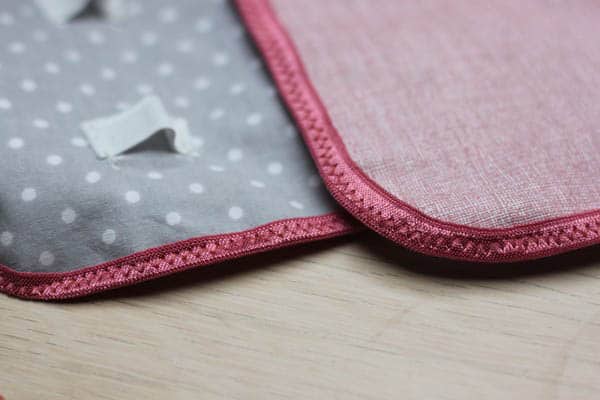
I stitch the bias tape with a zigzag.
Final touch: A Fastener!
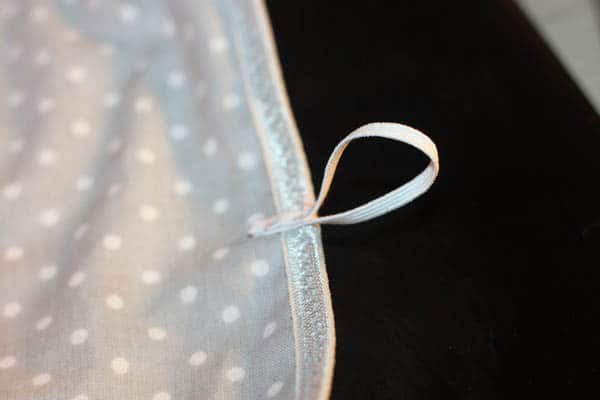
Find the center of one short edge and sew a loop from the narrower elastic band onto it.

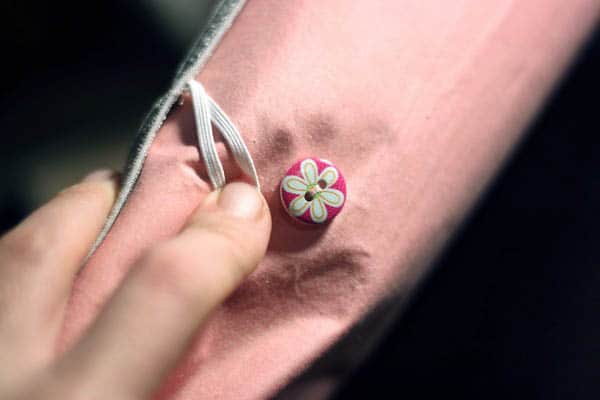
Then roll the pencil case up and find the correct spot for the button. The elastic loop should stretch to reach it. Sew on the button. I actually sewed on two buttons so the pencil case could be rolled up and closed when full as well as half-empty.
And that’s it, the DIY roll-up pencil case is done. Now tell the pencils to take a home in it and to never run away ever again!


