
Grass hat? Why not! This is a fashion piece you definitely need this summer!

I really love grass weaving! Do you remember my Grass Bowl and Lid? Or the Grass Basket? Well, here comes another grass project!
I don’t even remember I came to the idea to try to make a hat but I am so glad I did! The grass hat turned to a very practical thing to have while I work in the garden or on the field. I have one that I have been using for a third season now and it’s great. It shades my face from the sun and I find it’s actually a good heat isolation, my sculp doesn’t sweat as much as in fabric hats.


Soooo, if you want to learn something new and make something practical, let’s do it!
Supplies

- grass, as long as you can cut
- thick thread
- needle – long and thick is better but you can use any. I’m using embroidery needle with a round tip.
- elastic band
- optional: long/stem herbs
How to make Grass Hat
First, cut enough grass. Cut it as long as possible, although you can work with shorter grass as well, it’s just going to be more work as you’re going to have to add grass more often. Cut off the roots.
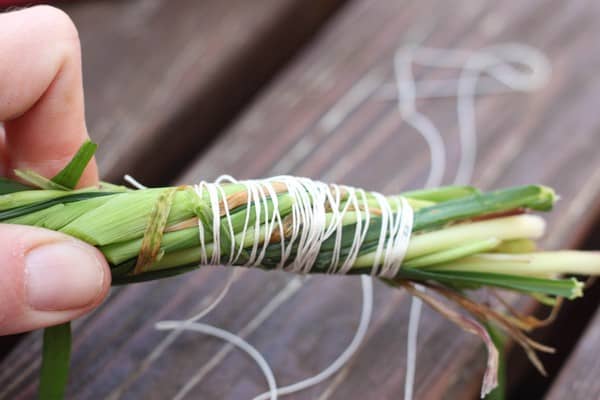
Prepare a cluster of grass as thick as you want and scrunch the ends a little in your hand to make them softer. Twist about 10 cm and then twist some thread around. Thread a needle – I use a jeans thread so I thread it single, if yours is thinner, thread double.
Now start coiling the end as tight as you can. You will coils the grass always around the previous layer and sew through the previous layer and around the newly coiled layer.
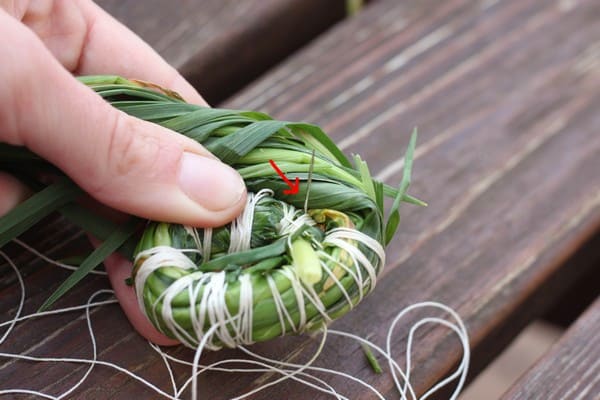
Twist the thread around the new layer and sew through the previous layer. This might be a bit more difficult to do when you start – around the very center, but it will get easier as you go.

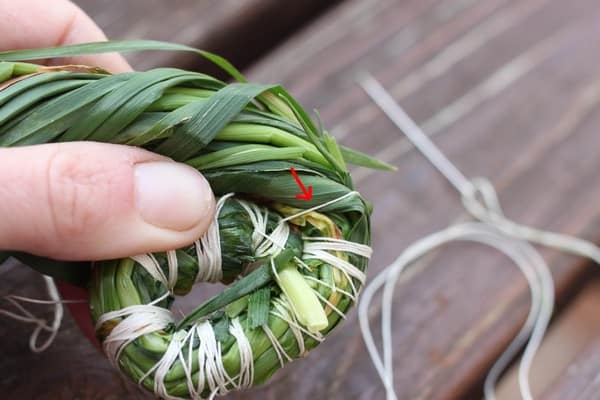
Keep twisting the grass, coiling it and stitching it to the previous layer. Keep the stitches not more than 2 cm/0.8 in from each other. The closet the stitches, the better the final product will hold together. Keep stitching until you’re happy with the size of the bottom of the bowl. Soon after you start, start moving the new layers always a little in front and outside the previous layer to make the hat wider. This way, you won’t be making just flat grass circle, the future hat will start looking like a hat after you add a few layers. It’s the same like making sides of the grass bowl. Each new layer will be a little wider than the previous one.

If you want your hat to be rather wide and on the flat side, move the new layers more outside that each previous layer (the difference between the previous and the new layer will be more visible). If you prefer a smaller hat that copies more the shape of the head, move each new layer only a little.
To add grass, follow these steps.

Keep adding layers and every now and then, try the grass hat on. If you want to keep using the hat for a longer time (even several seasons), make it larger than you want it because it will shrink while drying.
When you’re happy with the size, follow these steps to finish.

Stitch the ends of the elastic band to two opposite spots on the inside of the hat. When you put the head on, the elastic band will go over your chin and it will keep the hat on.
Using herbs

You can use herbs instead of grass. For this hat, I used lavender at the end of the brim and the hat smelled like lavender for some time!
Drying
As the grass dries, keep the hat away from rain and other water. Ideal would be to let it dry on a head figurine but you can just let it dry laying on a table like I do. If you just lay it down somewhere, however, it will deform a little:

Which I do not mind because the hat will still sit well on the heat. If you need to fixate some layers after the grass is dry, just sew threw them again. If you want to prevent at least some of the deformation, turn the hat a little every few hours of the drying process, hang it, position it.


