
Warm fluffy socks, soft blanket, a cup of hot cocoa and not having to go outside, that’s the spirit of these cold rainy days! Make these hygge socks with my tutorial even if you don’t have much experience with sewing.

I just bought this awesome coral fleece fabric to make a wearable blanket (that’s a sweatshirt that looks like a blanket and you can cover your whole self into it). It was a bargain, the e-shop was selling it for half the price because the fabric didn’t meet the requirements, meaning the hair is a slightly longer, which I actually love!
With this tutorial, you can make warm fluffy socks for any foot because we’ll be drafting a pattern. The drafting and sewing here doesn’t need to be as precise as patterns usually so don’t worry, this really is something a sewing beginner with little experience can do. Also, these socks are for laying on your sofa with your feet tucked into this pair of warm clouds…so they’re pretty loose and it doesn’t matter if you make them a centimeter larger than you need. If you want something fancier, I also have a tutorial on these DIY Warm Boot Socks (also for any foot).

As for the fabric, get something that feels nice on your feet, you can use a blanket you like but don’t want it to be a blanket anymore.

At the end of the tutorial I will show you two hacks to make the socks even better!
(This post contains one affiliate link.)
Table of Contents
Supplies
- approx. 0,5 m of fabric (I’m using coral fleece)
- sewing machine and thread
- scissors
- pins
- paper
- pen
- tape
- ruler
- measuring tape

How to make Warm Fluffy Socks
If you chose coral fleece like me, wash it first and if you have a dryer, dry it as well. This fabric sheds a lot when you cut it but it won’t if you wash and dry it first. Or you can wash and dry the finished socks but it will still complicate the sewing process if you have to deal with the loose “fur”.
Drafting pattern
I always draft pattern just for one foot and then cut the pattern for the other in a mirroring way. If you want a pattern for every foot, just follow these steps for each foot:
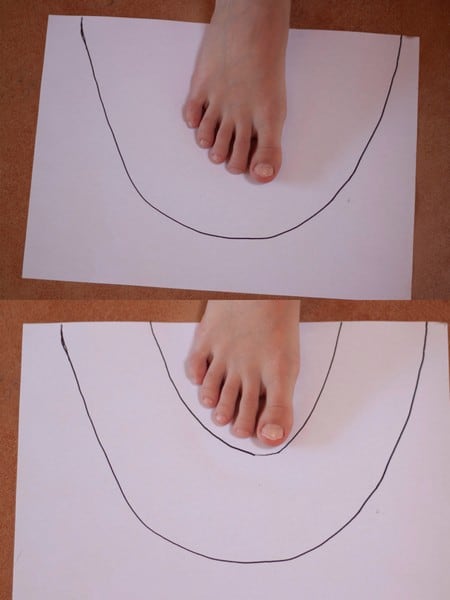
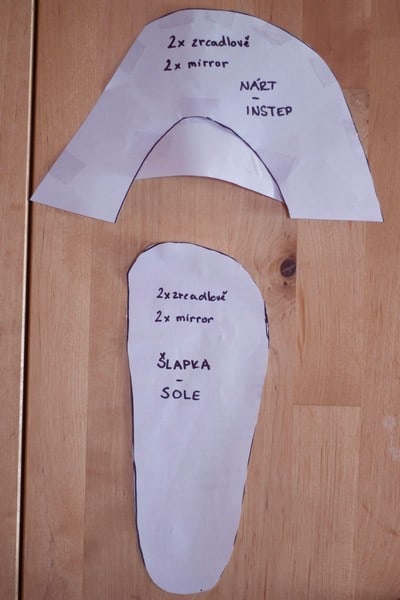
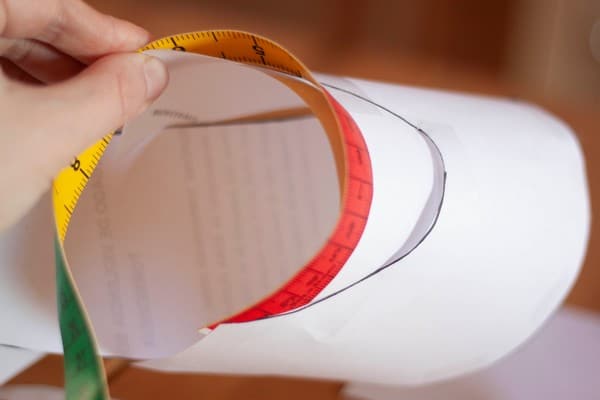
Place half of your foot on a sheet of paper and draw a curve at least 8 cm/3.1 in around the foot. Later we’ll be taping pieces of the pattern together and adjusting them. Then move the foot down so that only your toes and a little foot under is on the sheet and draw another curve. Both curves should be at least 5 cm/2 in apart. This will be your instep part of the pattern.
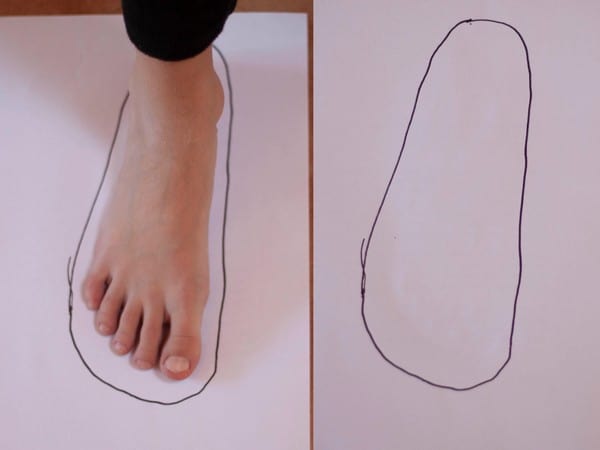
Now step with the whole foot on another sheet of paper and trace about 1,5 cm/0.6 in around it. This will be your sole pattern.

Cut out both pieces.

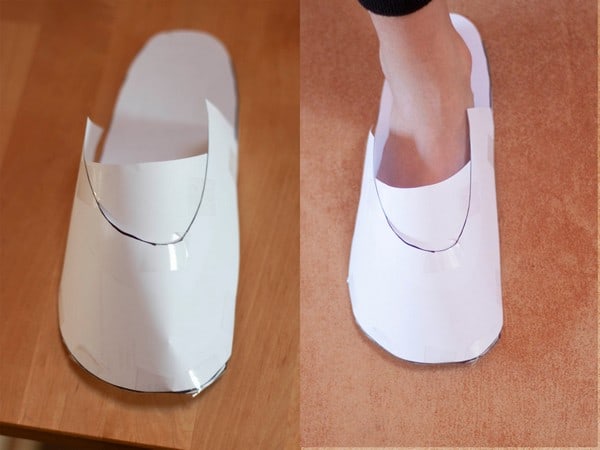
Start taping the instep pattern from the center to the sides to the front part of the sole pattern (where the toes are). Cut the sides of the instep piece straight so you can tape them to the sole piece.
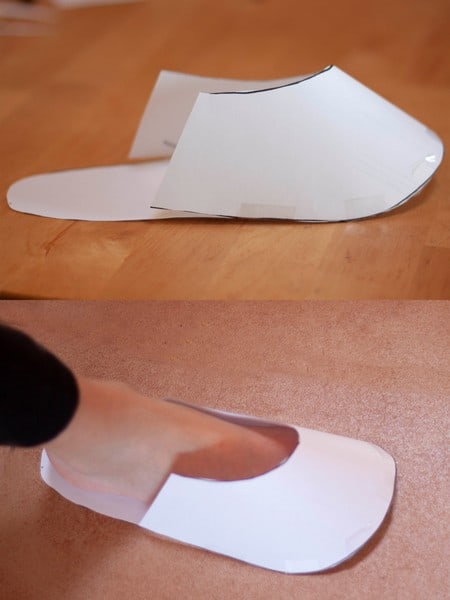
You will get a paper slipper basically. Put it on. You can see that the inside curve of the instep piece is very far away from the leg, it covers the toes and a little more. This needs to be fixed because the sock would be too loose. We need to get that curve closer to the leg but not too close because it would make it difficult to put the sock on.
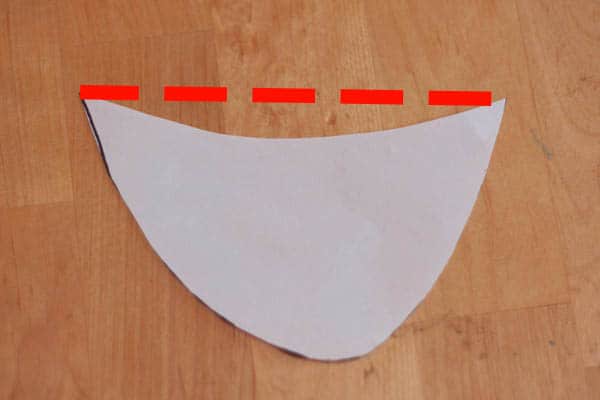
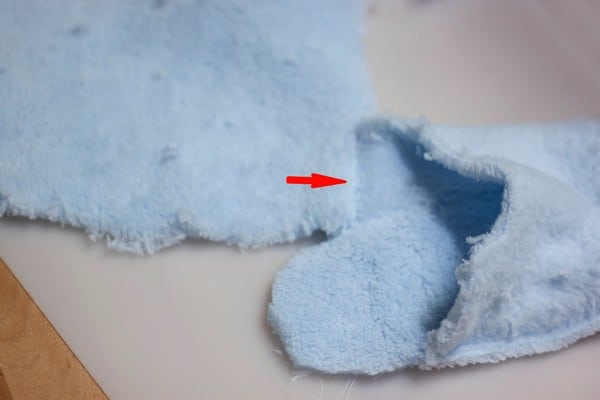
Take the round cutout that was left when you cut out the instep piece. It has one straight side, cut a little curve into it. The red line shows where the side of the paper was so you can see how much of a curve I cut out.
Tape this piece inside the instep piece curve facing up. You can move this new cutout up and down the instep depending on how close to the leg you want it. What you see in the photo is perhaps still a little far from the leg, I would recommend about an inch (2,5 cm) from the ankle.
When you’re happy with the slipper, cut the tape that connects both pieces.
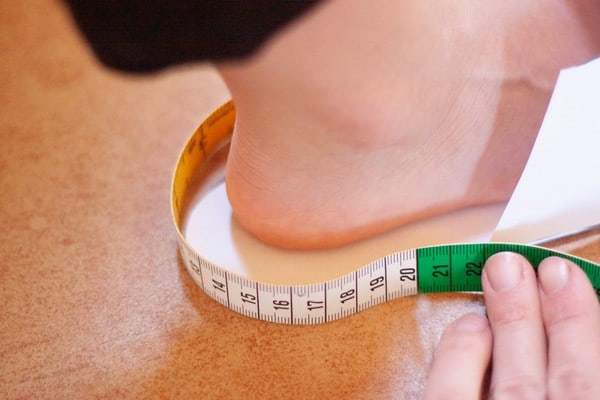
Measure the heel part of the sole (the space between the ends of the instep piece) and add 2 cm/1 in to the number. This will be the width of the back piece of your pattern.

Now measure how high you want your socks to be from the sole and add 3 cm/2 in and a little. This will be the height of the back piece of your pattern.
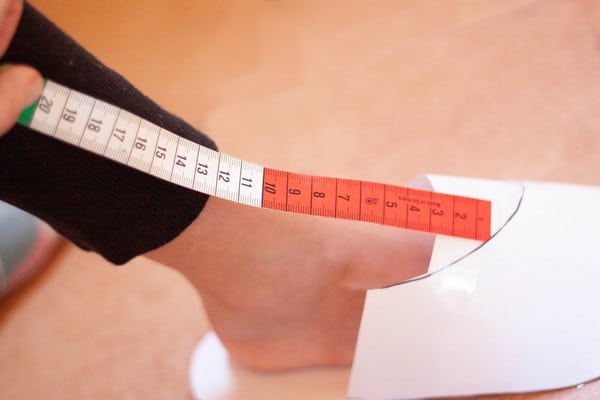
Now measure the distance between the upper edge of the instep piece to the required height of the sock and add 3 cm. This will be the height of the front piece of your pattern.
Measure the upper circumference of the instep piece and add 2 cm/1 in. This will be the width of the front piece of your pattern.
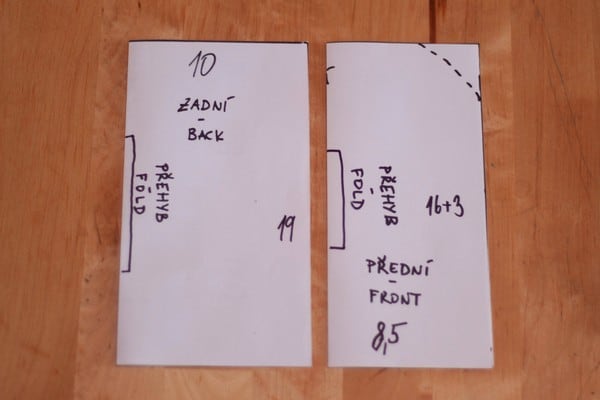
Use the measures to draw four rectangles (width and length of the back piece for one and width and length of the front piece for the other). I actually divide the width by 2, draw rectangles of only half the width and then place and cut the pattern on fold. Also, you see the dashed line in one corner of the front piece, or cut it right away or cut the corner of the fabric rectangle.
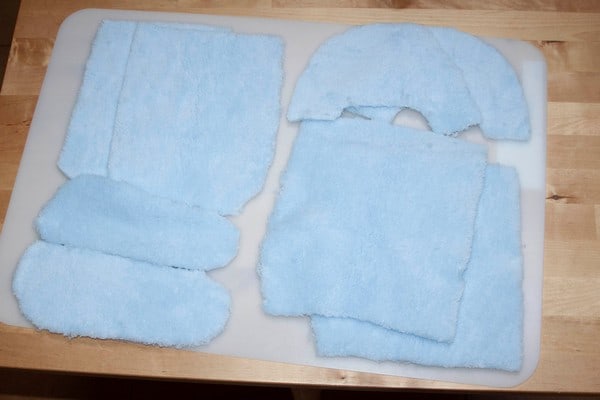
Cut out all the pieces of the pattern, it’s 8 pieces in total.
Sew instep and back piece
I use the zigzag stitch, narrow whenever I sew the sole piece and wider everywhere else.
Place the sole right side up and the instep piece right side down on the top of it (where the toes are). You’ll be sewing it exactly like when you taped it to make the paper slipper.

Stitch 1 cm from the edge. One again, you have a slipper.
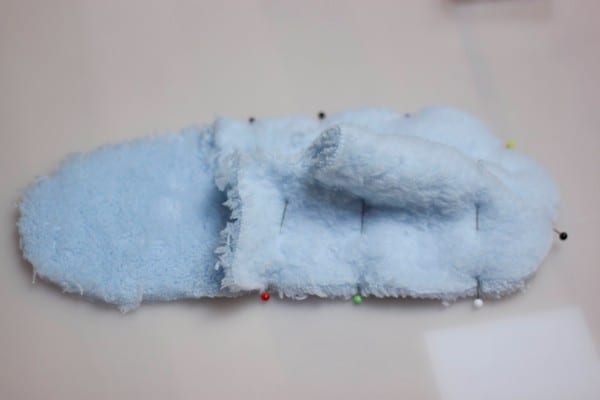
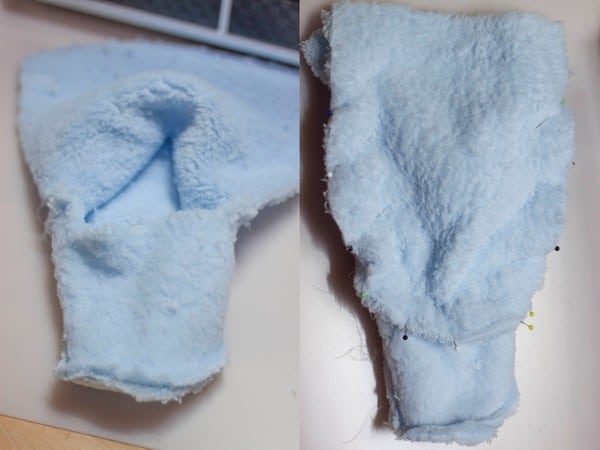
Now you need to wrap the back piece around the heel part of the sole, make sure you’re wrapping the width of the back piece and not the length.
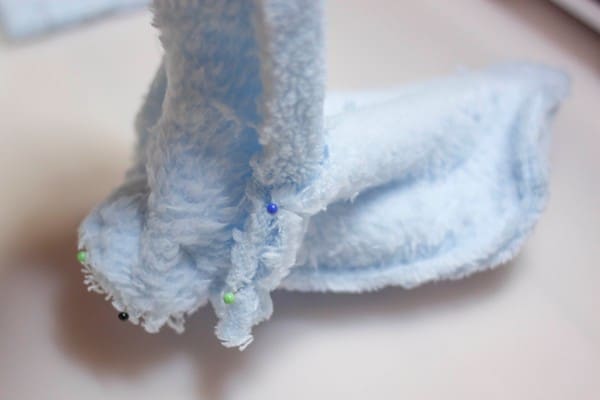
Pin it around the sole and also the sides of the instep piece, the right side of the back piece needs to be turned inside.
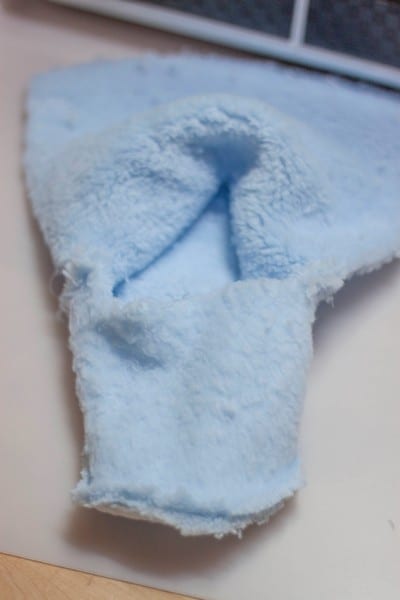
When you stitch it, this is what the sock looks from the front, you can see the front piece is missing.
And this is what it looks like from the side.
Sewing front piece and finishing
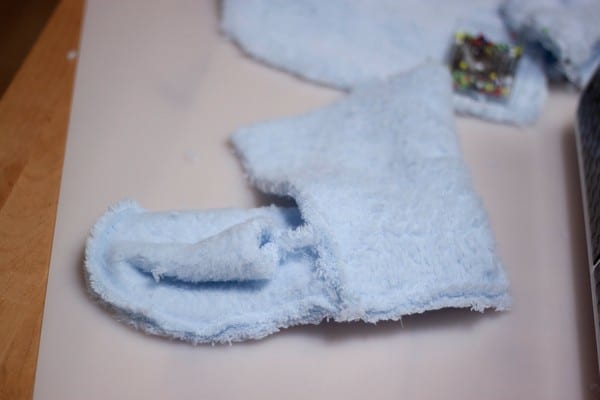
Place the sock so that the toes face you, open the back piece. Place the front piece round side (the rounded corners) down and right side also facing down. Pin around the edges of the back piece and the upper edge of the instep.
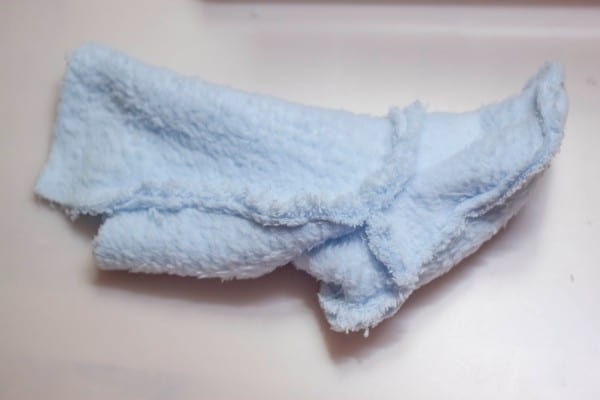
Stitch.
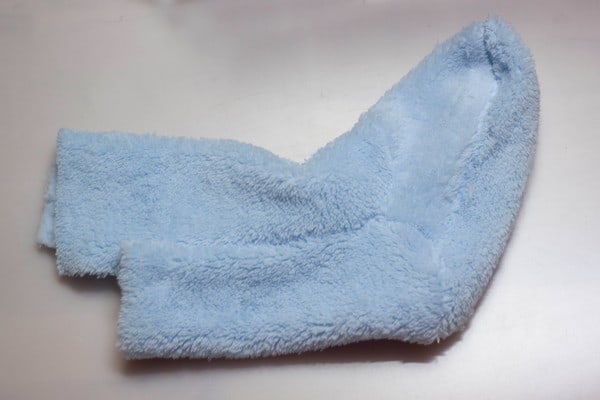
Now turn the sock right side out and cut the upper edge to be the same height.
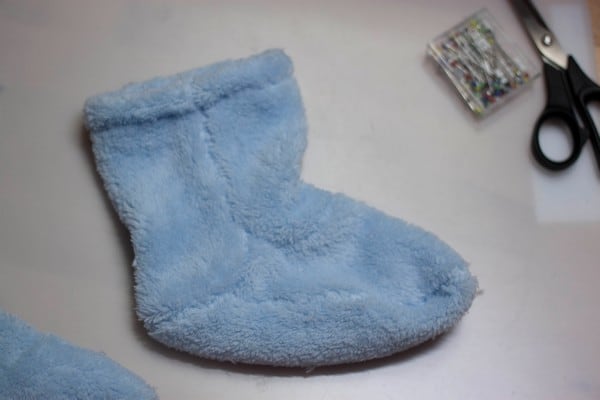
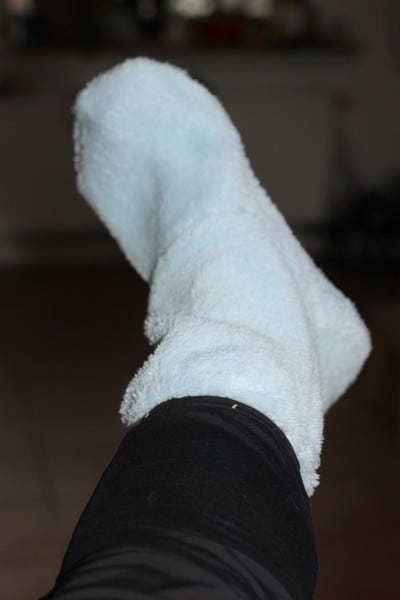
The last step is to turn the upper edge 2 cm/1 in inside and stitch. And then you can jump on that sofa and cover your feet in the fluffiest socks ever.

Too wide?
If your socks slide off your foot, or they are too large or the instep is too short (too far from the ankle). It can be fixes quite easily. You’ll just need some flat rubber band about 5 mm wide and a safety pin.
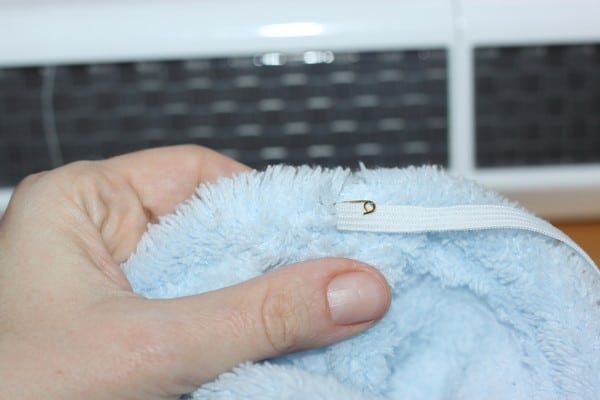
If you folded the edge of the sock (and top-stitched) at least 1,5 cm, you can just cut a hole in one place, it should be just a little wider than the rubber band. If your folded edge is less than that or if you haven’t folded it in yet, fold it about 1,5 cm in and topstitch it 1 cm from the edge leaving a 2 cm opening. Pin the safety pin to one end of the rubber band and thread the band through the tunnel.
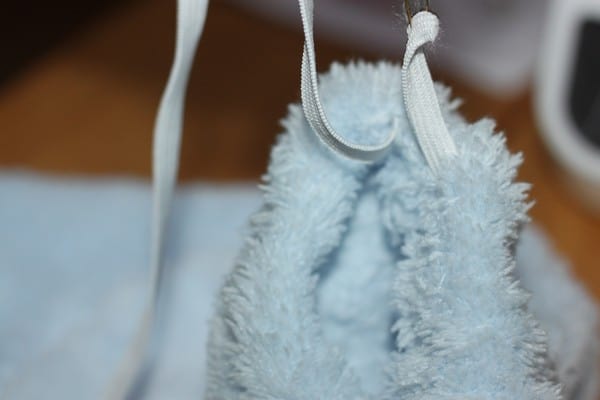
When the other end is out, pull on both ends to make the edge of the sock as tight as you need to fit your foot. Stitch the edges of the bands in the sock and trip the excess.
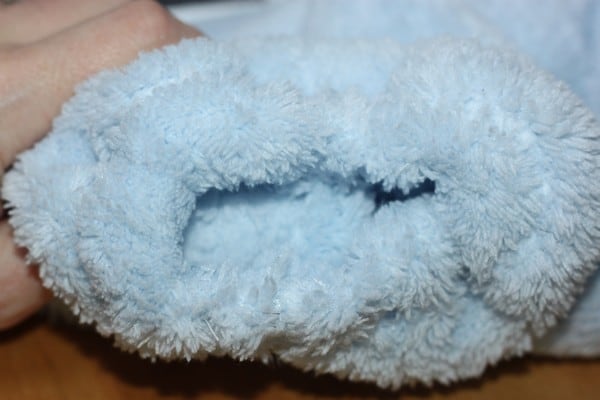
The edge will crease and the sock should not be falling from your foot as you walk.
Non-slippery warm fluffy socks
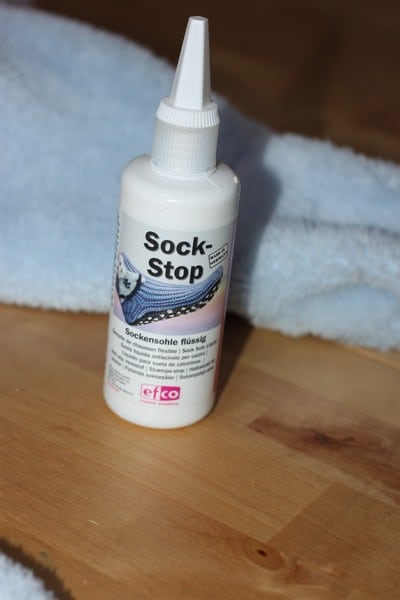
Are the socks too slippery? That is also an easy fix. There’s a liquid exactly for this purpose and you can get it HERE. You’ll also need a piece of cardboard that fits inside the sock.
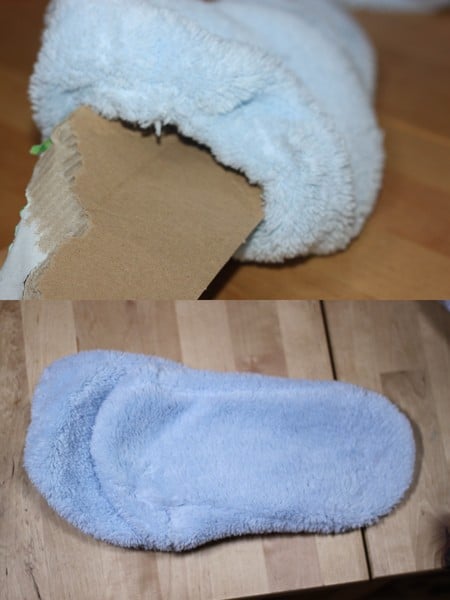
Insert the cardboard inside the sock. It will help keep the sole of the sock straight and in case the liquid leaks through, it will prevent the two sides of the sock from sticking together.

Apply the liquid around the whole sole of the sock. Dots, stripes, anything is fine. Let it dry for two hours and apply another layer. Then let it dry for another 12 hours and that’s how you make non-slippery socks.

