
I’ve been planning this starry space soap for some time and it turned out just perfect. Here’s the recipe and instructions:-)

Soapmaking is a beautiful hobby although I don’t have much time for it. I prefer simple looking soaps that are full of interesting ingredients, however, once in a while I make a design soap. I’ve been thinking of making a space soap for some time and when I figured out and planned the details, I must say it turned out more than allright. Each bar has a star inside and also one of the top. The colors of the soap look like a galaxy.
 This is a cold process soap and the technique is one-pot wonder. Although you don’t need to be extremely experienced, it is not a soap I’d recommend to a complete beginner. You should know your way around soaps before embarking on a challenge that involves separating and mixing oils and lye in several different containers.
So, if you’re a complete beginner and have never made a soap before, just save this tutorial for later and first try to make a few very basic soaps;-)
Before you start, please read about the Safety in Soapmaking.
Table of Contents
Supplies
For the star
- 50 g/1.76 oz of shea butter
- 25 g/0.88 oz of coconut oil
- 15 g/0.53 oz of palm oil
- 10 g/0.35 oz of castor oil
- 26,4 g/0.93 oz of distilled water
- 13,2 g/0,47 oz of NaOH (sodium hydroxide)
- golden mica (I use Double Gold)
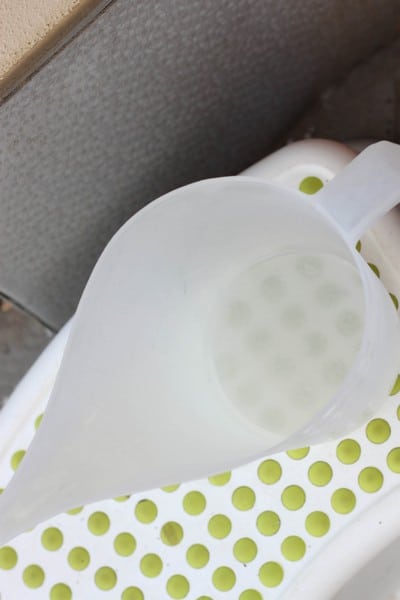
- long silicone star mold
- 2 large thick plastic containers
- 1 smaller thick plastic container
- stick blender
- silicone spatula
- teaspoon
- knife
- electronic scales
- electronic thermometer
- sieve
For the soap
- 400 g/14.1 oz of shea butter
- 200 g/7.05 oz of coconut oil
- 120 g/4.23 oz of palm oil
- 80 g/2.82 oz of castor oil
- 211,5 g/7.46 oz of distilled water
- 105,8 g/3.73 oz of NaOH
- mica: pink, blue
- coconut coal in powder
- hand whisk
- 6 large thick plastic containers
- 1 smaller thick plastic container
- 4 small plastic cups
- silicone spatula
- restangular soap mold
- soap cutter or knife
- electronic scales
- safety gear
- electronic thermometer
- sieve
- soap beveler or potato peeler
- 1% phenolphtalein solution or pH-indicator papers
Space Soap Tutorial
Make sure you’ll have enough time to make this space soap over the course of two consecutive days. First you have to make the star, then the rest of the soap. There shouldn’t be a log gap between these two or the star will get hard and difficult to cut inside the soap.
Making the Star
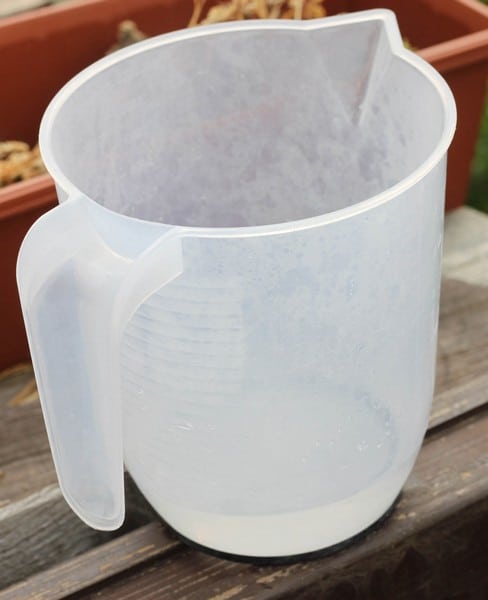
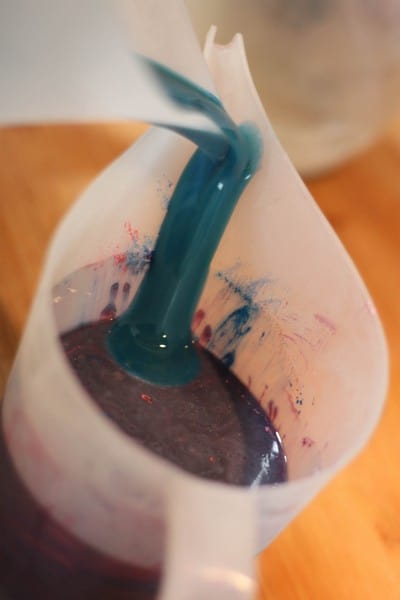
Weight the distilled water in one of the larger containers and the hydroxide in the small plastic container. Place the water outside or near an open window and slowly mix in the NaOH. Stir it manually until it dissolves, don’t use the stick blender. Don’t forget to wear the safety goggles and respirator! Make sure kids and pets have no access to the lye (hydroxide+water). Now let the lye stand and cool down for a while.
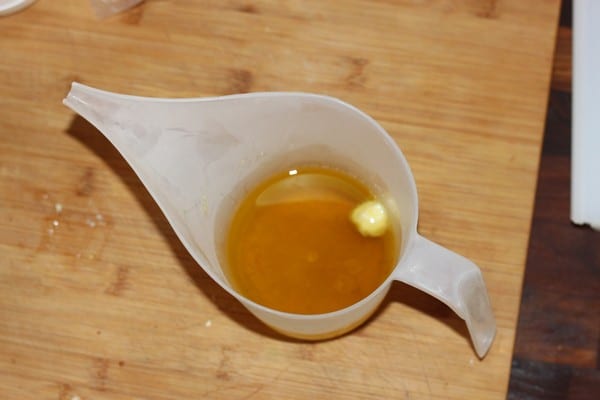
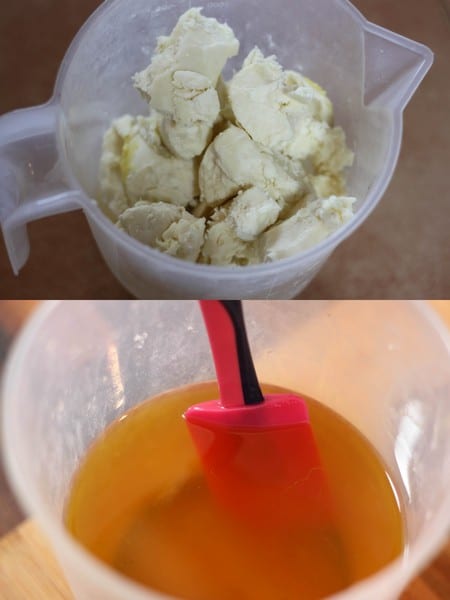
Meanwhile, weight the oils and butter into another large container and melt them completely. I do it in water bath but you can use the microwave as well. If you choose the microwave, heat the oils only few seconds at a time. When it’s all completely melted, add half a teaspoon of golden mica.
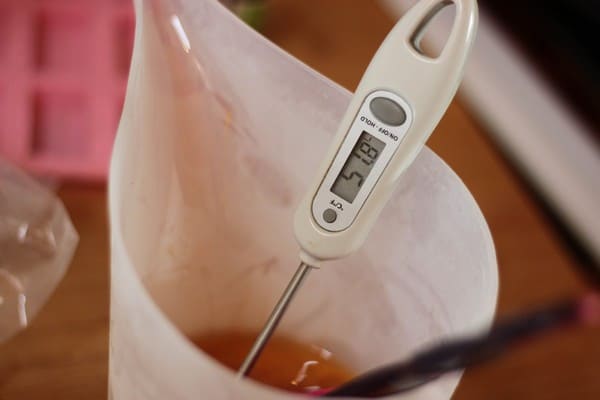
Keep checking the temperature of both oils and lye. We will be mixing both at 37 °C/98.6 °F (oils) and 39 °C/102.2 °F (lye). If one of these gets too cold, just heat it up a few seconds in the water bath or microwave.
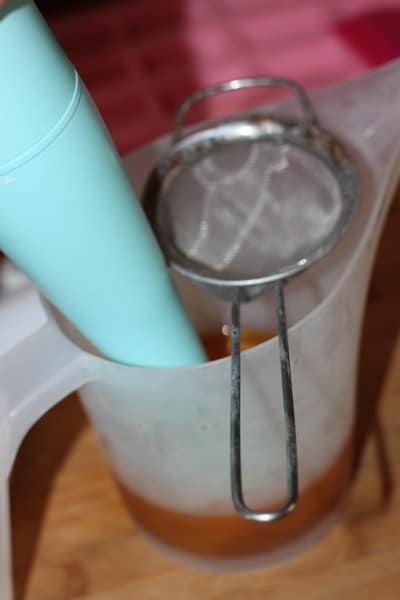
Sieve the lye into the oils (we use the sieve to catch any undissolved hydroxide). Then slowly introduce the stick blender in and blend for a few seconds. Then just stir with the blender off. Alternate blending and stirring a few times, then lift the blender and let some mixture drip in the mixture from the blender. If the drops don’t leave any trace on the surface, continue stirring. If they do, that is actually called trace and we usually want some trace before pouring the soap in the mold. Here we want only a light trace, the mixture has to be liquid enough to pour into the mold.
So, when you notice a light trace, it’s time to pour the mixture in the mold.
Hold the mold in one hand and the container with the mixture in the other. Pour the mixture in the mold and let it stand vertically until the mixture is solid enough not to pour out. Then cover the mold in aluminum oil, cling film or a towel and let it rest until the next day. The soap will go through gel phase and for this it needs to keep warm.
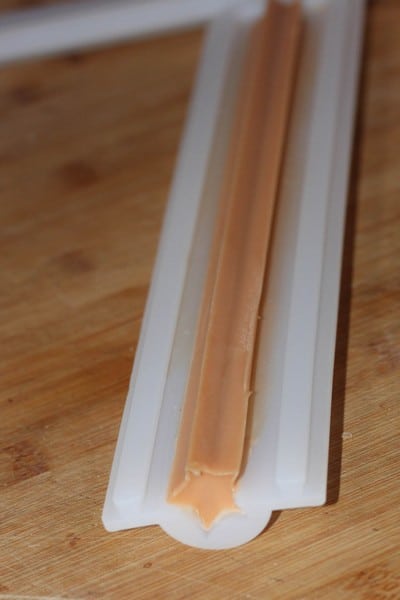
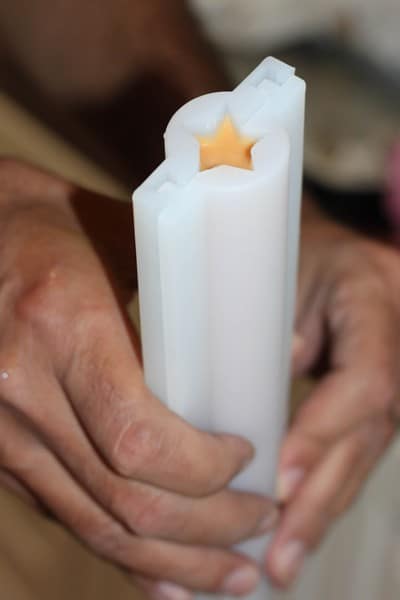
The next day open the mold and take the star soap carefully out.
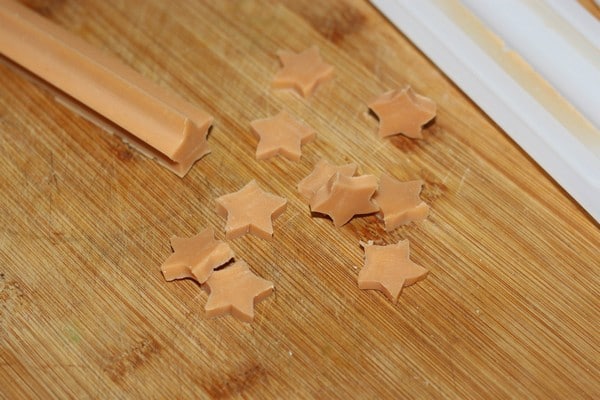
Cut off a piece as long as your rectangular soap mold and slice the rest. I made 10 star slices.
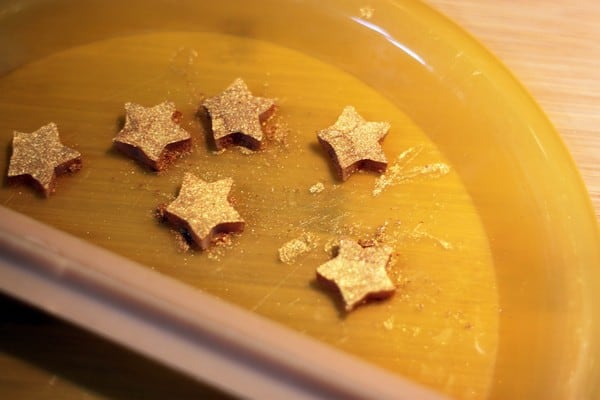
Put some golden mica on a plate and cover the stars in it.
Soap – preping the colors and the lye
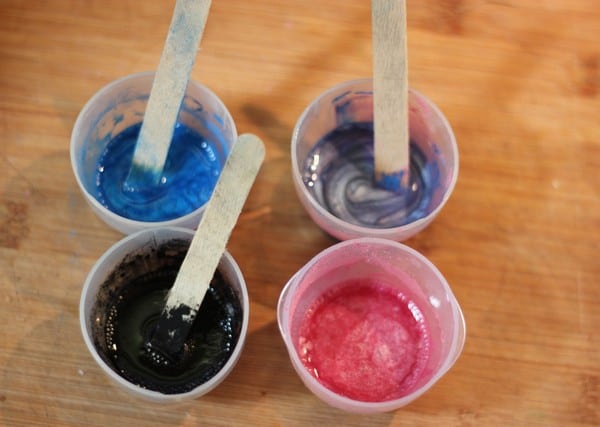
Split the castor oil in four equal parts in small cups (20 g/0.7 oz) each and mix in the colors – 1. coconut coal powder, 2. pink mica, 3. blue mica, 4. for purple mix pink and blue. Mix in generous amount of mica (about 1 tsp) because you’ll need to dye a much bigger amount of mixture with it and we don’t want the colors to be pale.
Just like when you were making the star, weight the water and NaOH, the stir the NaOH in the distilled water.
Blending and coloring
Once more, melt the oils in the water bath or microwave. Check the temperature of both mixtures until they are 37 °C/98.6 °F (oils) and 39 °C/102.2 °F (lye).
Pour the lye carefully into the oils. This time – unlike with the star – don’t use the stick blender, only whisk it fast manually until both mixtures combine. The reason for not using the stick blender is that we don’t want the mixture to go into trace, we will be playing with it for a while and that won’t be possible if it gets solid too fast. So just give it a quick whisk until you see that everything’s combined well.
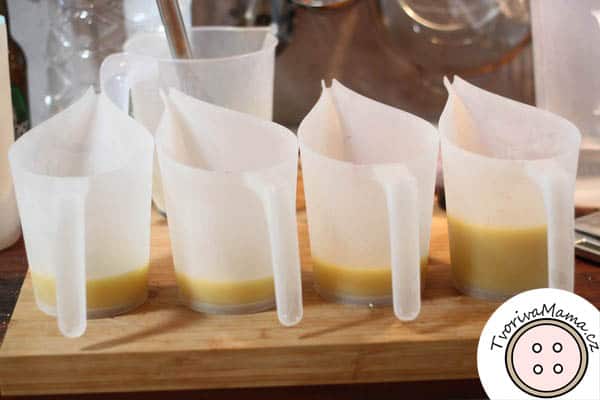
Divide the mixture into the four remaining large containers – 3 equal parts and 1 larger (this will be your main color).

Stir one color (castor oil with mica and coconut coal) into each container, the purple should be the main color.
Let’s do one pot wonder!
Take any of the colors and slowly pour some of it in the main color. Don’t pour it directly in, let it pour on the wall of the container.
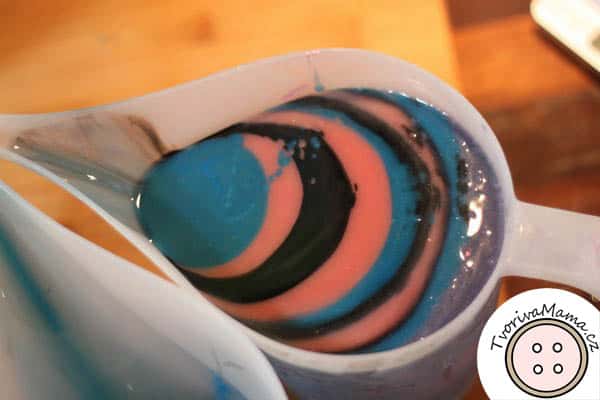
Then pour in the remaining colors combining them as you wish. Don’t use all of the colors, leave a little of each for later.
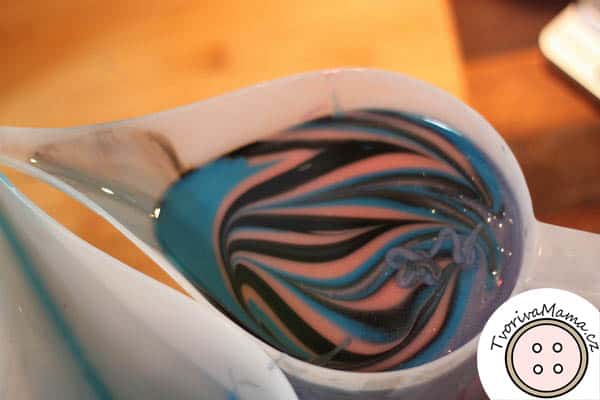
Take a chopstick or anything similar, dive it into the batter and do a few zigzag moves.
Now hold the soap mold in one hand, lean it slightly on the long side and with the other hand start pouring in the batter from right to left, back to right and continue in this manner until half of the mold is full.

Insert the long star in the batter.

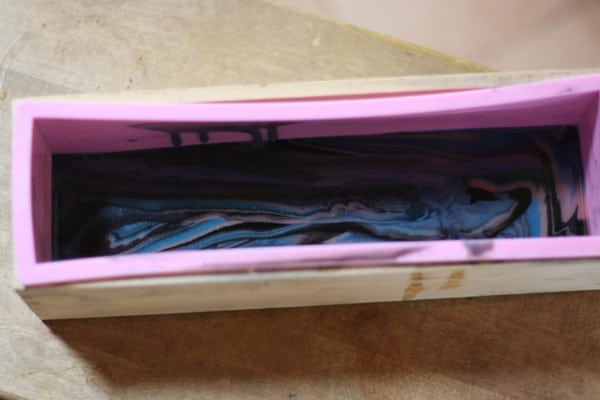
And pour the rest of the batter in, again from left to right and so on. At some point you’ll see that you have left a batch of main color and almost none of the other colors. This is when you use the leftovers of each color. Pour them in the main color and then continue pouring the batter in the mold. At the end of the pouring your batter will probably start getting solid but not too much and you can still finish the process. Let the mold stand until the batter gets a bit more solid. Then put the star slices on top of it. The batter should be solid enough for the stars not to sink.
Cover the mold with some cling film or aluminum foil and a blanket or a towel. Let it rest for 24 hours.
Testing and Cutting

After these 24 hours it’s time to cut and test the soap for safety.
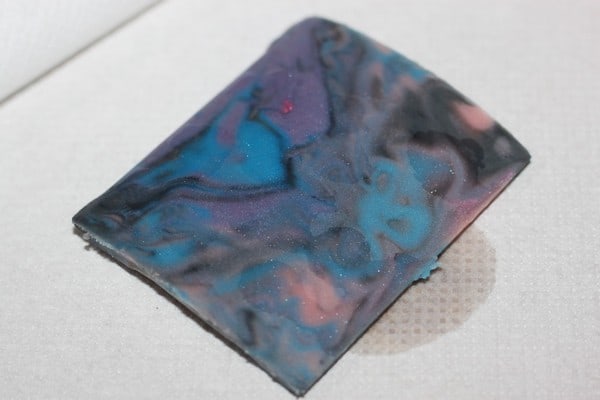
I have written a post on testing soap safety and you can read it here. I am using phenolphtalein to test the soap, if you want to use pH-indicator papers, read the post to know how to do it.
Cut off a thin slice of soap and place it on a disposable surface such as aluminum foil or several layers of napkins. The side that was on the inside (fresh cut) should be facing up. Drop a few drops of phenolphtalein on the whole area of the cut and if the droplets stay clear, your soap doesn’t have leftover NaOH and it’s safe. If the phenolphtalein turns pink or purple, there’s still some hydroxide and you have to re-batch the soap. Just search for “rebatch soap”, there hundreds of online tutorials on this, for example, this one.
On the picture you can see that the drops are still clear (the pink color is the color of the soap) so I could proceed to the next step.
Carefully wrap the slice of soap with phenolphtalein and dispose of it in the most nature-friendly way possible in your area.

Cut the rest of the soap in bars using a soap cutter or a knife.

Now you have the soap ready to be cured but let’s make it a bit more neat first.

Take the soap beveler or a potato peeler and peel off the edges. Usually this is done when the space soap has been curing at least for a few days and has gotten harder – the results are a bit better. I was very impatient and did it the next day.
Curing the Space Soap


Before we can use a soap, it needs to cure. During this process the water evaporates and the soap becomes harder, which also means it will last much longer once you start using it. The ideal place for curing is a dry and rather dark room with air circulation and the soaps should be on a wooden grid if possible. If not, just try to come close. And as for the time, let the soap cure for at least 3 months, ideally half a year.
If you liked this tutorial on a space soap, check out also my other cosmetics recipes.


