
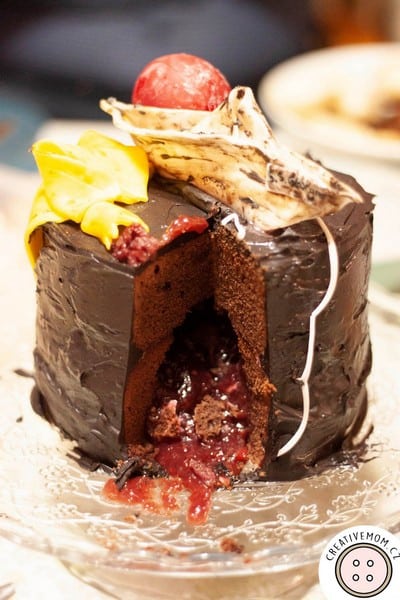
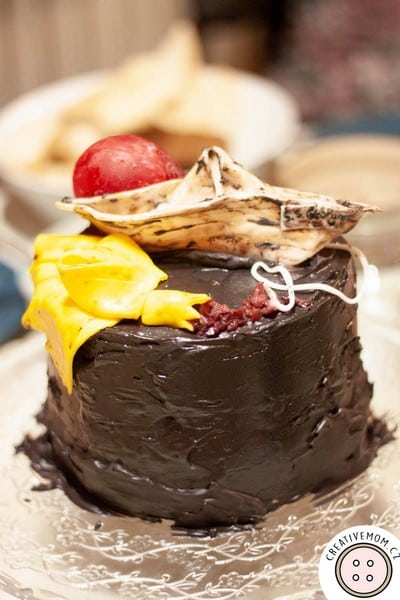
Another Halloween, another Halloween cake, this time inspired by one of the best horror stories – Stephen King’s IT.
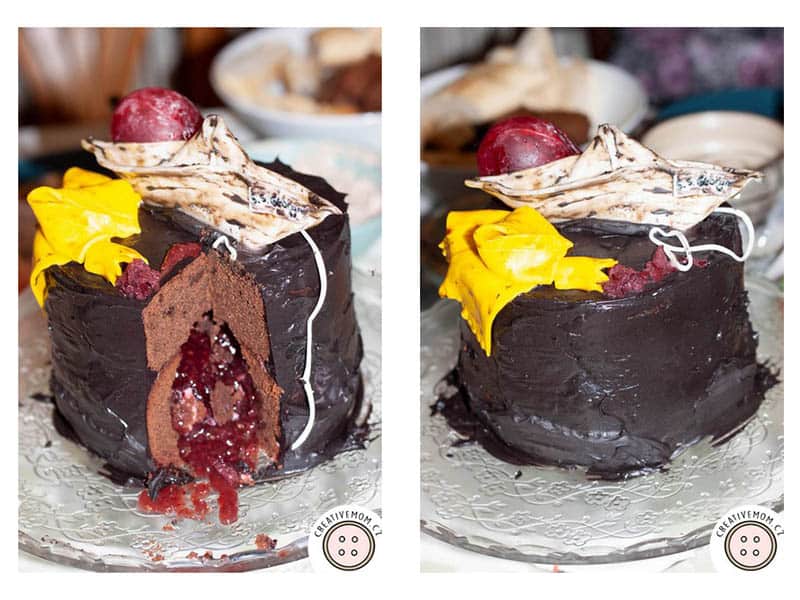
Last year’s Halloween cake was very gore, this year I decided to make a less gore but still scary cake. Surely, you know the IT horror story by Stephen King, whether as the original – book or one of the two famous movie adaptations. There are several important objects that the fans of this movie will recognize – the waxed paper ship, red balloons and Georgie’s yellow raincoat. And I incorporated them in this project.
The cake will also blead – it’s an adapted lava cake but instead of chocolate ganache it has homemade raspberry marmalade.
The cake it a typical Austrian Sachr cake with black cacao frosting.
Don’t forget to also check out my other Halloween recipes!
This tutorial has several affiliate links, commissions from which are invested into my blog and into creating more tutorials for you!
Table of Contents
Supplies
 Dough
Dough
- two 16-18 cm cake molds
- 200 g/7.1 oz of dark chocolate (at least 70 % cacao)
- 280 g/9.9 oz of softened unsalted butter
- 200 g/7.1 oz of powder sugar
- 300 g/10.6 oz pf all-purpose flour
- 6 eggs
- 1/2 tsp of baking powder
- 1/2 tsp of salt
Filling
- 250-300 g of raspberry or other red jam
Frosting
- 250 g/8.8 oz of unsalted butter
- 2 tbsp of powder sugar
- 2 tbsp of black cacao
Decoration
- 100 – 150 g/3.5 – 5.3 oz of SmartFlex or other good fondant
- 50 g/1.8 oz of Isomalt
- half-sphere mold
- piece of baking paper
- small pastry brush
- some sour cherries in rum or a little of red marmalade
- yellow powder food colorant
- yellow gel food colorant
- red gel food colorant
- black cake craft pen
- vanilla extract in alcohol
Bleed-IT Cake Recipe
Bake the Cake
Separate the egg yolks from the whites, whisk the whites until firm and keep them in the fridge.
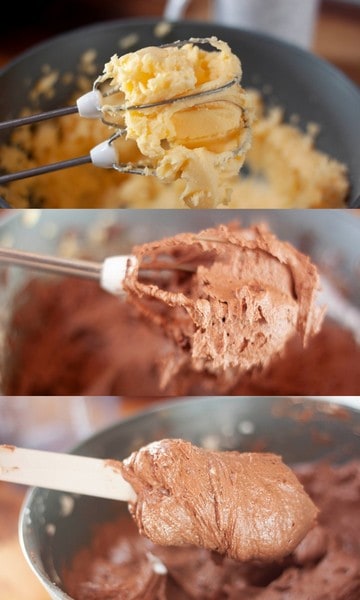
Whisk the yolks with sugar, salt, baking powder and softened butter. Melt chocolate in water bath and whisk it in as well. Then add flour little by little. Add the firm egg yolks slowly, incorporating them with a wooden spoon.
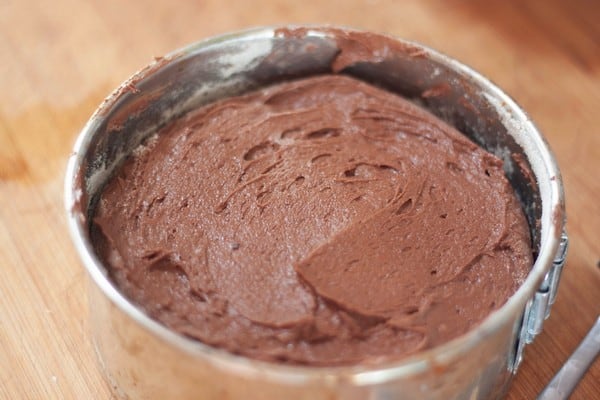
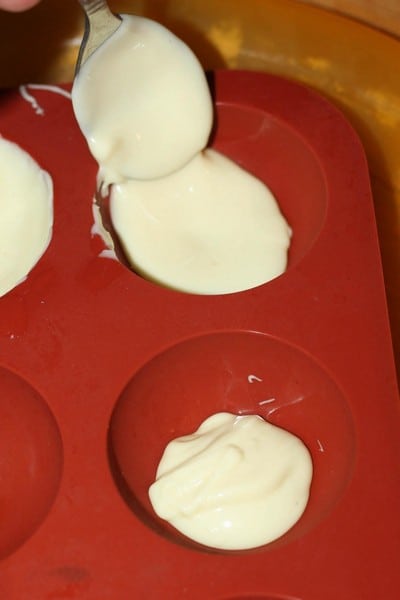
Coat the cake molds with grease and some flour and pour the dough in – two thirds into one mold and one third into the other. This is because the larger cake will be the lower part that will be filled with marmalade and the smaller cake will be a sort of a lid.
Preheat the oven on 160°C/320°F and bake for 60 minutes.
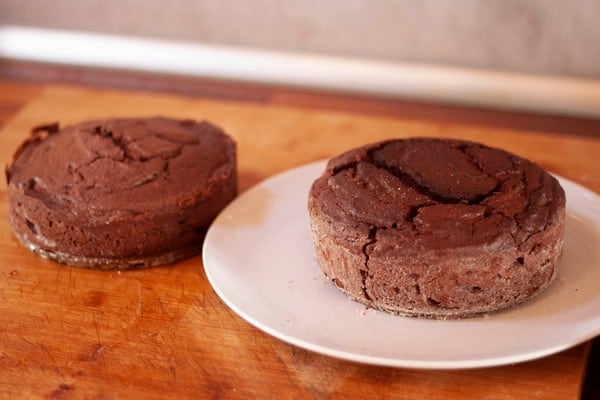
Here you can see what happens when you hurry and bake on a higher temperature – the center of the cake rose instead of being nice and flat. Also, there are cracks. Fortunately, we can fix some of that.
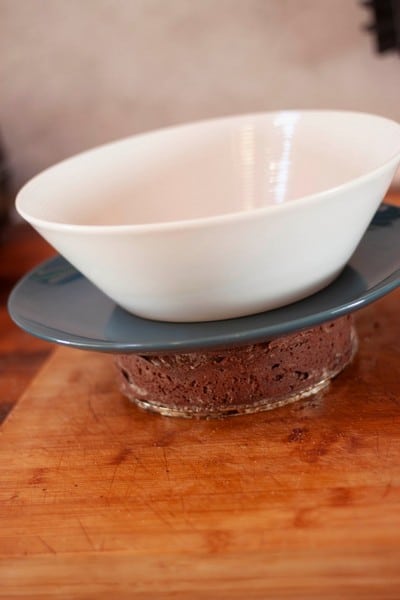
While still hot, I took the cake out, placed a large plate on top of it and something heavy (not crushing though). I left the cake like this until completely cooled down and the cake was flat. The cracks were still there but they’re not such a big problem.
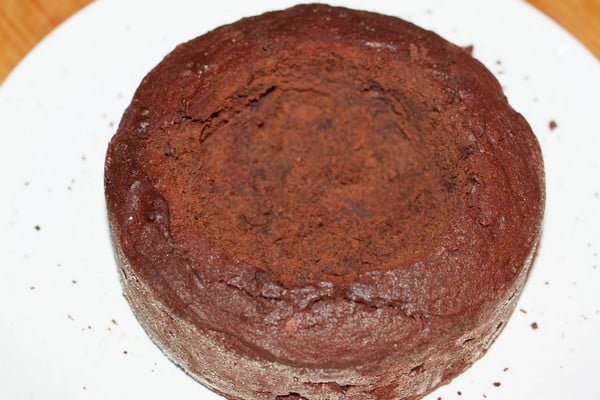
Place something round on top of the lower cake and cut around it. Then use a spoon to dig out a hole in the cake, make sure not to get to the very bottom and through the walls. You need a hole large enough to hold enough marmalade so you can serve some with each slice of cake.
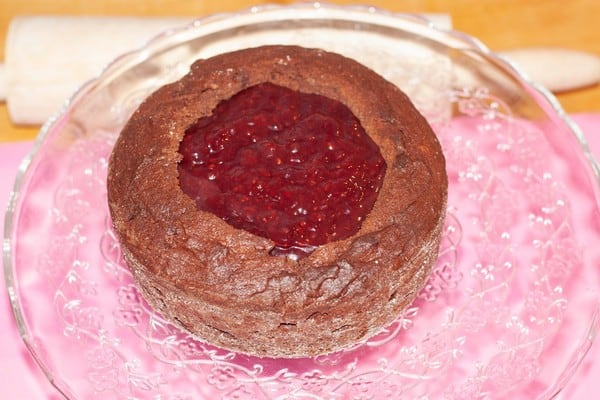
Mix the marmalade with a little hot water to make it liquid and fill it to the top.
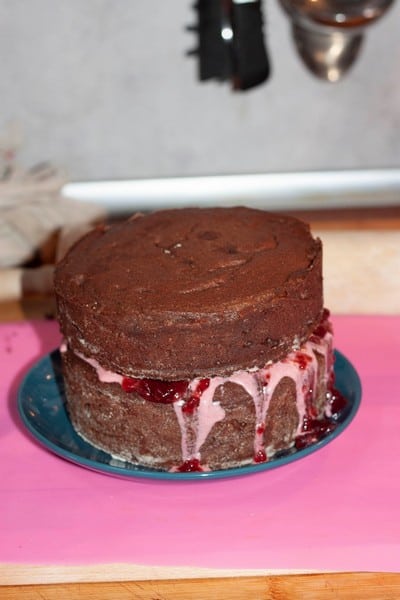
Put some marmalade on the top edges and place the small cake on top. The pink liquid you see is some pink ganache I had left from another project, so I added it as well.
Let it rest in the fridge for one hour.
Frosting
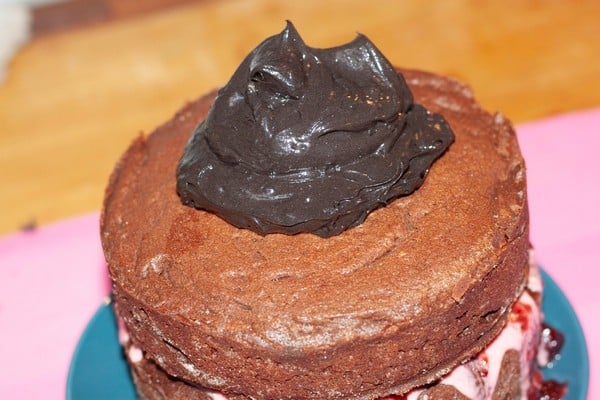
Let the butter get soft and whisk it with an electric whisk until it gets lighter in color and gains in volume. Then whisk in the sugar and black cacao, you’ll get perfect black cream. Reserve about 1 tbsp for later.
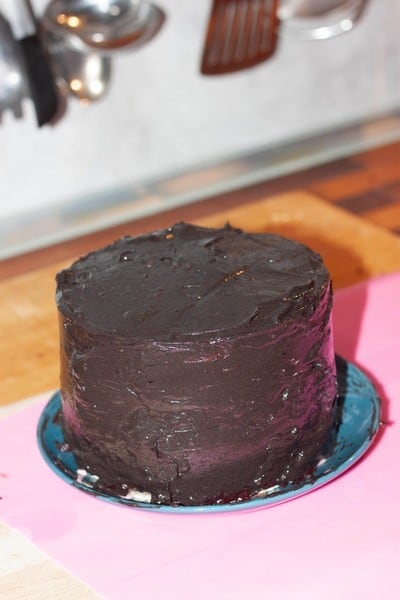
Spread the frosting all over the cake.
Balloon
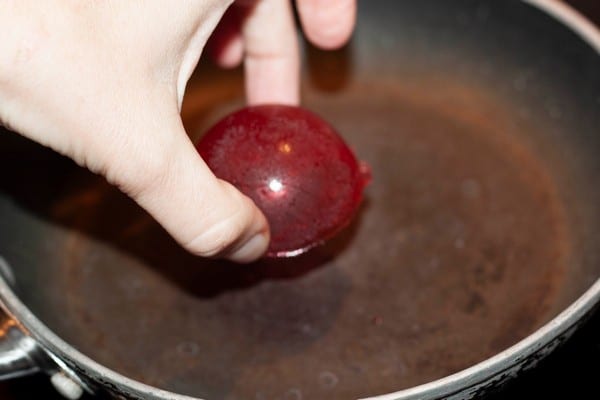
Make the balloon from isomalt or similar but be careful because the material is very very hot.
I forgot to take a picture of the isomalt in the half-sphere mold, so I’m borrowing a picture from my Peekaboo! Halloween Cake. Melt half of the isomalt and add few drops of red food colorant. mix well. Turn off the stove and pour the isomalt into two half-spheres. Brush the half-spheres instantly, cover the mold completely. The material will get solid very fast, then leave it in the fridge for at least 10 minutes.
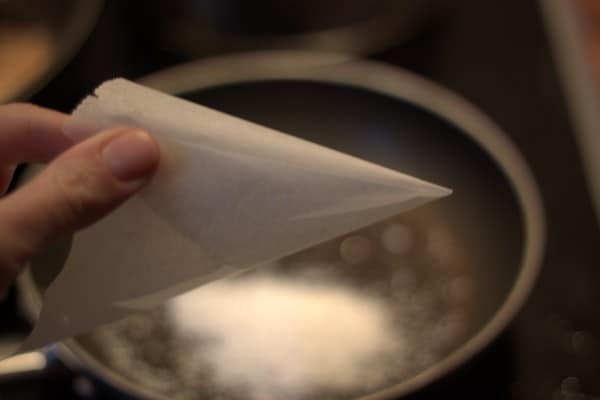
Fold a piece of baking paper to form a cone. You can also tape it but make sure you put the tape on the inside the cone. This is the mold for the lower part of the balloon.

Melt the rest of the isomalt, add colorant. Hold the cone pointy side down and using the brush cover the cone with isomalt. Hold the cone until the isomalt gets completely solid, then you can place it on a plate and in the fridge.
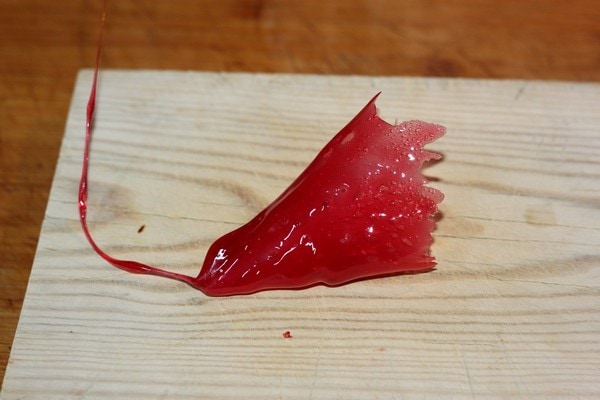
Remove the baking paper completely.
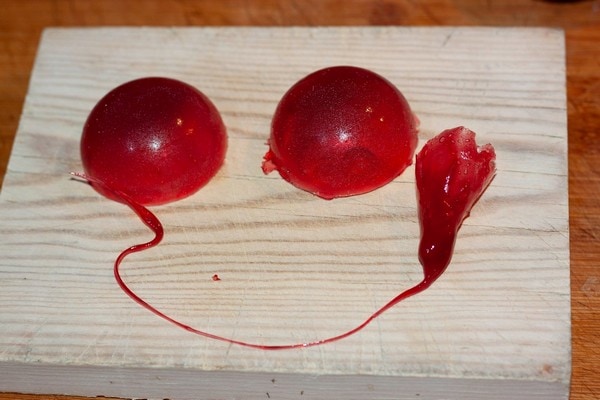
Remove also the half-spheres from the mold. As you can see, I stretched also the point of the lower part of the balloon to create a string but I didn’t like it in the end and so I broke it off.
Heat up a pan and place one of the half-spheres on it for about two seconds.
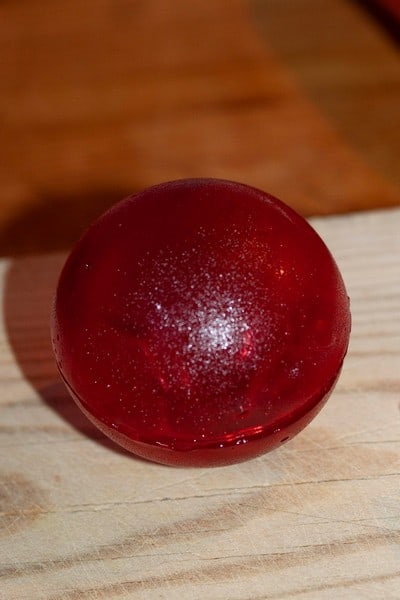
As soon as the edge melts, place it on the other half-sphere to create a ball. It’s the same principle like I used at the Peekaboo! cake or the Chocolate Planet Earth.
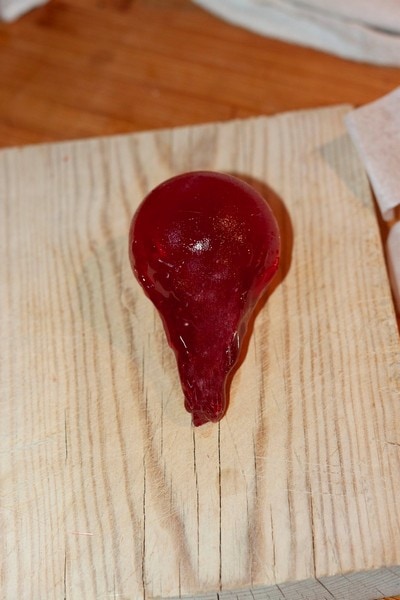
Then melt the edge of the lower part of the balloon until you’re happy with its size and glue it to the ball.
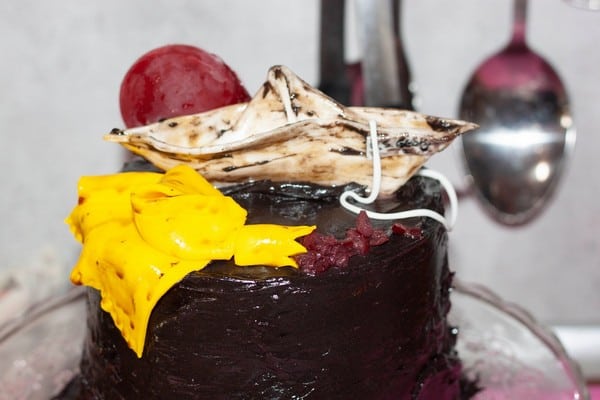
Ship
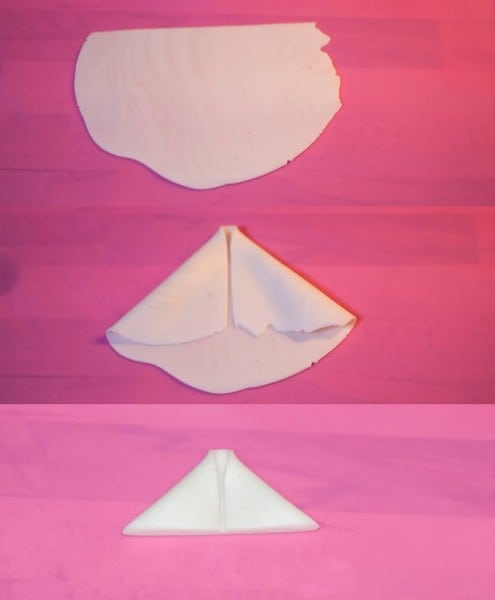
Roll out a piece of the fondant and cut the upper edge straight. Fold both upper corners towards the center and cut off the bottom. This is the top of the ship.
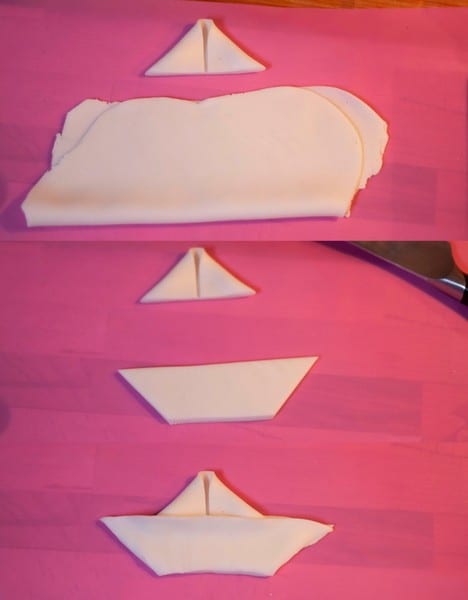
Roll out a larger piece of fondant and fold in half. Cut out a boat-like shape of which you’ll now have two pieces. Place the top of the ship between them and press the outer edges of the boat with your finders.
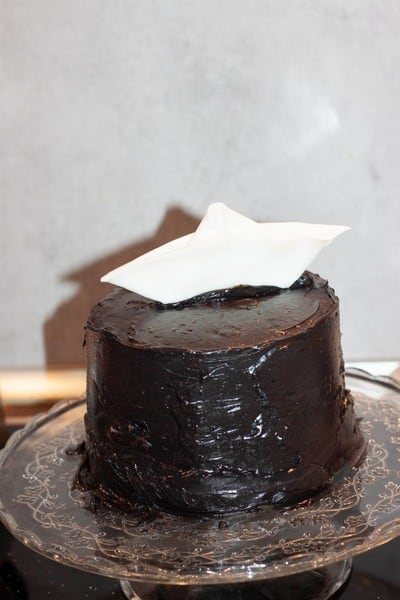
Put a little of the reserved frosting on top of the cake (still keep about 1 tsp aside) and place the ship into the frosting. Let it set in the fridge.
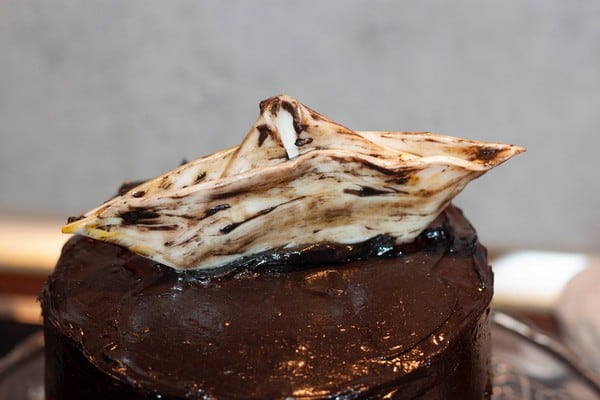
Mix the remaining frosting with a little vanilla extract and two drops of yellow gel colorant. Stir with the brush and paint the ship.

On a separate small piece of fondant write “S.S. Georgie” with the black pen and also paint it with the frosting mix a little, you’ll press this piece on the side of the ship later when the paint dries.
Raincoat

Dye the remaining piece of fondant yellow with the powder colorant, roll it out and cut out four pieces – body of the coat, hood and two sleeves. Cut one sleeve so it looks ripped (who read the book or saw the movie will know why).
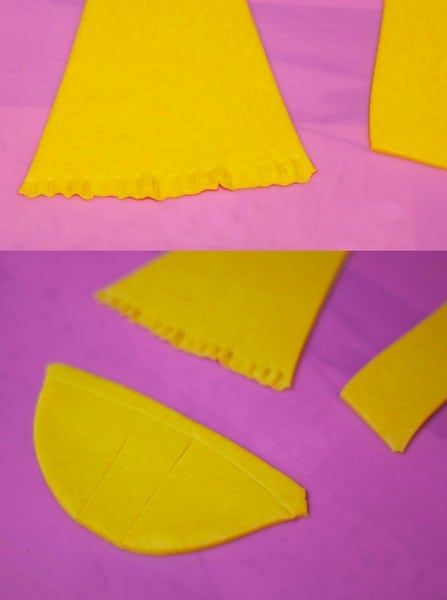
Press detail on the edge of the body with a fork and with a knife make the seams of the hood.
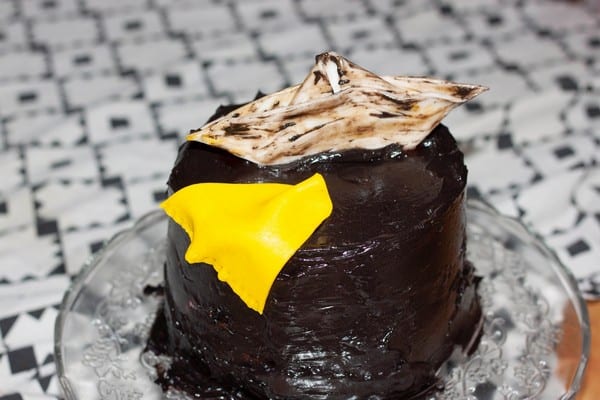
Place the body of the raincoat over the edge of the cake, fold it a little.
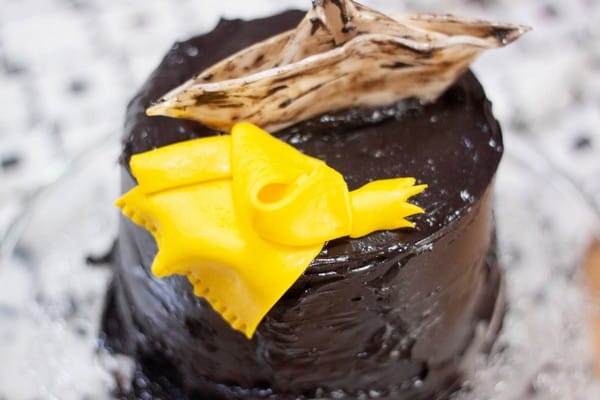
The add the sleeves and the hood.
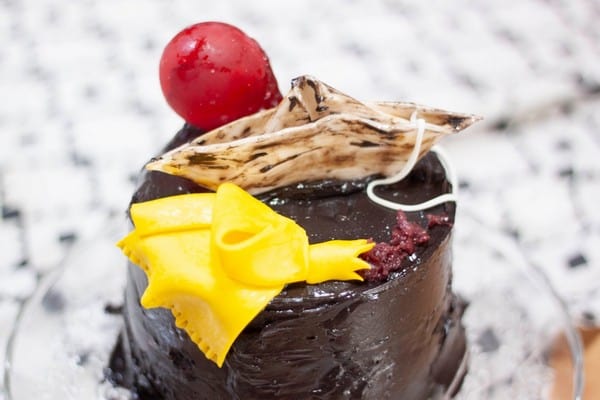
Chop the cherries or prepare some red marmalade and place it as if it’s coming out of the torn sleeve.
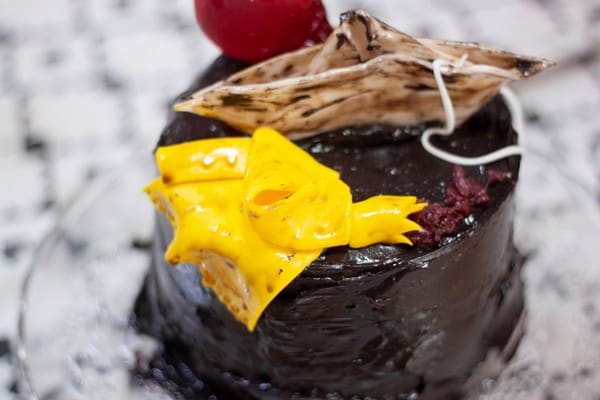
Paint the raincoat with the vanilla extract if it’s brown. If not, you can mix in a little cacao.
Also, place the balloon on the top of the cake, roll a thin string from white fondant and connect it to the balloon.
Place the cake one more time to the fridge.

And now you can already serve it.


