
Origami Strawberry is a great paper craft for adults as well as children and you can use it for example as a gift decoration.

Just two weeks ago I showed you how to make the Strawberry Giftbox and today we’ll add one more strawberry speciality. This paper craft strawberry is not a box but can serve as a gift box decoration.
If you like origami this tutorial is for you. Your kids can help and practise their fine motor skills.
Supplies (for 1 strawberry):

- red paper square (15 x 15 cm/6 x 6 in for a larger strawberry, 10 x 10 cm/4 x 4 in for a smaller strawberry)
- green paper square (6 x 6 cm/2,4 x 2,4 in)
- green paper rectangle 3 x 6 cm/1,2 x 2,4 in
- scissors
- pencil
- glue
- yellow gel pen or yellow acrylic paint + toothpick
Optionally also:
- ruler
- bone folder/creaser
Origami Strawberry Tutorial

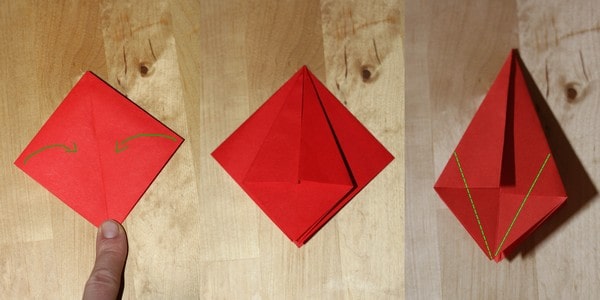
Fold the red square un all 4 directions in half and open.
Notice how the square is divided into 4 small squares and each of these has a diagonal crease. Push one if these creases in. The corresponding square will close.
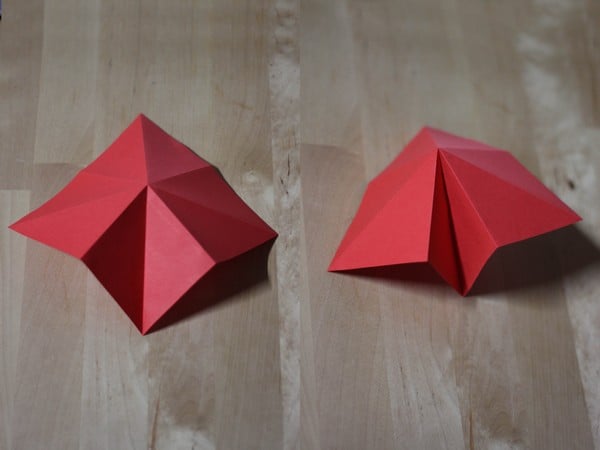
Push in the next crease and then the rest of them (all 4 creases). Now the shape of the folded paper should resemble a four-tip star.
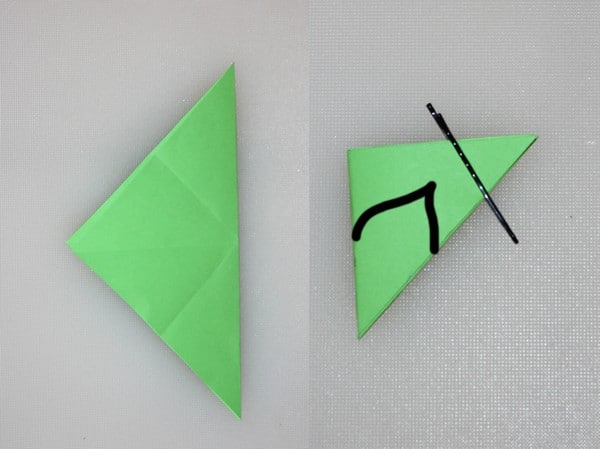
Fold the paper so that only one square is visible and place is so the diagonal crease runs from up down (open side is down). Fold the edges on one side in (as the arrows show) and then do this on the other side as well. Now you’ll be folding where you see the green interrupted line in the last picture.
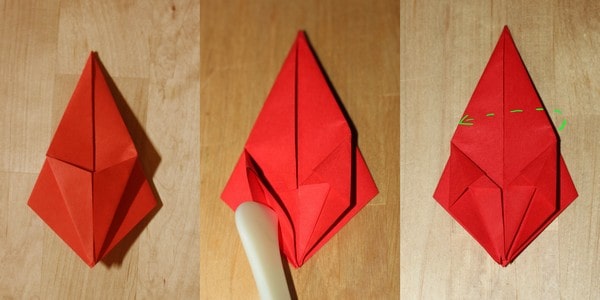
So fold the edges in as shown in the previous picture. Stay with the two pieces you just folded in – lift them, open and press down. It should for a rhombus. Flip the future strawberry around and do the same on the other side so you have four rhombus in total. And now, notice the arrow in the last picture…
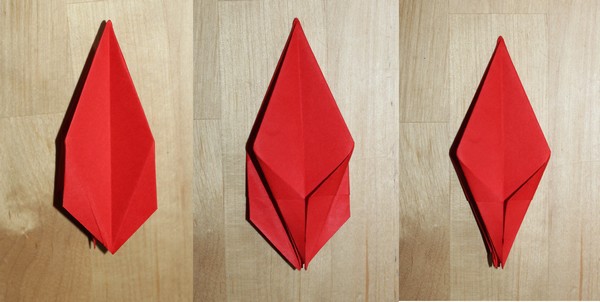
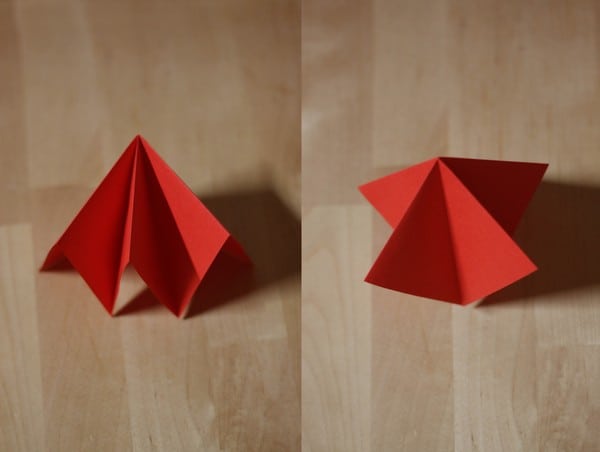
You need to flip one quarter of the shape, one rhombus (so now you have two rhombus touching each other). The overall shape has six tips. Do you see those two creases created in one of the previous steps? Fold the edges in using these creases and do the same on the other side.
Now your strawberry should look like this. The four tips are the upper side and there’s a hole between them.
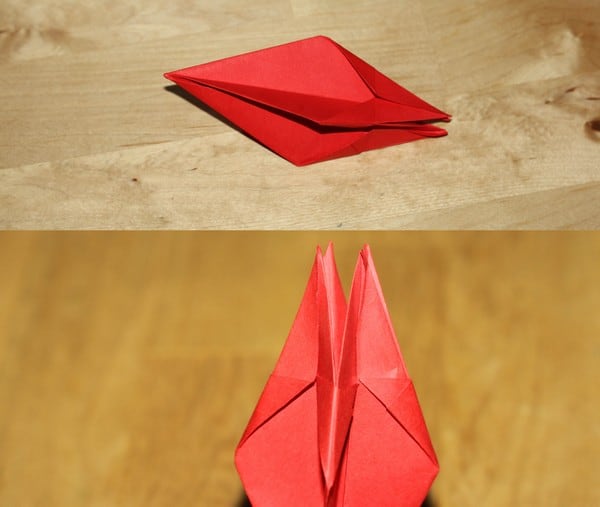
Put in finger these and push the sides of the strawberries gently from the inside. Push a little more in the upper part to give the strawberry rounder shape.
Fold the four tips inside.
Fold the green paper square diagonally in half and then once more. Place the resulting triangle with the long (open) side on the right and the the short closed edge left. Trace a leaf as you can see in the photo.
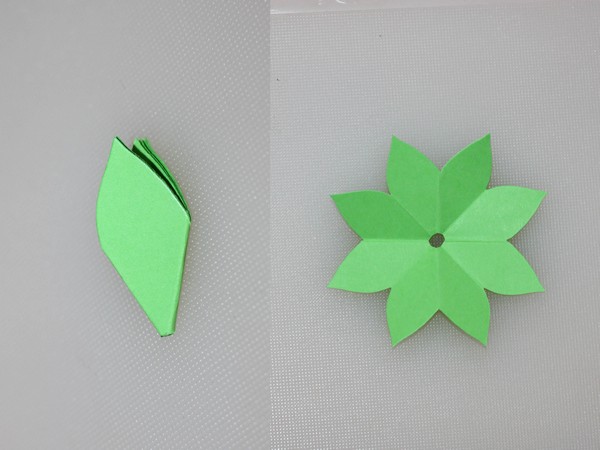
Cut out the leaf and then cut off just a tiny bit of the lower tip. Open.
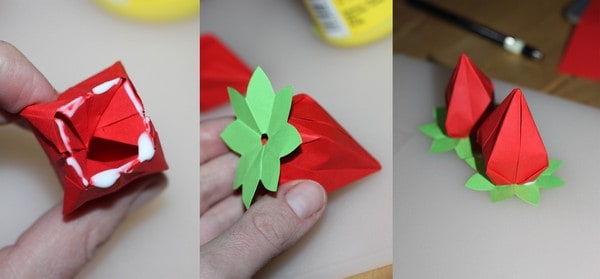
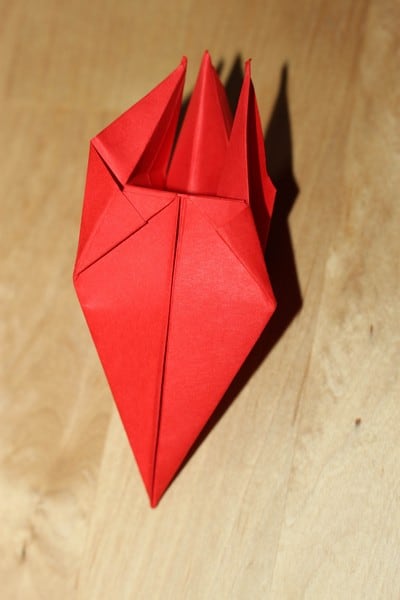
Apply some glue on the upper side of the strawberry. Place the green leaves on the glue and let it dry.
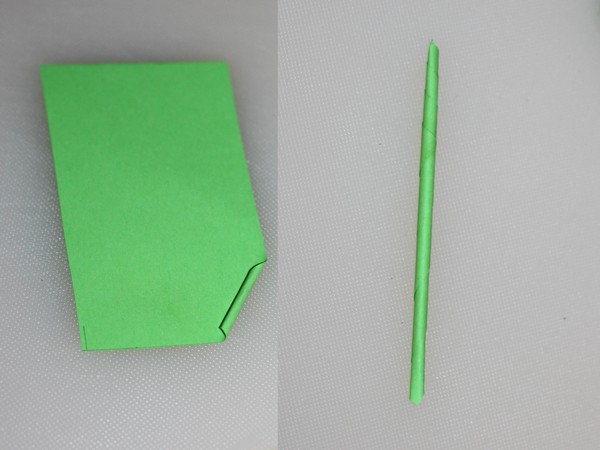
Now prepare the green rectangle. Start rolling from one lower edge diagonally to the opposite upper edge, roll it tight. Glue the last corner to the stem you’ve just rolled.
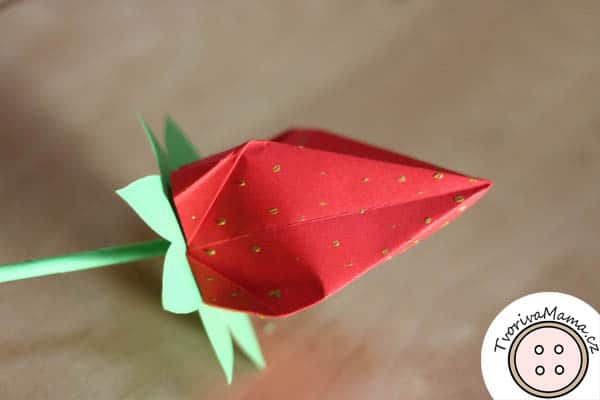
Dip the stem in the glue and put it through the opening in the leaves. Let dry. You can trim the stem if you want it shorter.
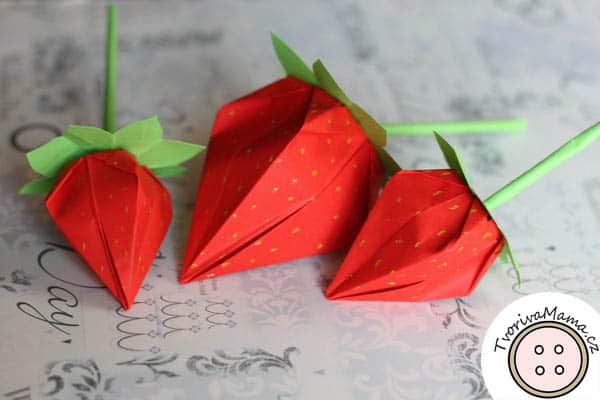

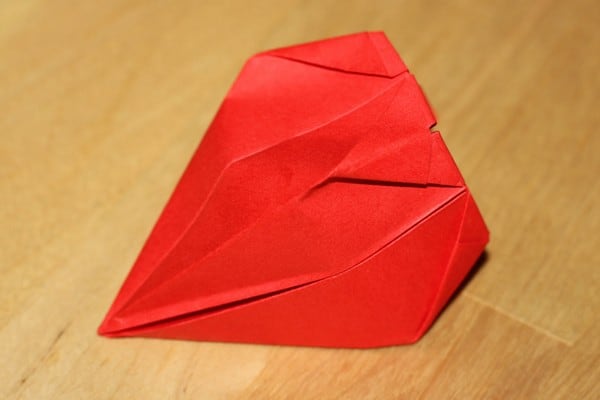
Make strawberries of different sized and you can use such an origami strawberry to decorate a gift box.


