

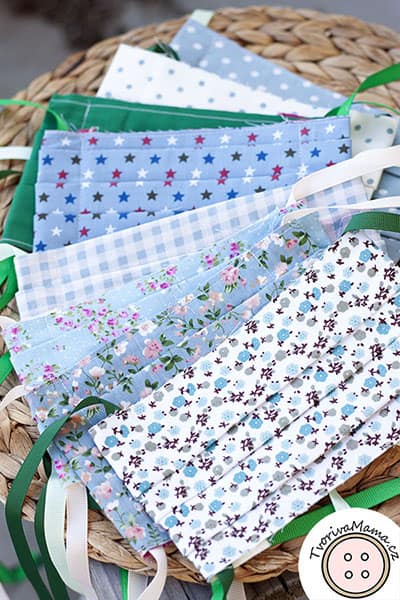
I would have never said two months ago that I would be making a face mask at home. It’s virtually impossible to get these mouth masks in a pharmacy in all this coronavirus craziness so I just found a good use for some of the fabric scraps in my ever-so-full fabric drawers and just sew a pleated face mask.
[UPDATE] I have prepared a second tutorial with another model of face mask. You can find it here.
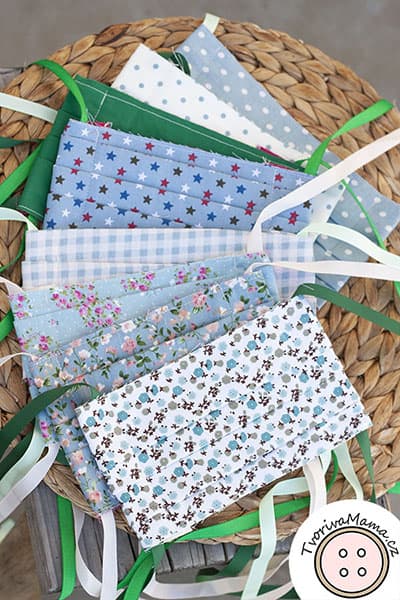
I had some really nice fabrics and decided to use them for this project to make it easier for our kids. It’s really easy to make a double layer face mask at home, you don’t need much experience with the sewing machine. These surgical masks are done following the instructions from the Institute for Mother and Child Care in Podolí’s hospital, Prague. This is a more simple version of the pleated face masks, ideal especially for those who need to sew fast (for example if you need to make a bigger amount of face masks). If you want the somewhat neater version, see the tutorial on Pleated face mask 2.
Important notice before we start – do you have symptoms of coronavirus or do you think you might be infected without showing any symptoms? Please contact the authorities responsible for testing in your area. If you are in the Czech Republic, all the important information in English is here.
Supplies for one pleated face mask:
- 2 squares of 100% cotton fabric 25 x 25 cm
- 2 cotton laces of 100 cm
- thread
- scissors
- sewing machine
- iron
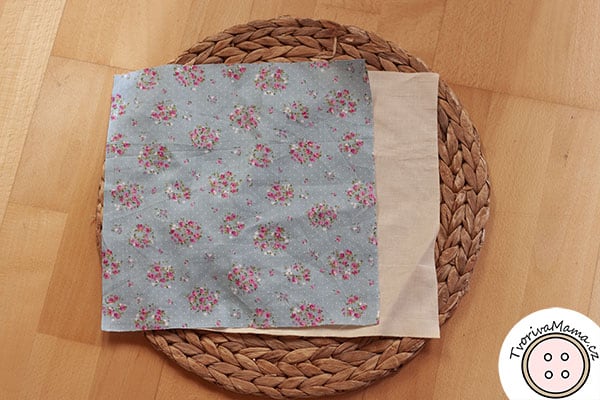
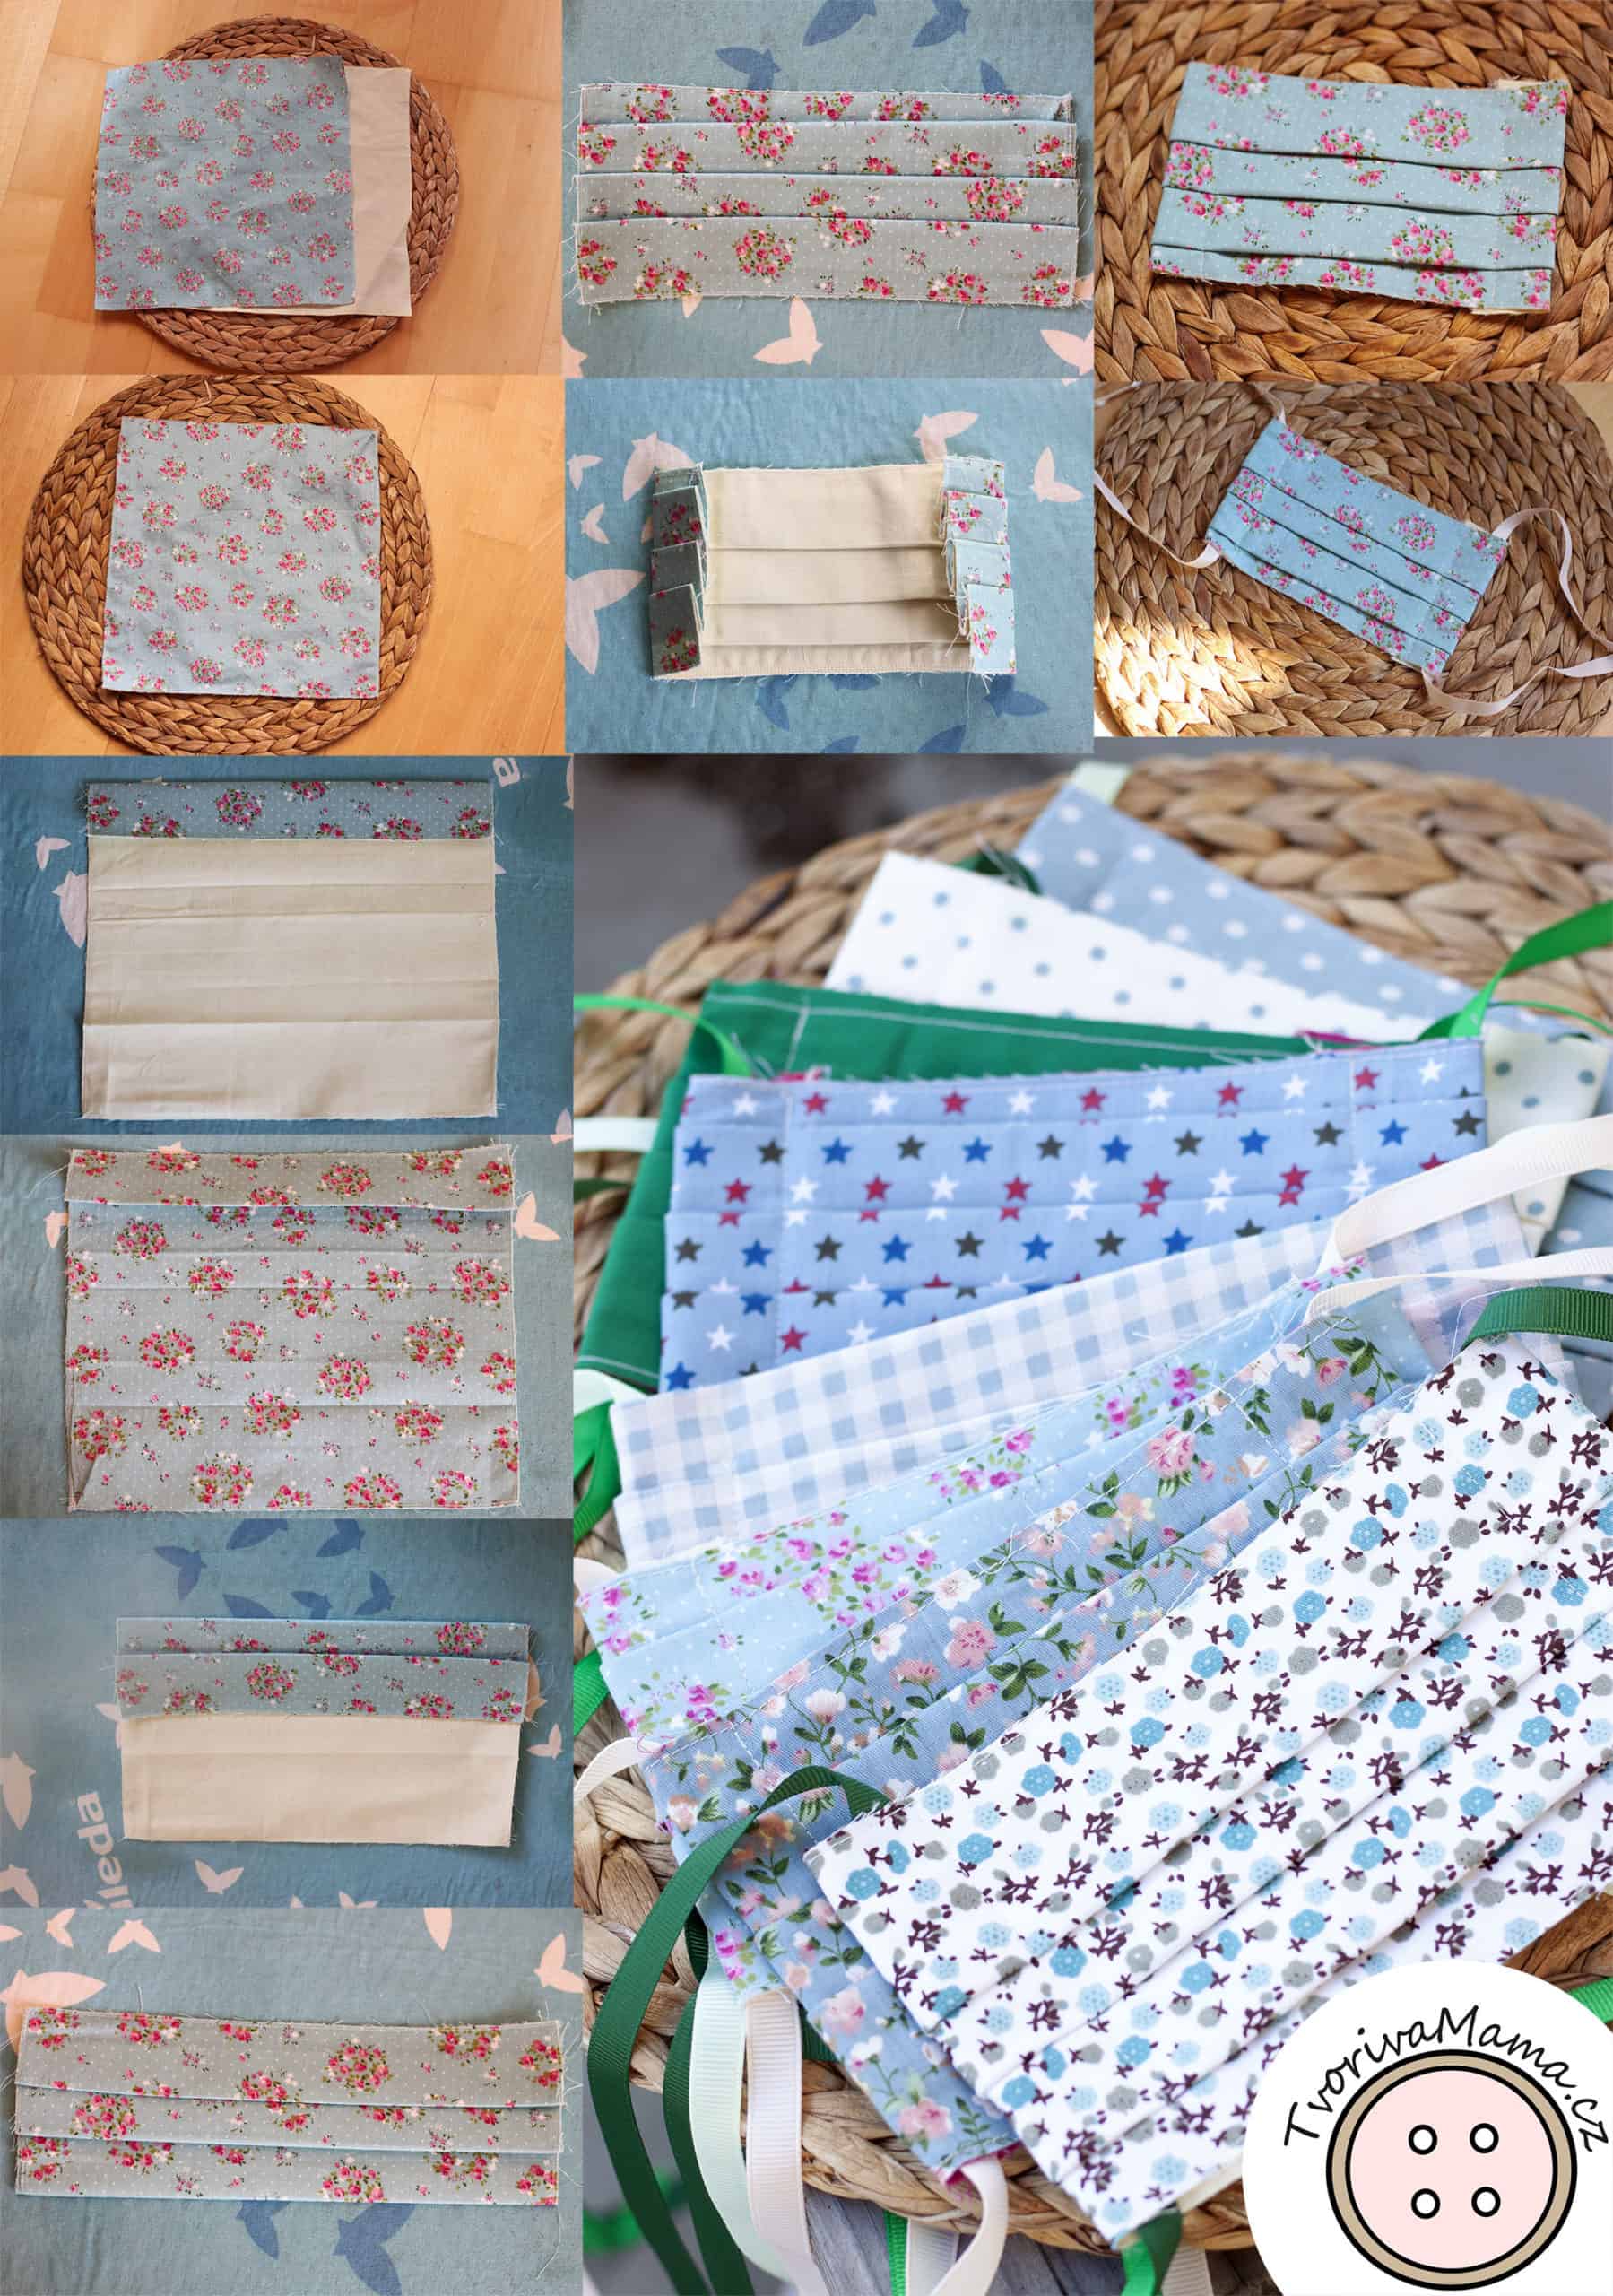
Steam-iron both fabric squares and let them cool down.

Stitch them together on all sides. At the very beginning we were asked to sew huge amounts of masks and skip the steps that were not absolutely necessary. I stitched the squares wrong sides together which of course made the fabric fringe. After the mask was finished, I washed it twice to make all the loose threads to fringe. I cut them off and the edges of the mask stayed smooth and without fringe. Now, if you have more time for this, you can do it the proper way – stitch the squares right sides together leaving a 5 cm opening on one side. Turn the fabric right side out through the opening, iron well and stitch the edges.

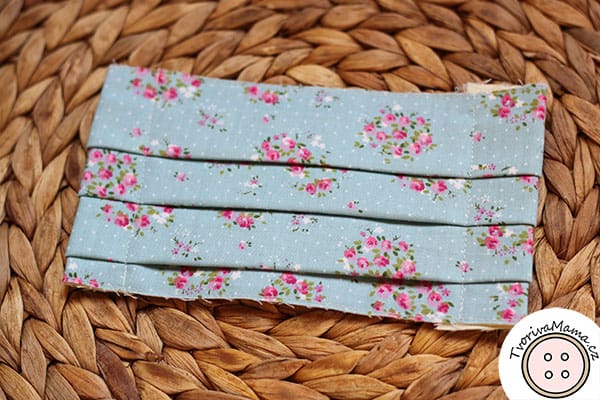
Now start folding. Each fold is about 2 fingers thick, check how I do them:
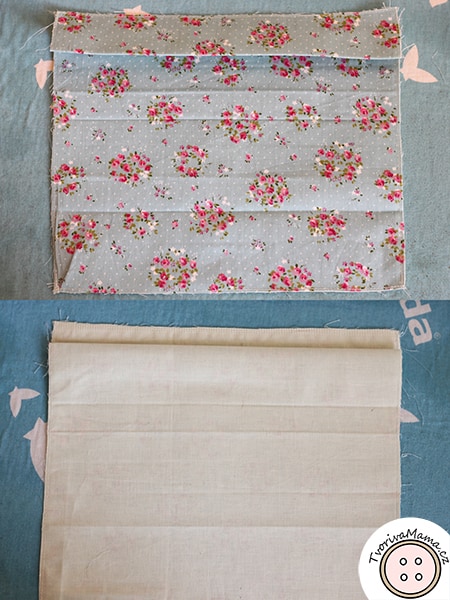
Fold in a kind of accordion shape but each fold starts about a half in the previous fold.

The folds are what allows the face mask to cover the mouth and nose nicely.
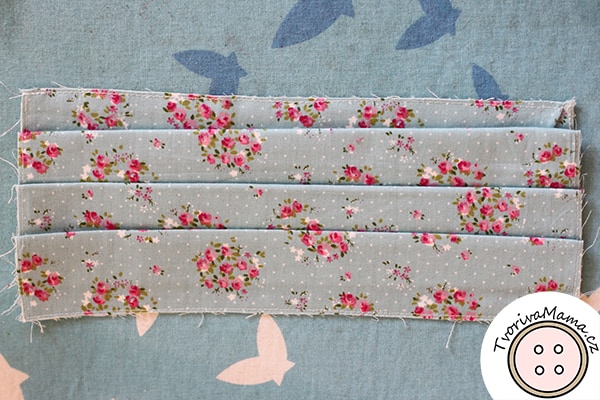
The face mask should have at least 4 folds.
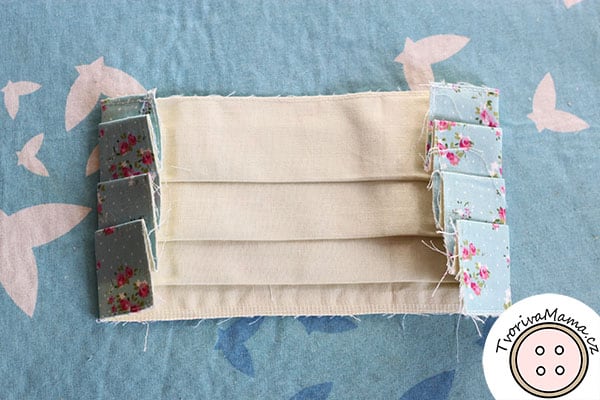
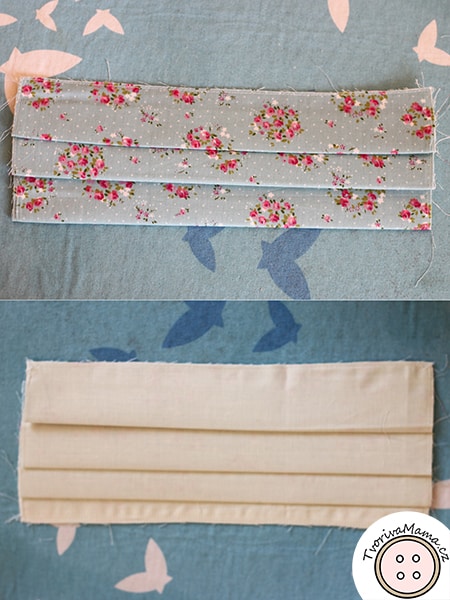
Fold the sides inside in a width that’s just s little wider than your lace. Simply put – the lace has to fit in this fold.
Stitch the folded sides to create tunnels for the laces.
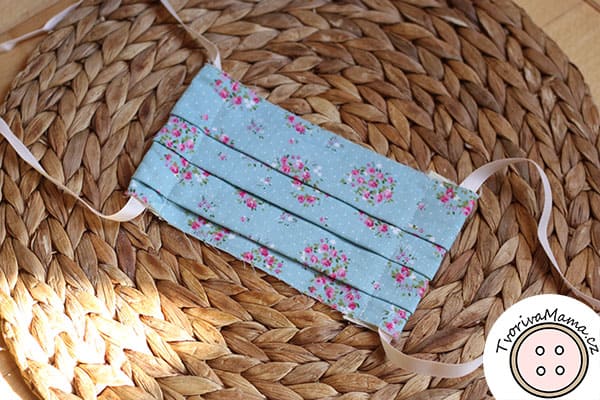
Pull the laces through.
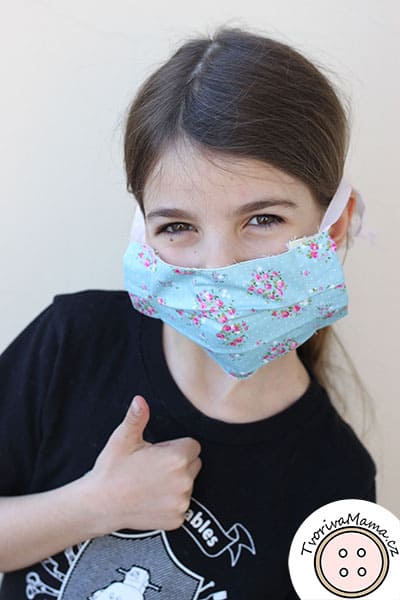
Your fabric face mask is done! Sterilize it in boiling water for 15 minutes after each use.
You can read an article here informing about the importance of using masks.
And here’s the photo tutorial – you can download it with a right-click on your mouse and select “Save image” and you can also find it here:


You should never make something that needs to be washed repeatedly with the raw edges of the fabric exposed. Please remove these instructions and replace them with one of the many version that capture the raw edges inside the mask. Not only will these not hold up very well, they risk threads coming off and being dropped onto the patients that are suppose to be protecting.
This is a tutorial created in the time of the biggest need when we were asked to produce as much as we could, so this was the fastest solution. My family was wearing and washing these without any problem until I had time to make them better masks. I also have a tutorial for a pleated mask without raw edges which will be published as soon as I can process the photos. I understand your point but I am not going to remove the instructions since I proceeded according to the instructions of the hospital. By the way, the masks hold up perfectly and the threads are not dropping anywhere after a month in use;-)
I want to thank Petra for her instructions here. While Joys comments are valid, there is no reason to hate on this tutorial. Next time, just add to her instructions by stating your pertinent points. This data can be used by millions of others that are not working over a hospital table or with a patient.