
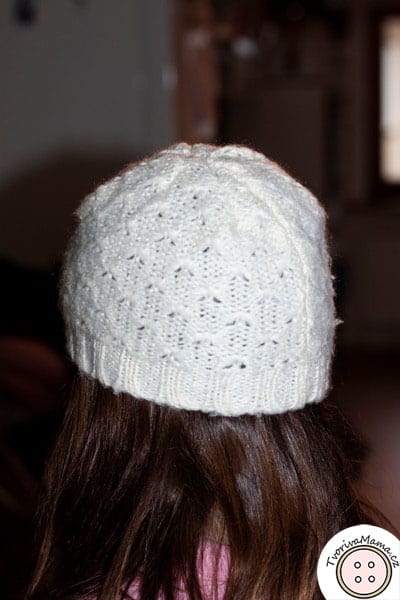
This spring beanie is the last part of my project “Complete upcycling of a sweater”. You can also read about how I upcycled the body of the sweater into a handbag and how I made a winter cap from the collar. I was left with the sleaves which I turned into a lighter headwear.
This is a very easy to make sewing project, you can use a sewing machine or sew in hand (which I did). If you’re used to watch TV without doing anything, know that before your prime time movie is over you can make four of these.
My sweater had shorter wide sleeves that fit my daughter’s head perfectly. So you really need a wide sleeve for this.
Supplies to make a spring beanie:
- wide sleeve of a sweater
- scissors
- pins
- thread
- needle

I cut the sleeve off the sweater.

I sat the sleeve on Mina’s head and cut it about 5 cm above the top of the head.

I made 2 cm cuts at one edge of the sleeve (the future top of the head). You can see only 3 of them on the photo, the fourth one is on the side facing the floor. The cuts have the same distance between them.

I turned the sleeve wrong side out and stitched the cuts.

Still working with the wrong side out I put two stitched cuts together (two that are next to each other) and stitched the fabric between them.

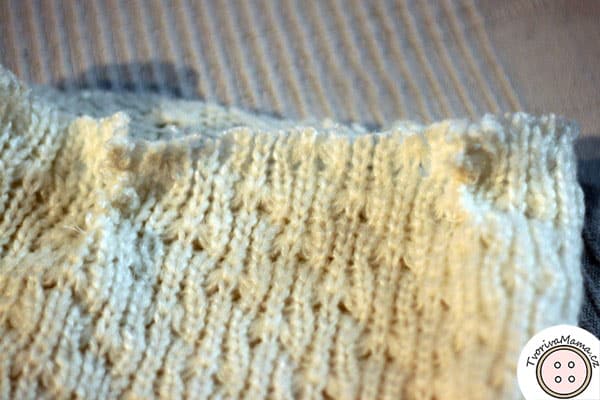
When I stitched all 4 cuts, the stitching of all the parts met in the center. There were those four corners left on the wrong side which make it impossible for the beanie to sit properly on the head. This is how I got rid of them:

I turned the beanie right side out and where the corners are I adjusted the fabric nicely to make the shape round.

I took out the pins and held each adjusted part in my fingers. I flipped the beanie wrong side out and stitched it in the same place. In the photo you can see one pin on the wrong side and one line that shows where I cut all the corners off.

So I cut off all the corners and stitched the fabric.

This is what it looked like on the right side.

Thanks to those eight stitched parts the beanie had a really nice round shape and fits the head perfectly.


I can’t wait to see your entire blog..Thank you so much for all the formative instructions and information
.OMG!! You’re so creative!
Hello and thank you, you might be interested in the other tutorials on how to upcycle a sweater (links are at the beginning of the article).