
 The year 2020 gave us some massive lemons and it’s up to us to make lemonade. A face mask can be pretty fun, especially if it has a huge mouth that opens and greets people in several languages;-)
This pleated face mask has a large pleat on the inside and in the center so it’s not the right choice if you need to wear a mask for several hours. When you open the pleats (and therefore, the mask’s mouth) it becomes much more comfortable to wear and it’s absolutely fine for wearing on a quick trip to the grocery store.
Supplies for the Face Mask with a Mouth

- 100% cotton fabric and from it cut: 2 squares 25 x 25 cm for an adult mask or 2 squares 20 x 20 cm for a children’s mas. If you want your mask to have just one layer, cut only one square.
- cotton thread
- scissors
- felted pens for textile or other paint for textile that can withstand sterilization without staining
- cotton bias tape ties or elastic (for example 2 ties 90 cm long or 2 elastics 30 cm long)
How to make the face mask with a mouth

Like with any face mask, first pre-shrink the fabric by sterilizing it. Place the squares on top of each other right sides together. Stitch all four edges together and leave a 5cm opening unstitched on one side. If your mask is a single-layer, just fold each edge 0,5 cm in and stitch.

Turn the fabric right side out through the opening, fold the edges of the opening nicely, iron well and stitch all the four edges again, this time from the right side.

Fold the square in half and open again, you’ll see a line in the center.

Take the fabric 4 cm (2,5 for a children’s mask) above the line and make a fold that aligns with the center line.

This is what you get at this point.

Fold the other side in the same way. The upper picture shows the outer side of the mask and the lower picture shows the inner side. Iron the pleats well.

Draw the outlines of the mouth first and then color them.

You will see this if you open the pleats.

You can draw whatever you like inside the pleat. I drew the teeth and tongue and added a greeting. When you draw with felted pens and different colors next to each other, wait for the first color to dry before you use another. I didn’t and you can see how the black outline blended with the pink tongue. When it dried it actually looked good, however, I am going to wait the next time.

Fold the short edges of the face mask 1,5 cm in and stitch.
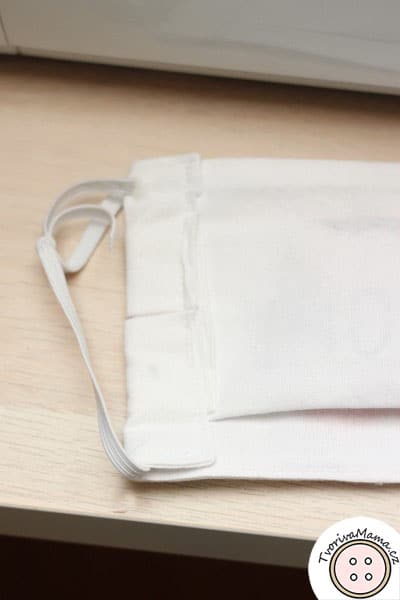
Pull the tie or elastic through the tunnels and depending on the style of your tie stitch them, knot them or leave them as they are.

Enjoy your funny face mask and aloha! Or better a hui hou, mālama pono!

Does the elastic of your mask make your ears sore? Try the ear saver!


