
Are your feet always cold in winter? Or not just in winter? Let’s make this fluffy cozy feet warmer with a pocket for a heat pad.

I know this all too well – hot shower, two pairs of warm socks, blanket…and in a while you can feel those super warm alpaka socks getting cold from your feet. The winter time motivates me to come up with warm projects, maybe you remember my Boot Socks, Warm Fluffy Socks or Cherry Stone Heat Pillow. The last one is something you can use also in this project because the Feet Warmer has a pocket for such a heat pillow.

This Feet Warmer is not for walking but it’s will make your feet feel sooo waaaarm! It’s ideal for chilling on the sofa or sitting down, whether you work at a PC, do some beading or play board games. As you can see from the pictures, it’s not as sturdy as some home shoes. This was my intention, as I don’t like wearing anything shoe-like in bed, whatever I wear needs to feel more like socks than shoes. It comes from the custom in our country that you never wear outside shoes at home and, subsequently, whatever you wear outside of bed you don’t wear in bed. I wanted a leg warmer that would be soft and that would make me feel like I had warm socks on.
The main fabric is warmkeeper, the lining is acrylic furry thing, I don’t remember the percentage of materials or the exact name but you can choose any fluffy material you like. The upper edge has a lace for making the edge tighter around my legs. The heat pad pocket is on the soles. You can make a feet warmer from sturdier fabric if you want and you can also completely omit the lace and grommets but in this case, you need to use sturdier fabric so your feet warmer holds its shape.
Let’s make this!
Table of Contents

 Supplies
- paper
- pencil
- scissors
- measuring tape
- outside fabric (according to measurements+ pocket)
- lining (according to measurements)
- two grommets + tools
- lace
- adhesive velcro (stripe or circles)
- Heat Pillow made with my tutorial, heat pad, small hot water bottle…
Feet warmer with a pocket for a heat pad – Tutorial
Measuring
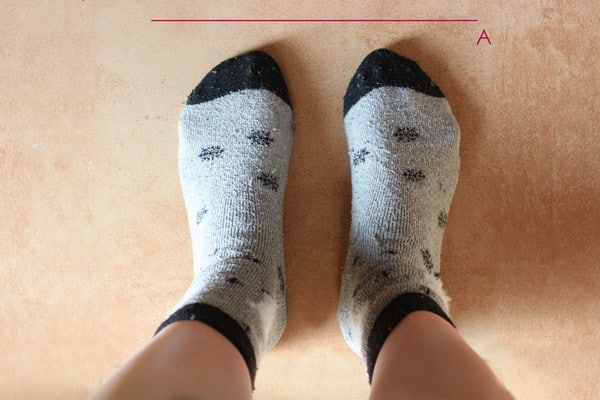
First, we’ll measure the size of the center pattern piece. Stand up with your feet as apart as you want them in the feet warmer. Measure the distance between the outer edges of your feet. This will be A – width of the center piece.
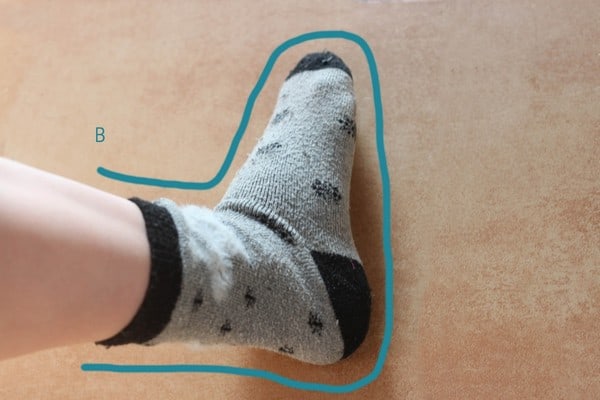
Then mark a point on your leg where you want the feet warmer to have its edge (how tall it will be), probably above your ankles or on the shins. From this point, measure around your foot until the same height on the other side (on the calf) just like the blue line marks in the photo. The feet warmer will have thick lining and we want to have space for warm socks, so let’s add 5 cm/2 in to that measurement. This will be B – length of the center piece.
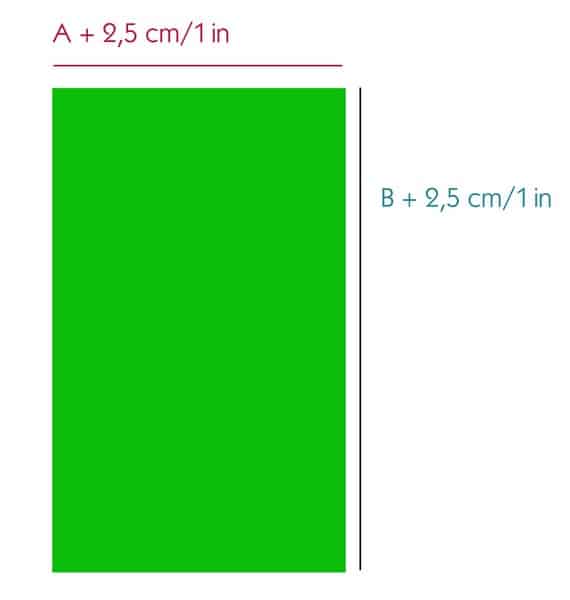
Cut a paper pattern of the center piece. It’s a rectangle where the shorter side is A + 2,5 cm/1 in seam allowance and the longer side is B + 2,5 cm/1 in seam allowance.
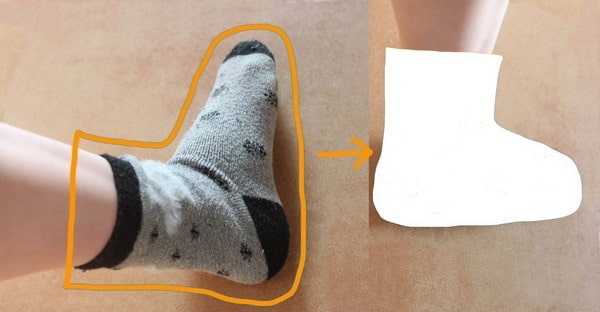
Now we need the side pieces. Lay your foot on the side on a piece of paper and trace around it from the points on your shin and calf where you marked the height of your future feet warmer. Cut out the traced shape.
Last thing to measure is the pocket. It will be a rectangle with the same width like that of the center piece, so A + 2,5 cm/1 in. And the length will be the length of your sole. You’ll fold and topstitch the edges so the resulting pocket will be shorter than your sole. You can make the pocket even smaller if you want but I like to have the sole covered to be able to insert more heat pads.
Cutting the fabric
Cut out all the pieces, don’t forget to cut the side pieces mirrored.
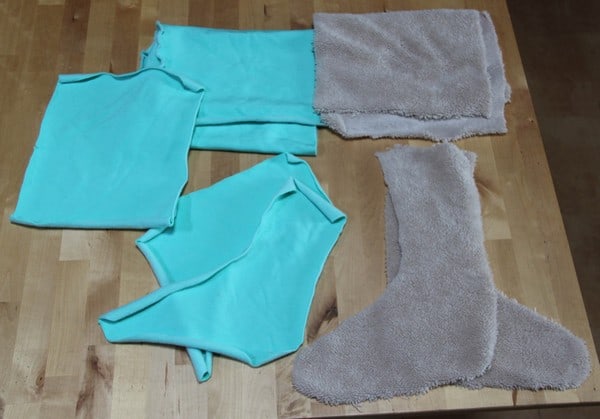
Main fabric:
- 1x center piece
- 2x side piece mirrored
- 1x pocket
Lining:
- 1x center piece
- 2x side piece mirrored
Main fabric – attaching the pocket
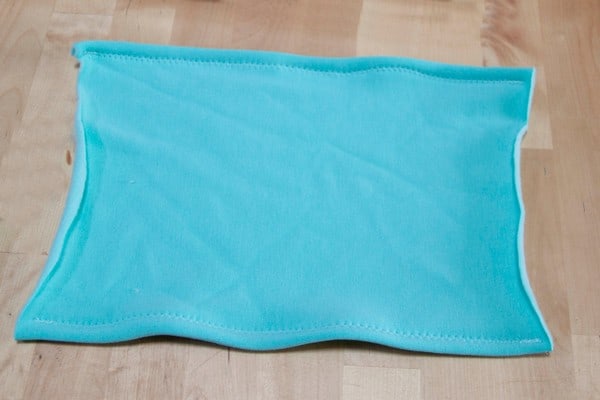
Fold the two opposite edges on the width of the pocket (those that won’t be aligned with the center piece). If you’re using warmkeeper or any other fabric that doesn’t fringe, 1 cm/0.4 in is enough. If your fabric fringes, 2 cm/0.8 in or more is necessary.
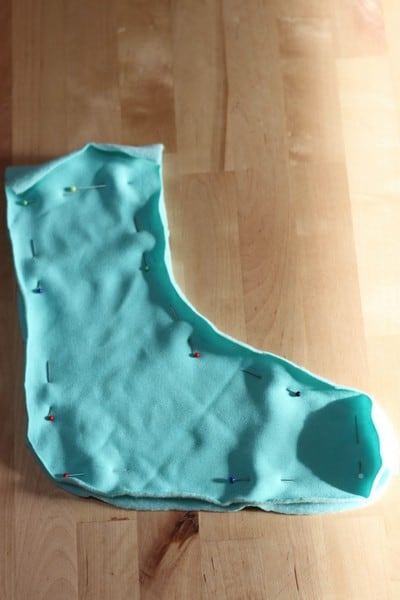
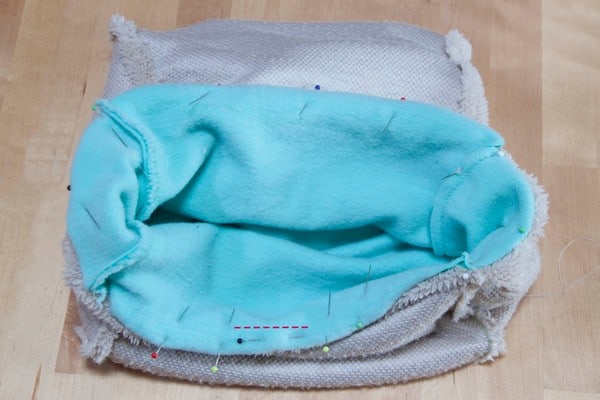
We have to attach the pocket to the center piece. To know where to stitch it, first, pin the side pieces to the center piece, right sides together. Start at the upper edge (where the feet will go in) and continue to more or less the beginning of your sole/big toe (between the two pink dots in the picture). The last pin on the sole will be where you pin one edge of the pocket. This way, the opposite side of the pocket will be on the heel.
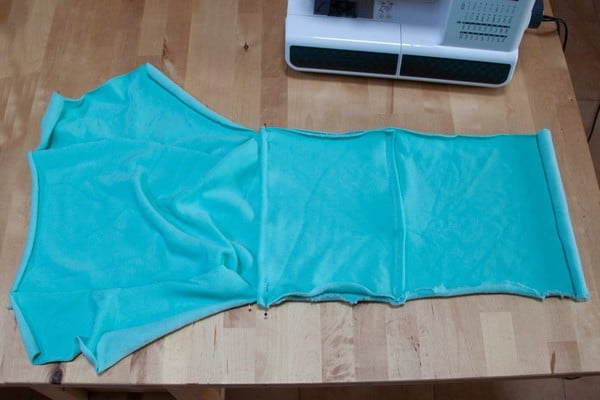
The pocket should be pinned wrong side to the right side of the center piece. As you can see, the edges that aren’t folded, are aligned with the long edge of the center piece. Stitch these edges and also the folded side of the pocket that’s on the heel.
Main fabric – stitching pieces
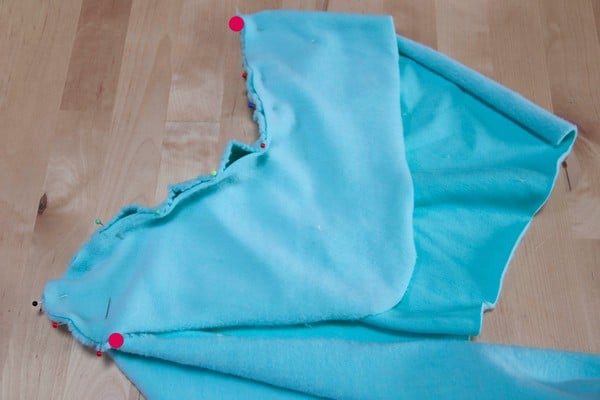
Now pin the center piece (with the pocket stitched to it) with the side pieces, right sides together.
Stitch and turn it right side out.
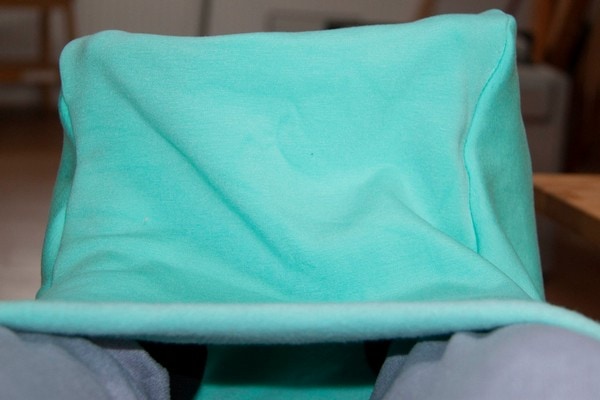
Now you can try the main fabric piece on.
Lining – stitch the pieces
Stitch the lining pieces in the same way like the main fabric pieces, just without the pocket, of course.
Stitching main fabric piece and lining piece

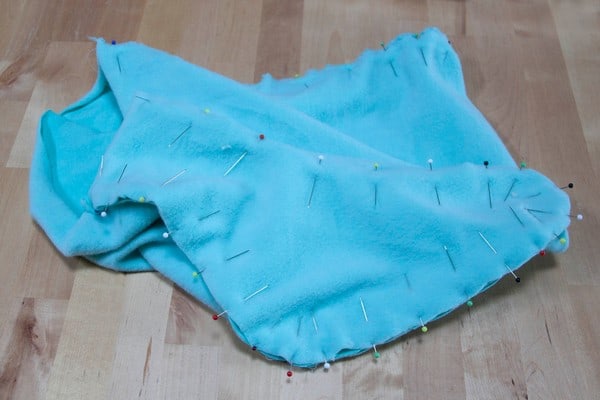
And now we’ll put it all together. Both pieces will be right sides together, so turn the lining piece wrong side out and the main fabric piece right side out. Place the main fabric piece inside the lining piece but watch out! Each piece has to face different direction. The toes of one piece have to be in the opposite direction that those of the other piece. If it sounds strange, just trust me 😉
Pin and stitch about 1 cm/0.4 in from the edge. Leave 5 cm/2 in unstitched in the center of the front of the main fabric piece (that’s the edge of the side of the toes). You’ll need this opening to turn the whole thing and also to install the grommets.
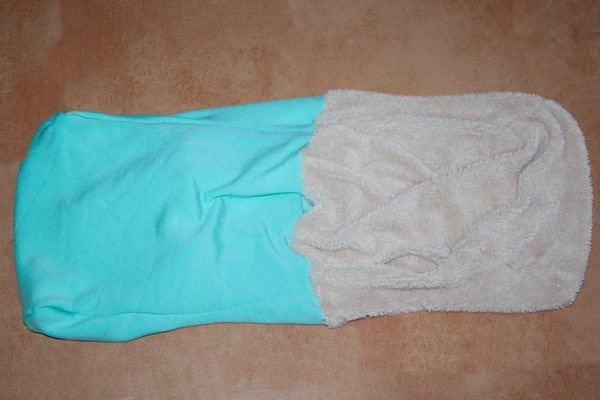
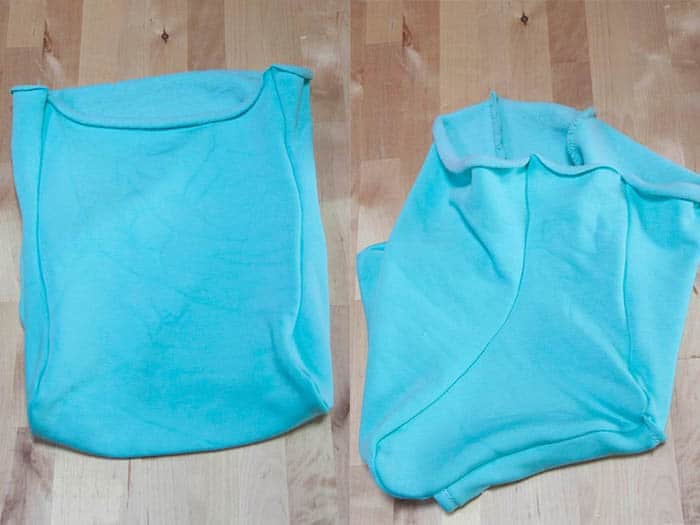
Turn both pieces right side out.
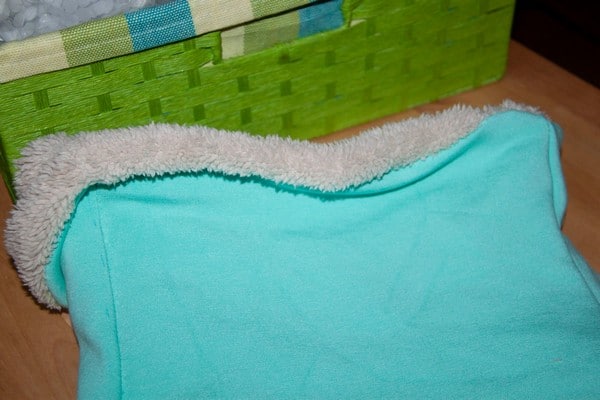
Place the lining piece inside the main fabric piece. You’ll see that the toes of the lining go nicely inside the toes of the main fabric piece.
Grommets and lace
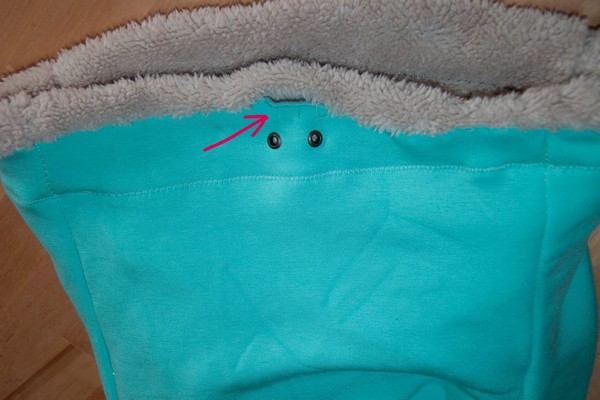
Use the opening in the front to make two holes about 1,5 cm/0.6 in from the edge (only in the main fabric) and install grommets. The steps you have to follow to install grommets depends on the tools you’re using. Stitch around the whole edge 1 cm/0.4 in under the grommets. This creates a tunnel for the lace and it will prevent the lace from “escaping” further down the feet warmer which would complicate tying the lace.
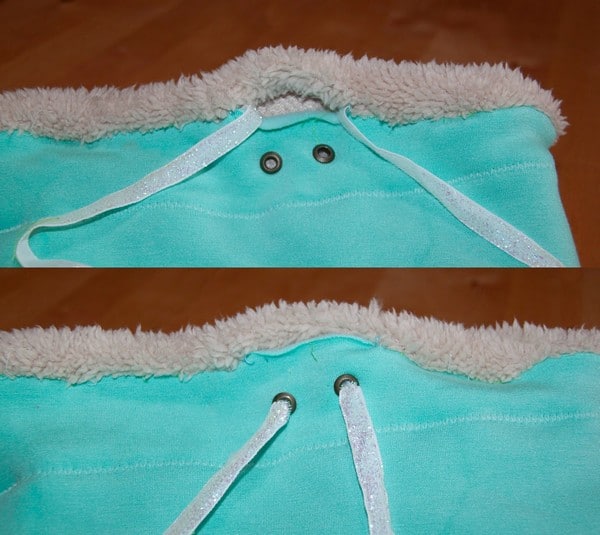
Pull your lace through the tunnel and the edges through the grommets. Then you can already close the opening using the Hidden Stitch.
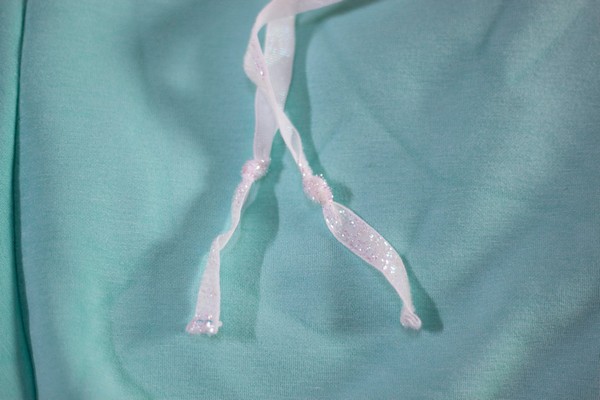
Topstitch the ends of the lace if they fringe and also tie a couple of knots on each end (or attach large beads) so the ends of the lace can’t slip through the grommets and disappear inside the feet warmer.
Finishing the pocket
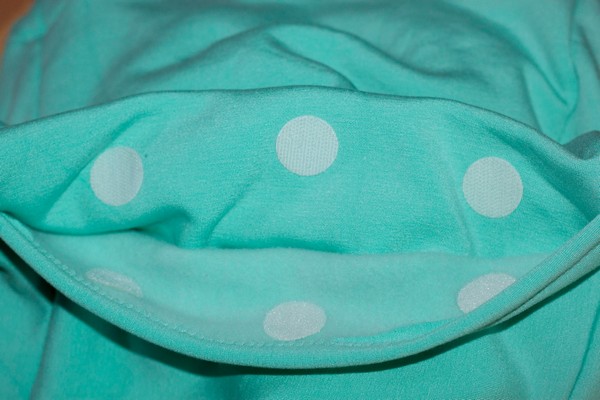
Place the adhesive velcro around the edges of the pocket. Heat the pad, place it inside the pocket and enjoy the warmth!


