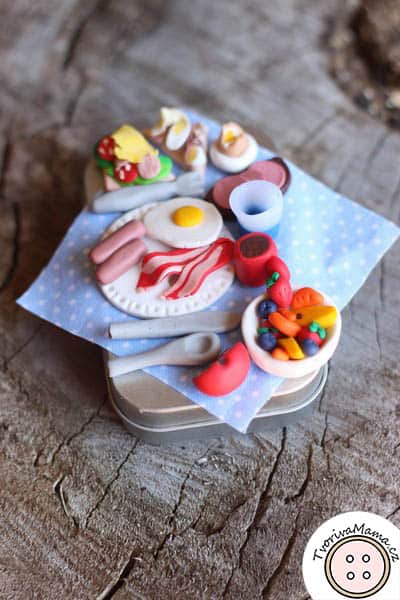
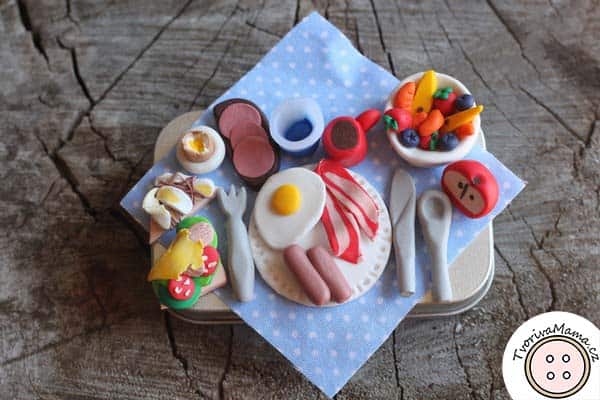
Keeping your kids entertained during traveling can be the difference between a quiet car trip and hell. And if you haven’t figured a way yet, how about trying this DIY travel toy in form of miniature magnetic breakfast?

 Do you also sometimes feel like as soon as you get in the car or on a place your kids turn into screaming monsters who tease each other and defend “their” half of the seat as if it was a matter of life and death? We have more than 2 so the territory gets even smaller and the fights more heated. If we have to travel for more than 2 hours we are like a circus.
We tried even travel tablets (our kids don’t use tablets at home and they enjoy them the more on our trips) but recently we’ve started to need something more. So I grabbed some tin boxes and turned them into DIY travel toys from which the breakfast set was my first. I’ll show you the other boxes later.
What’s great about this toy is that each piece has a magnet attached to it so it’s motion-resistant to a certain grade. It’s really great for car and plane trips, the pieces stick to the box and even when they’re inside the box they don’t waggle. Of course, it’s still just small magnets so you have to consider your child’s age and explain to them that they need to take good care of the toy.
We haven’t eradicated the “Are we there yet” questions and the teasing but the frequency has decreased. And that’s good enough for me;)
Browse the Clay Play category to see more tutorials like this one, for example the Dollhouse Magnetic Pizza!

At the beginning let me explain to you how to attach the magnets and what to be careful with. Then I’ll show you how I made some of the pieces of the breakfast box and at the end I’ll add some more pictures for your inspiration.
Table of Contents
Supplies for the Miniature Travel Toy
- Polymer clay – I use Cernit
- Tin box
- Magnets – I used sizes 4 x 2 mm and 6 x 1 mm
- Rolling pin
- Silicon mat
- Sharp knife
- Round cookie cutter
- Any other tools like fork, toothpick, ckae modelling tools
- Superglue
- Latex gloves
- Canvas rectangle for the table cloth
Choose any magnets you like, just know that you might have to try on a few toy pieces how strong they are.
Breakfast Miniature Travel Toy Tutorial
How to work with the clay
Each polymer clay is a little different to work with. Sometimes it’s said that the quality of the lots of Cernit vary, some are harder, some softer. My experience is that Cernit is wuite hard and it needs some kneading (except for the transparent variety which is softer and stickier). However, I like working with it because it keeps its shape.
There’s one complication of working with polymer clays – keeping it clean. The clay seems to catch any small dust piece from the air, the mat and your hands. And, of course, your fingerprints as well. For clean products I recommend you to wear tight gloves although I have to admit that I sometimes don’t wear them myself because I can get some of the details right only when I don’t wear any gloves. The professionals work in extremely clean environment but it’s something we can’t always afford at home. Still, it’s a good idea to clean all your tools properly and perhaps also to clean them with an anti-static cleaning product.
When it comes to the rolling tin it should be a smooth one, I don’t recommend wood. Tip: If the clay sticks to your rolling tin and breaks, put a little handcream on the tin. But just very little to grease it lightly.
How to attach the magnets
Attention: Always make sure that you’re attaching the magnets the right way. The poles should be directed in a way that the pan and plate always attracts the food pieces. If you attach several magnets to one are (like the plate), make sure that all of them are in the same direction.
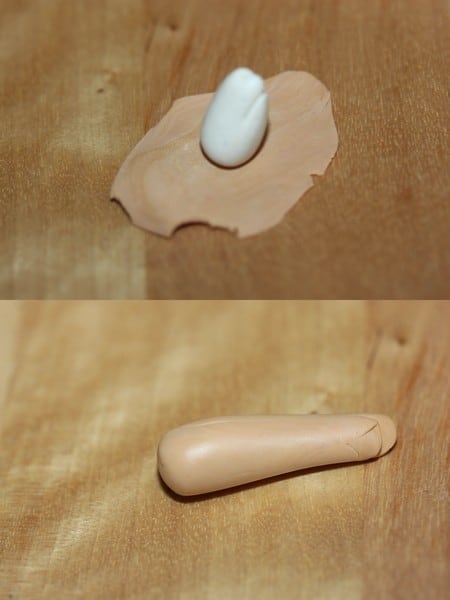
I will use the pan to show you how I attach the magnets.
I make the desired shape like the plate or the pan.
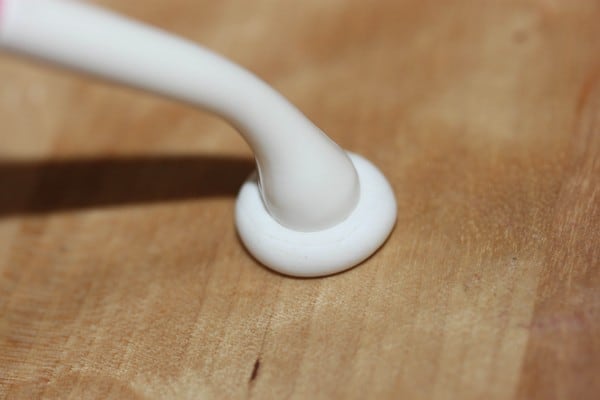
I push the magnet in place and with the plate and the pan that would be on the lower as well as the upper side so that the plate/pan sticks to the box and also to the food. Before I bake the piece I take the magnet out and after baking I glue it back with superglue. You can bake the piece with the magnet but it can fall out later. Sometimes you have to dig a little to get the magnet out, I recommend to do this with the tip of a knife to prevent poking a hole into the clay. Sometimes it’s enough the place the knife on the magnet and the magnet will stick to the knife and get out of the clay:
If your magnet is extremely strong you can press it into the clay and cover it with a thin layer of clay and bake like this. I, however, don’t have good experience with this.
Attention! Don’t forget to watch the right direction of the poles!
What I like to do is to make the plate or the pan first, I bake it and glue on the magnet. Then I use this pan or plate and place other magnets on it before gluing them to the food pieces to make sure the poles are right.
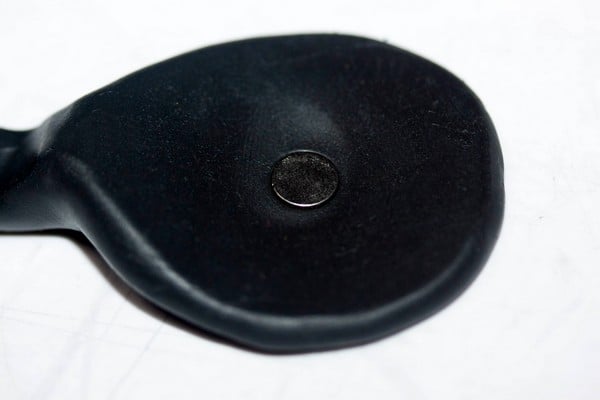
Plate and Pan
The pan in the pictures above was made from one piece. The advantage is that it holds together as one piece and I don’t have to worry about the handle falling off. The disadvantage is that its shape is less regular. Now I make two-piece pans. I cut out the round base and then form the handle which I glue on after baking.
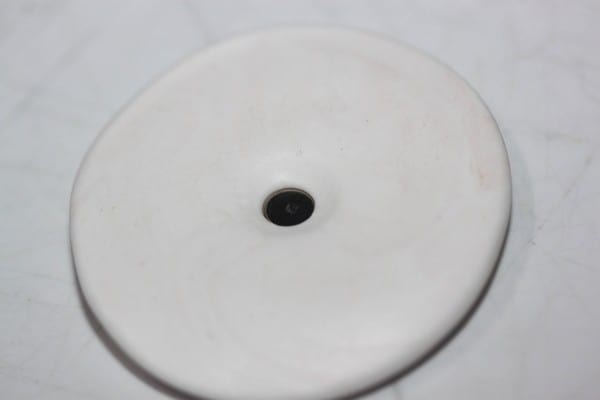
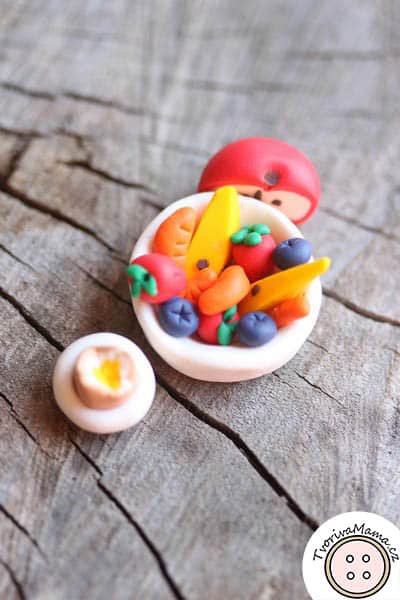
For the plate I just cut out a round shape and press a magnet in its center. I use a larger flat magnet for the bottom side.
And then I press several different magnets in what’s going to be the upper side. Then I roll out the plate a little and cut it out again. I press some ornaments in the edges and if the plate gets too deformed, I cut it out again.
It’s a bit difficult to get the magnets out of the plate. You can try to get them out with another magnet but be careful with the plate, it could get deformed.
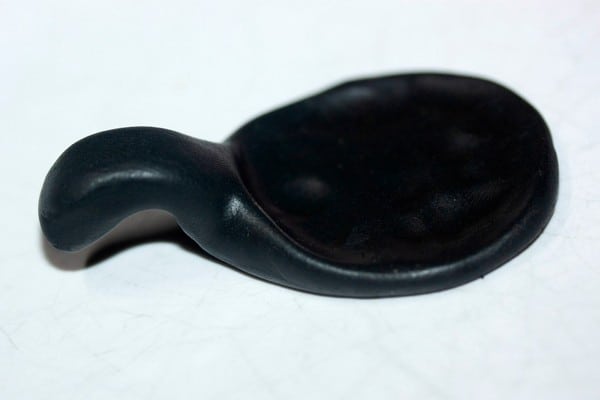
Cutlery

To make the spoon I roll out a piece of grey clay and make it thinner towards one end. Then I make a round dent in the wider end and form it into a spoon. I press the magnet into the back side.
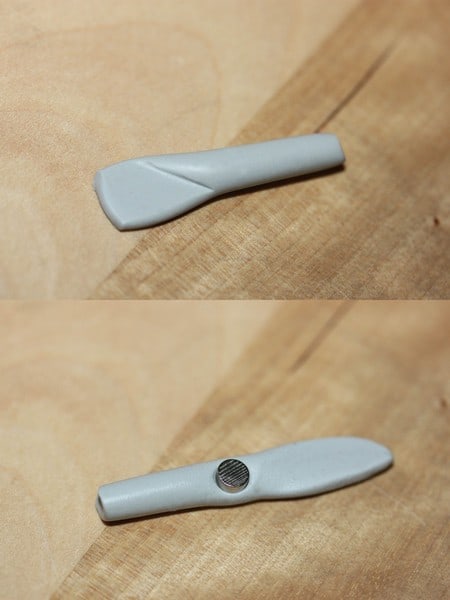
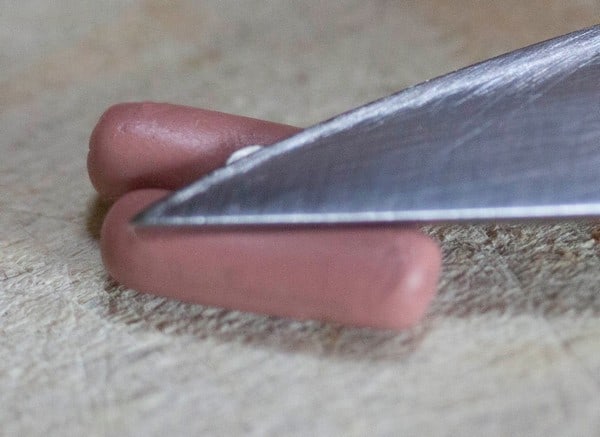
A knife is a rolled out “snake” as well. I press one end flat and shape it into the knife.
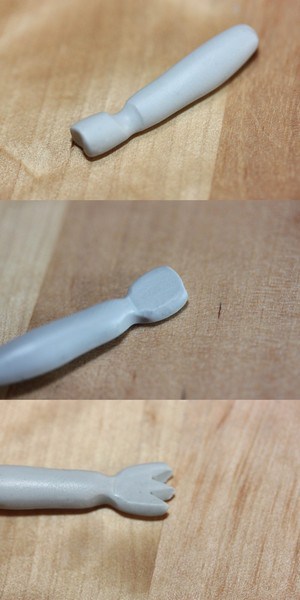
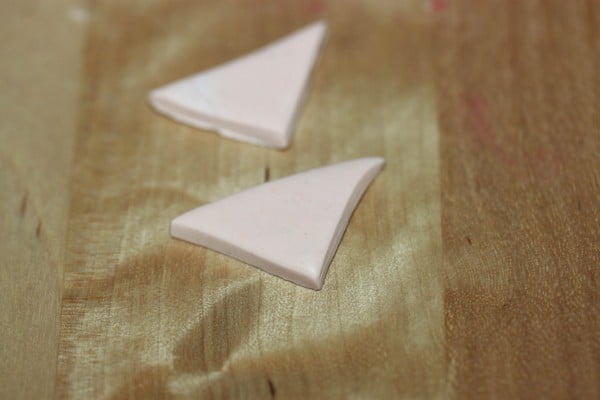
For the fork I rolled out a piece of clay and used a thin stick to mark the separation between the fork and the handle. Then I flatten the fork and cut out two triangles.
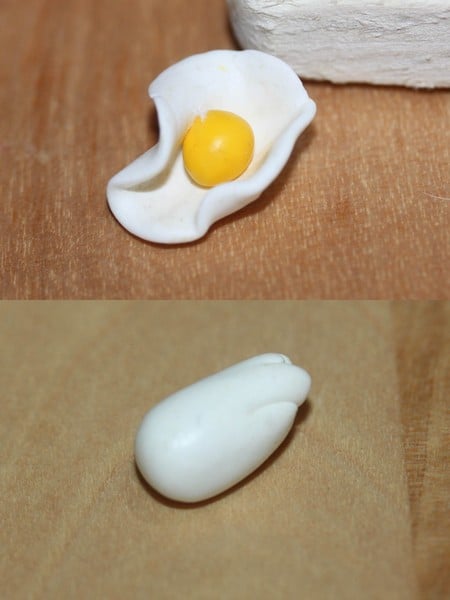
Fried Egg

The fried egg is super easy to make. I just make the egg white from white clay – the shape is pretty random.
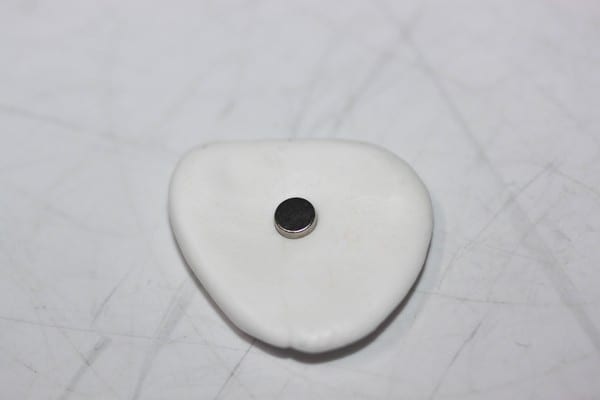
Then I press a magnet into the lower side and take it back out.
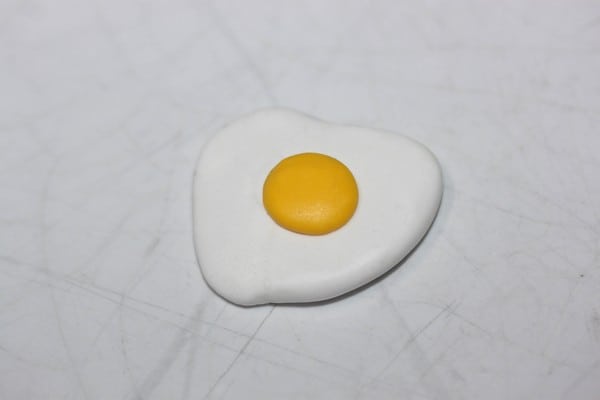
And then I add the egg yolk. Voilà!
Bread
To make the bread I roll out some dark clay first. Then I form a loaf from lighter clay and place it in the center of the brown clay.
I wrap the brown clay around the loaf and smoothen it.
Then I make a few cuts on the top of the bread and I cut slices.
I add some texture to each slice with the tip of the knife.
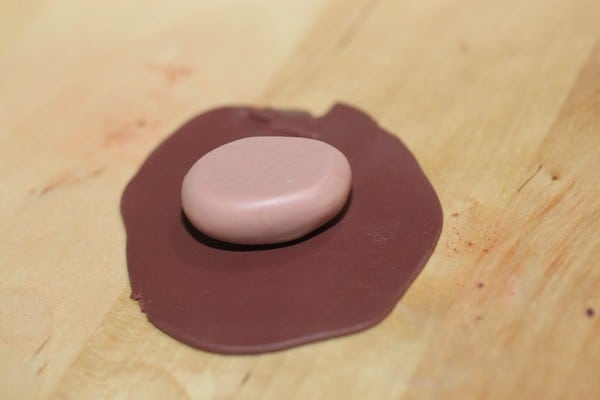
Apple
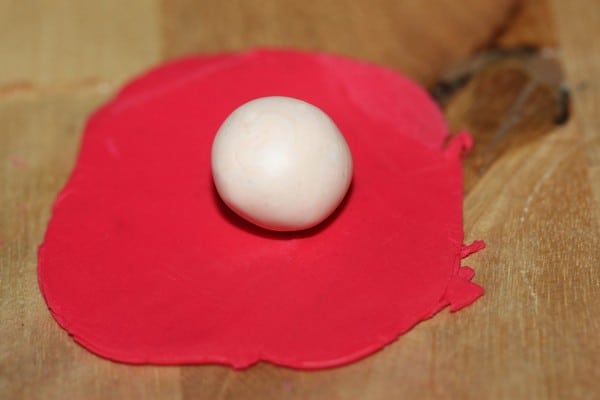
The way to make the apple is the same like with the bread – first I roll out some red clay pretty thin, then I place a small ball in its center. The ball is a mixture of white and light pink.
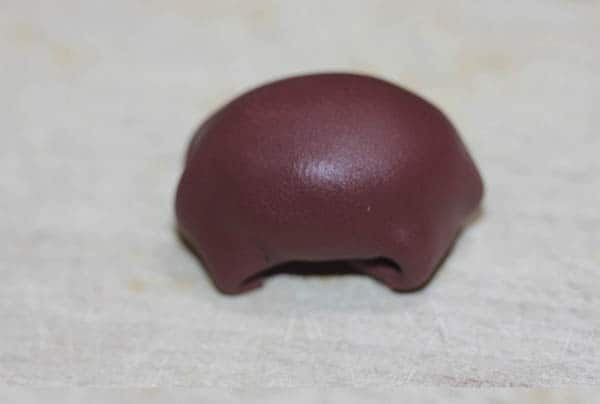
I wrap the red around, smoothen it and then roll the ball again in my hands.
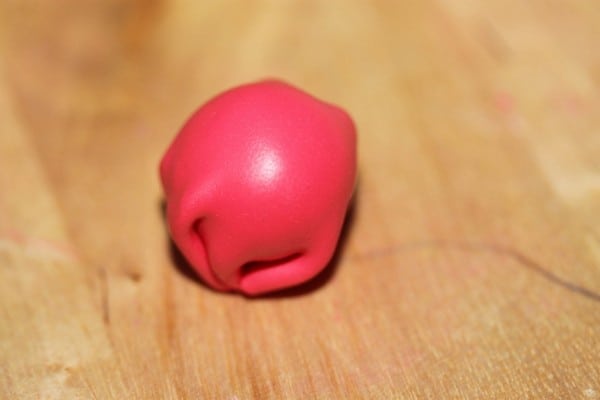
I add the stem and the dry leaves at the bottom.
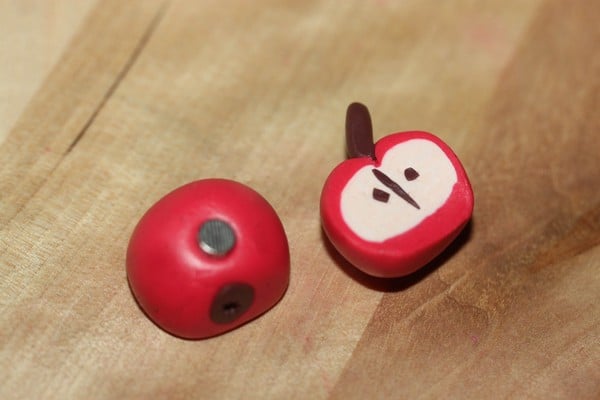
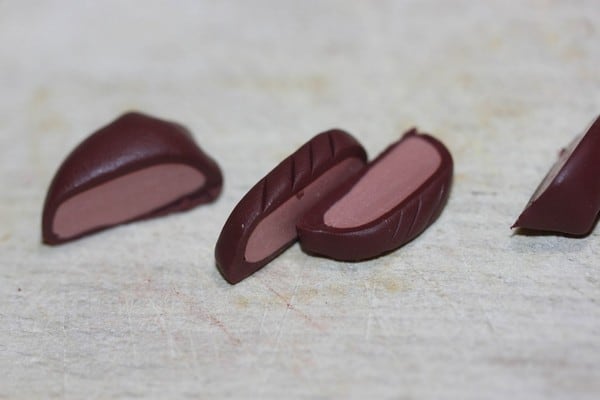
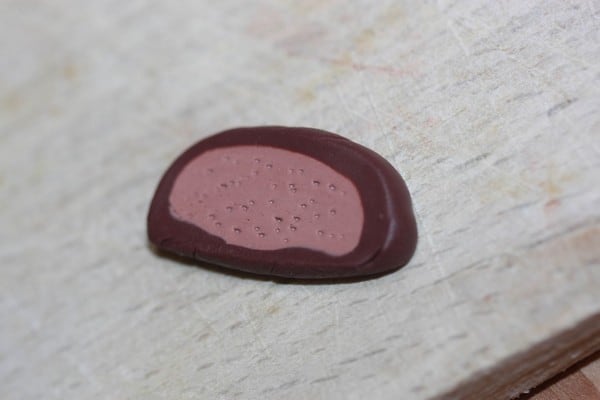
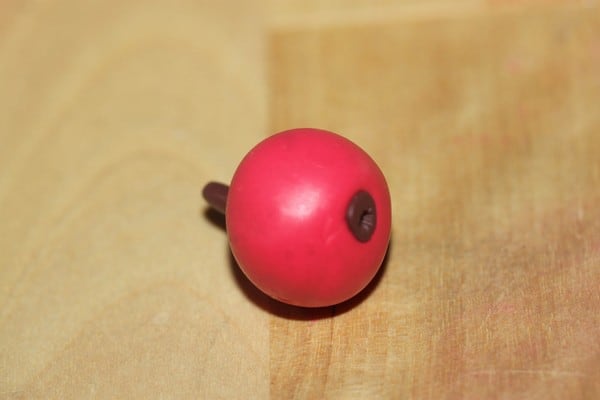
I cut it in half, add the core and the magnets, of course.
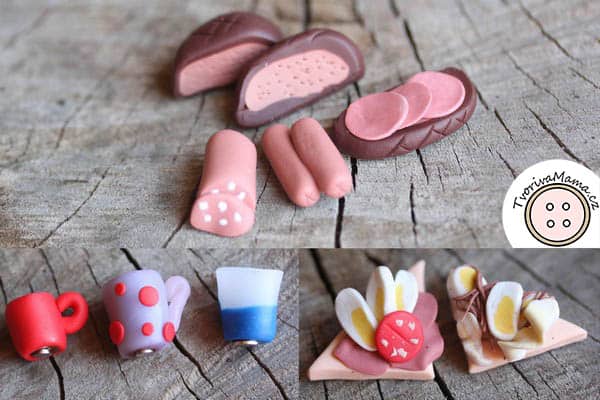
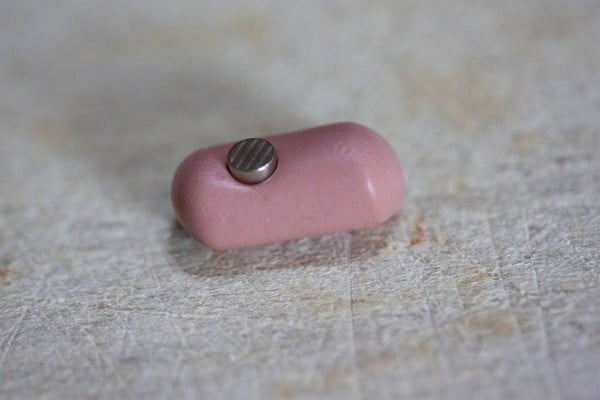
Sausages and Salami
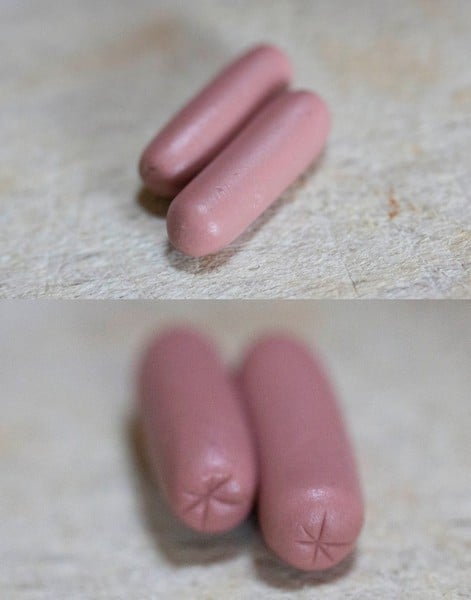
The sausages are just two rolled out pieces together.
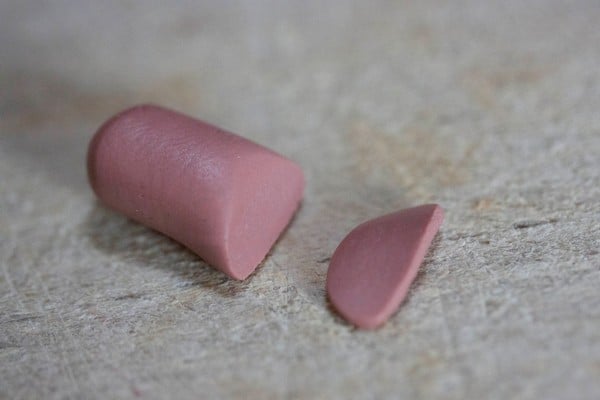
The sausage is one shorter and thicker roll from which I cut off a slice…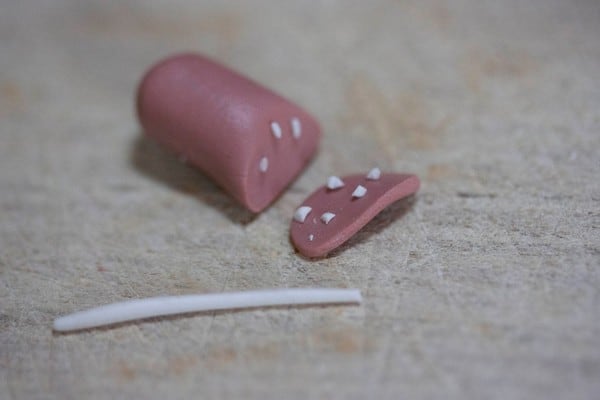
…then I add a few white “fat” dots…
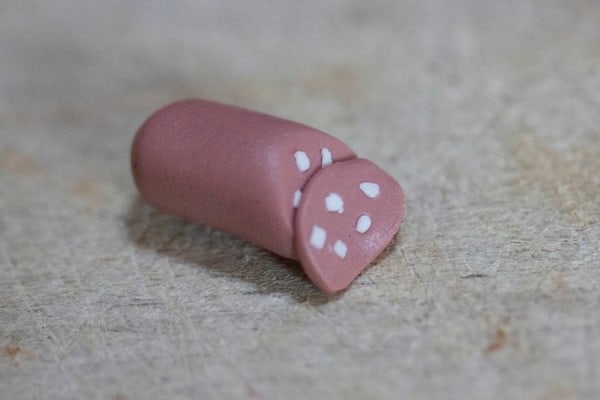
…and put the slice back.
Sandwiches
Making the sandwiches was really fun, I enjoy the small details.
I mixed some white with a little yellow and a tiny bit of brown, rolled it out and cut out several triangles for the sandwich bread.
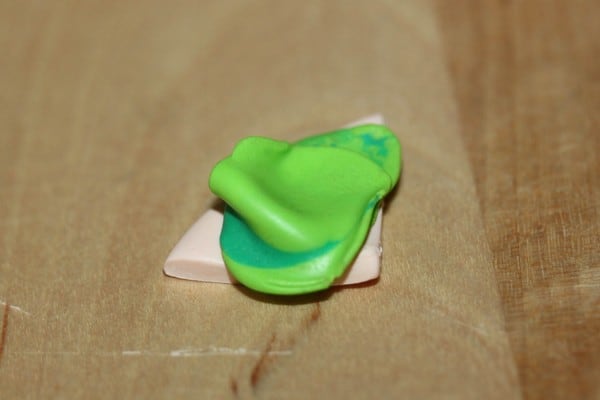
And then I started adding the ingredients. Here’s some salad…
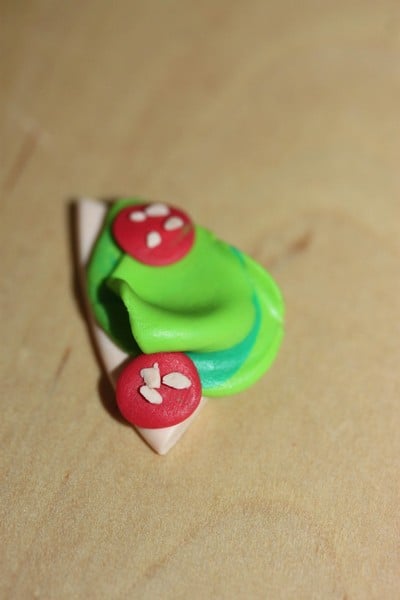
…tomatos…
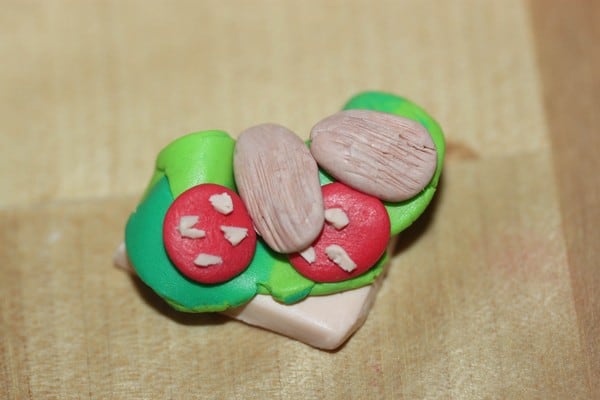
…meat…
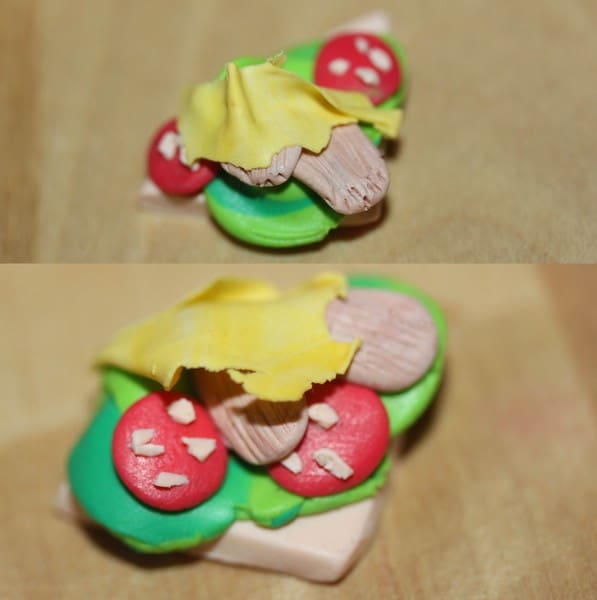
…and cheese.
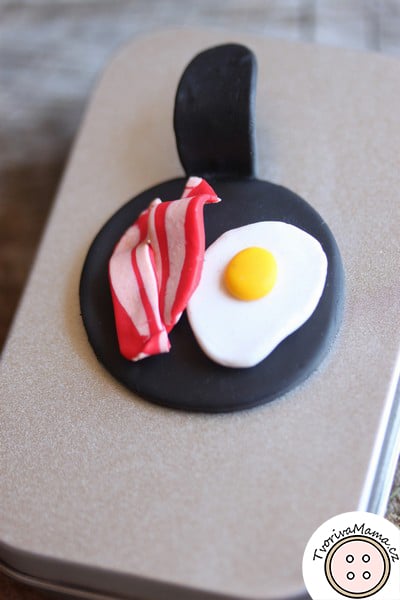
Bacon
What would a proper breakfast be without bacon?
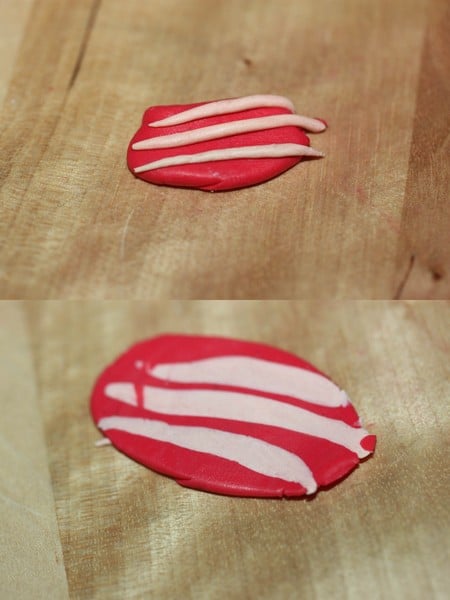
I rolled out some red relatively thick. The I added three light pink stripes and rolled it all out together.
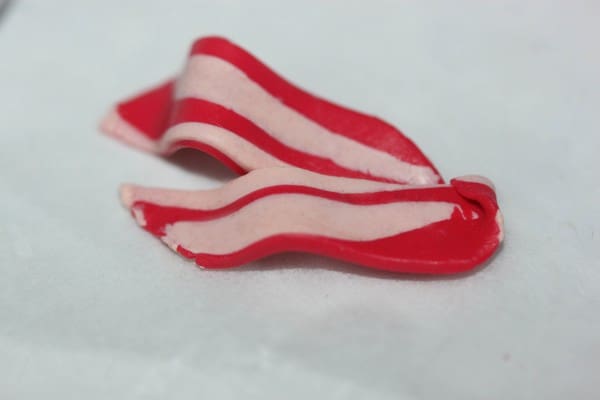
I cut out two slices, made them a little wavy and put them together. The magnet is on the lower side of one of them.
Lightly Boiled Egg
Once again the way you know – I rolled out some white and places a tiny yellow ball in the center. Then I wrapped it and rolled it out a little.
Then I mixed some clay of eggshell color, rolled it out thin and wrapped the egg in it.

I rolled out the egg some more but I didn’t have to worry about the shape of the top of the egg too much because I was going to cut it off. And so I did, I cut it in a messy way so it resembles a lightly boiled egg which somebody has eaten the top of.
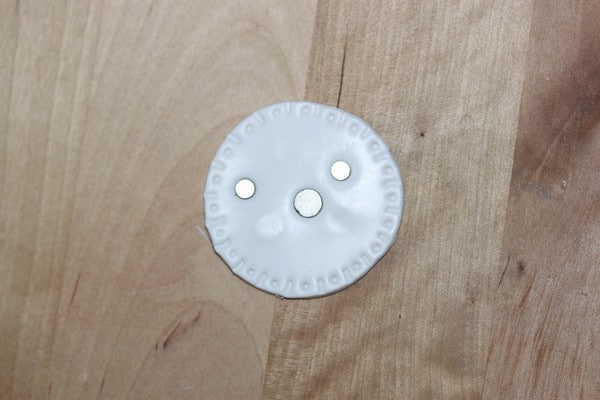
For the plate I made a white ball and made a round hole in it.
I added the magnet.
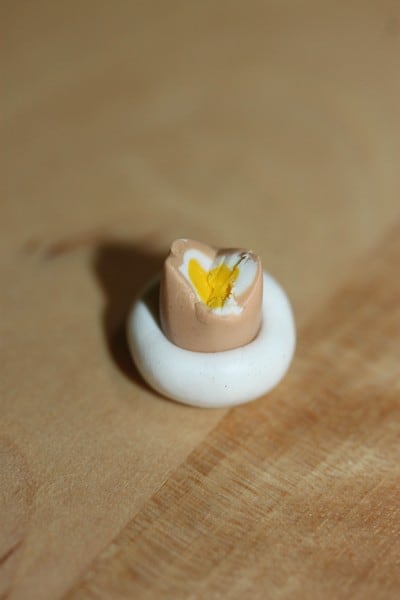
And I put the egg in it before baking.
Water Glass
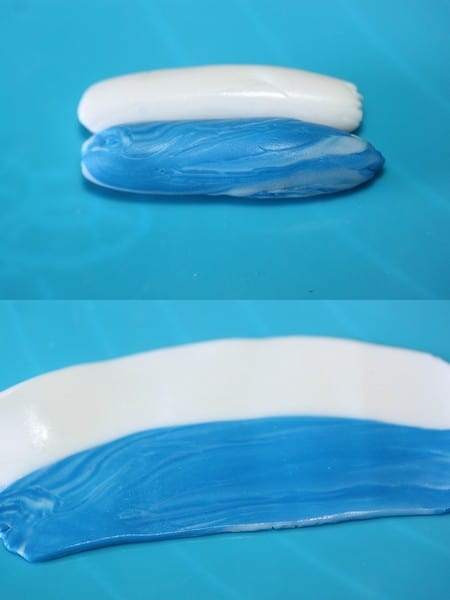
I mixed some blue with transparent Cernit, I find the color resembles water a bit more. I put this blue tripe along a transparent stripe and rolled them out together.
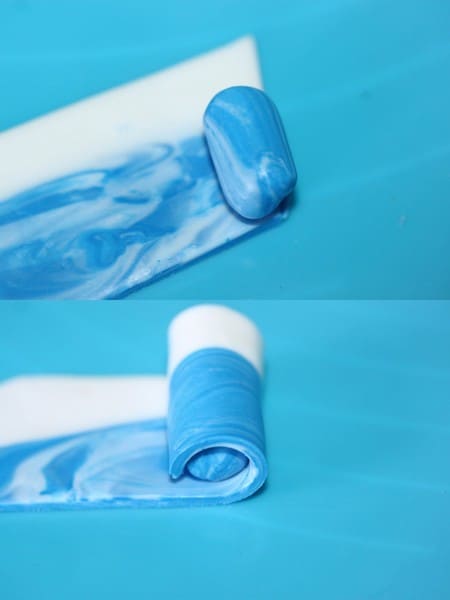
I cut the long edges straight and one of the short ones diagonally. I put a piece of blue clay aligned with the diagonal edge on the blue part. Then I rolled it to wrap the small piece completely. I cut the other edge diagonally as well.
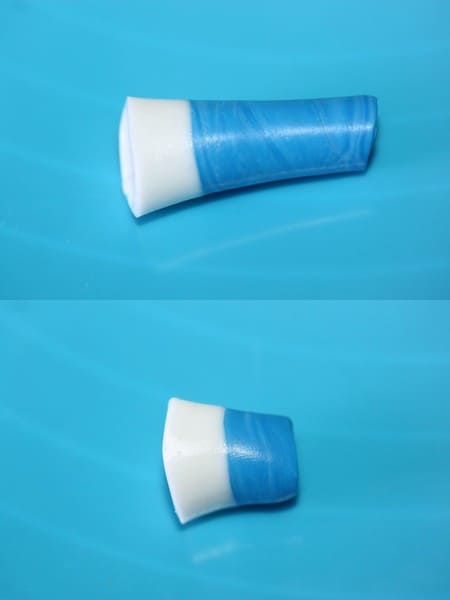
I rolled it out some more and cut the glass.
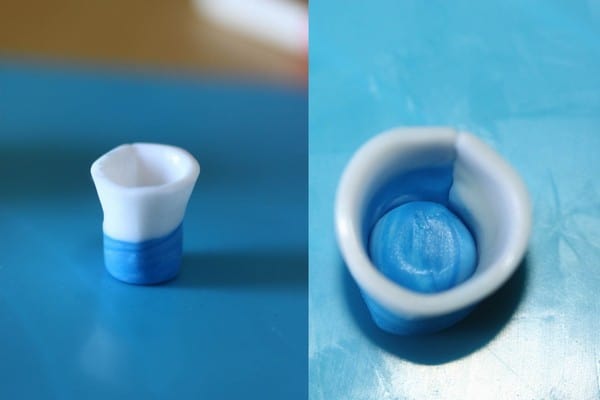
The small blue piece inside is water.
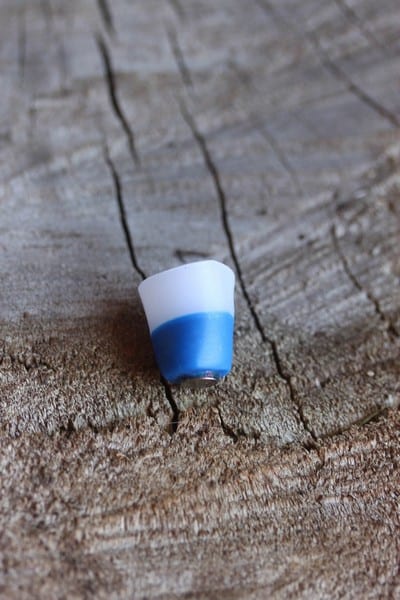
After baking it should look like a glass of water.
Baking
Each polymer clay requires different baking conditions. I baked the Cernit for 20 minutes on 120 °C (248 °F). I let everything cool down completely and then glued on the magnets.
In the box with it
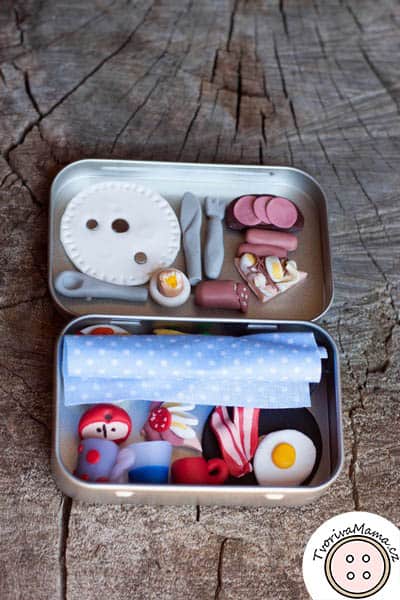
I placed everything in the box and checked that the box could still be closed properly without damaging the pieces.
Let’s Play with the Miniature Travel Toy!
And now the real proof of resistance – giving the miniature travel toy to the kids!
Some More Photos