
“Mommy, I’d like a bunny cake,” said the upcoming birthday girl and she had me at bunny. So I planned the cake, the decoration and everything. Long story short, it was one fail after another until there was nothing left from my original plan and I had to come up with a new one a day before the party. This is the story (and tutorial, of course) of the fluffy bunny cake.

Make sure you have enough time to make the cake. Working with the chocolate requires some patience and you also have to count in the time to prepare the cake tiself. I will tell you what cake I used but you can choose almost any cake, I just don’t recomment too soft gelatine cakes.
Check out also my other cakes in the cathegory Recipes.
Table of Contents
Supplies
 Ears
Ears
- pattern – download it in PDF or JPG
- 300 g of white chocolate
- 1 tbsp of coconut oil
- several drops of pink food colorant in gel
- baking paper
- pencil
- scissors
- 2 decorating bottles
Frosting
- 500 g of softened unsalted butters
- 3 cups (each 100 ml) of powder sugar
- 1 tbsp of vanilla extract
- food colorant in gel: black and red or pink
- decorating set
- electrical whisk
Cake – make mine or any other
- cake mold with removable sides, diameter 20 cm and 15 cm high
- small fluffy biscuits, cca 350 g
- 500 g of full-fat quark cheese
- 300 g of sour cream
- 3 tbsp of powder sugar
- 2 handfuls of raspberry
- 2 handfuls of blackberries
- 100 g of white chocolate
- 1 tsp of coconut oil
Fluffy Bunny Cake – How to Make it
Cake
Start with the cake because it has to cool down before you decorate it and if you’re making a non-baked cake it needs time to set.

I made our classic – layers of biscuits alternating with layers of cream. I blended the raspberries and blackberries, mixed them with the quark cheese, sour cream and powder sugar. I always start with a biscuit layer and the last layer is always cream. I left the cake in the fridge over night so the biscuits had time to soak.

After I took off the side, I had to smoothen the surface with a spatula. Then I melted 100 g of white chocolate and coconut oil in water bath and covered the top of the cake with it to make it even. You can skip this step. It makes the top smooth, however, it is then a little harder to position the ears.
Ears
You can make the ears ahead and leave them in the fridge.

Cut 2 stripes of the baking paper sheet and draw one ear on each using the pattern (download it in PDF or JPG). If possible, cut the baking sheets long and place the ear closer to the bottom. It will make it easier later to make the ear round.

Melt the chocolate with coconut oil in a water bath and mix well. Color about a quarter of it pink and place it in one decorating bottle and the rest of the chocolate in another bottle. First, make the white contours of the ears, then fill the ears. When the white layer sets a little, add one more layer and while this is still liquid add the pink center of the ear.

Using a fork or knife make the edges of the pink layer a little fuzzy moving it left and right.

Let the chocolate set at room temperature. When it’s not liquid anymore but still soft, cut the contours with a knife.

And because we want the bunny to be a bit flop-eared, we have to curl one ear. You can find your own trick, here’s how I did it: I leaned the sheet with the ear against the kitchen wall and moved it a little up every 15 minutes until I couldn’t move it anymore. That’s when I curled the top of the ear completely down and placed it in the fridge.

And this is why it’s good to have a longer sheet. As you can see mine was too short and if it was longer I could have stretched it further and fastened it to the plate. Anyway, I just pressed the paper down and hoped it would stick until the chocolated solified in the frisge.

This is how the ear looked when I took it out of the fridge.

I used a small sharp knife to smoothen the edges. After you do this place the ears back in the fridge and leave them there until it’s time to put them on the cake.
Frosting

Use this recipe to make a perfect buttercream, just with the amounts in this recipe. Take one spoon of the frosting and color it pink and 3 spoons with black.

First, fill your decorating set with the pink frosing and make the snout – use any decorating tip that can make this fluffy efect. Then use a round tip to make the mouth and the ears.

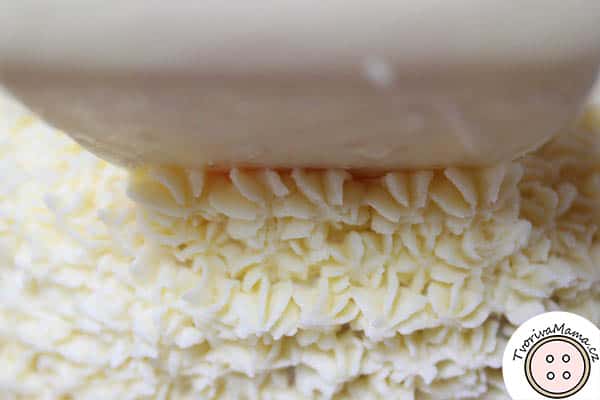
After that fill the decorating set with the white frosting and start making small fluffy bits. First fill the face features, then around them.

Then fill the rest of the top of the cake.

Then fill the sides. Put the cake in the fridge for a while, it will make the frosting more solid.
Attaching ears

You have to position the ears a little diagonally. So take a knife and make cuts for the ears. Don’t penetrate the cake with the ears without making the cuts, you might break the ears. Insert the ears in the cuts.
Now make some more “flufs” behind the ears which will give additional support for the ears. Place the cake in the fridge again and take it out right before serving. If you leave it at room temperature, the ears could melt and break.


