
I bet you wouldn’t pick up a walnut from a bowl and expect to find a miniature pantry in it! In this tutorial I will show you how to make this original little thing.

I haven’t figured out yet how to get the hunter’s clothes, the ball dress or the wedding dress in a hazelnut but I did figure out how to make a whole pantry fit into a walnut.
I really like working with the polymer clay, as you can see from all the tutorials in the category Clay Play. And I especially like miniatures. This time is my personal record as this is the smallest clay piece I’ve ever made. The tweezer was my constant companion and the tip of a knife was used a lot.

I wanted to make the walnut pantry as realistic as possible and I’m especially proud of the jars with the bottled fruit because I managed to make the fruit show through the wall of the jar. And what more is there in the pantry? Fruit, a small pumpkin, marmalades, syrup, potatoes and flour. I’ll show you how to make all of these but you can make anything you’d like to have in your pantry.
Table of Contents
Supplies

- polymer clay in different colors and also translucent (I used Cernit)
- acrylic or silicone matt
- smooth rolling pin
- knife
- sculpting tools
- 1 whole walnut shell
- miniature metal hinge (mine is 8 mm long)
- drilling machine with very thin drill (about 1 mm or the width of the screws you use)
- epoxy glue
- fine sandpaper
- small cutting pliers (jewelry pliers)
- thin rubber gloves (so the clay doesn’t catch any dirt or fingerprints from your hands)
Pantry in a Walnut – Tutorial
Preparing the shell

I recommend putting the walnut shells inside down on a sandpaper and flattening the edges a little. If you have two halves that fit together perfectly, you can skip this step.
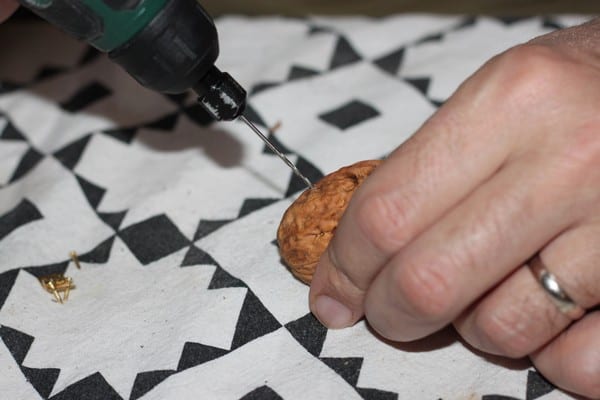
Next you need to drill holes for the screws on the back side of each half of the shell. First, place the hinge where you want it to be and mark the holes with a pencil, that way you’ll know where to drill. I’m using 2 + 2 screw hinge so I’m drilling two holes in each half.
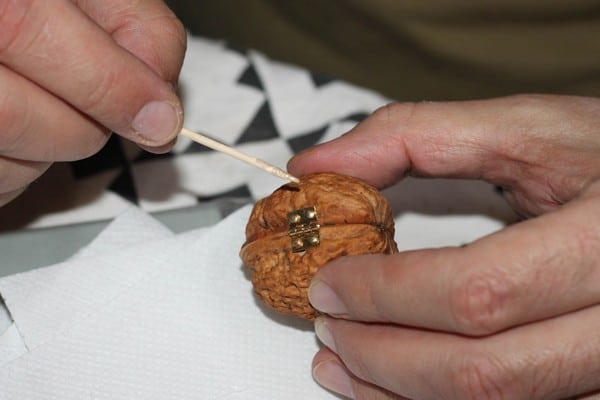
You can also sand the place where you’ll place the hinge but there’s a chance that the hinge won’t fit tightly onto the shell. Anyway, place the hinge on the shell and place the screws in the holes. Scoop small amounts of glue on a toothpick and put the glue under the hinge where it doesn’t lay flat on the shell.
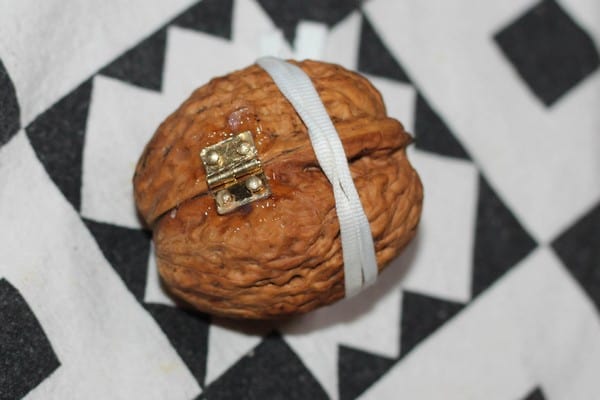
I put an elastic band around the walnut while the glue was drying.
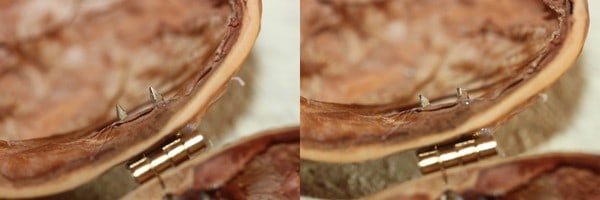
The screws came through the shell and the pointy end could penetrate the clay, so I clipped it off with the jewelry pliers.
Pantry
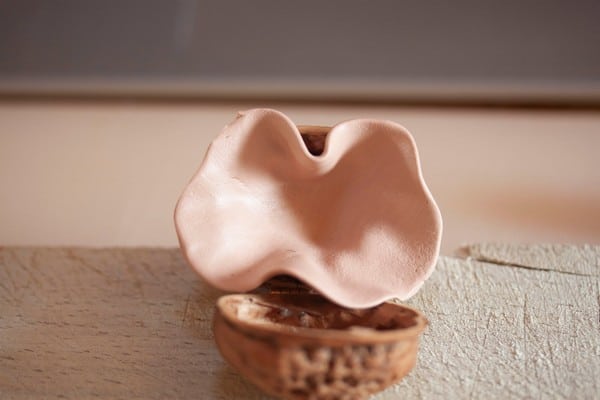
First I covered the walls with some clay. I chose pale beige which I rolled out to about 3 mm and cut a circle larger than the inside of the shell (I cut one circle for each half). I placed the circle on the inside of the half shell and gently pushed it inside.
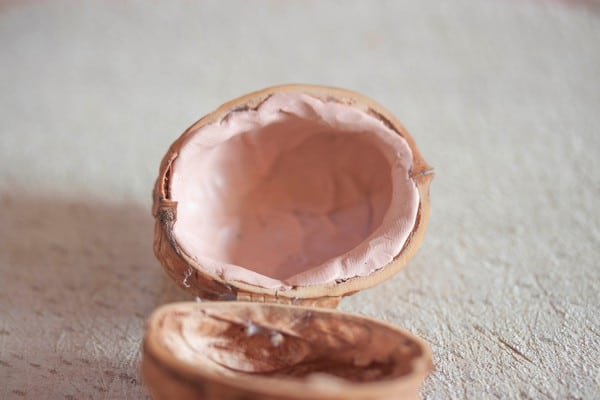
Once the clay was completely inside, I started pressing it on the walls. You can see that the walls aren’t smooth, they copy the inside of the shell. I trimmed the excess clay and pressed it around the edges.
I cut small rectangles for the shelves.
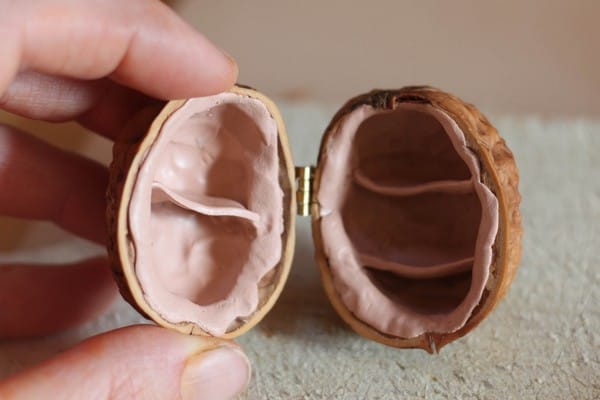
Since I was going for a naturally “messy” look, I didn’t measure the shelves exactly. I cut a rectangle that would be just a little longer and thinner than the half shell, put it in the shell and pressed the edges little by little into the wall until the transition between the shelf and the wall wasn’t apparent.
Jars
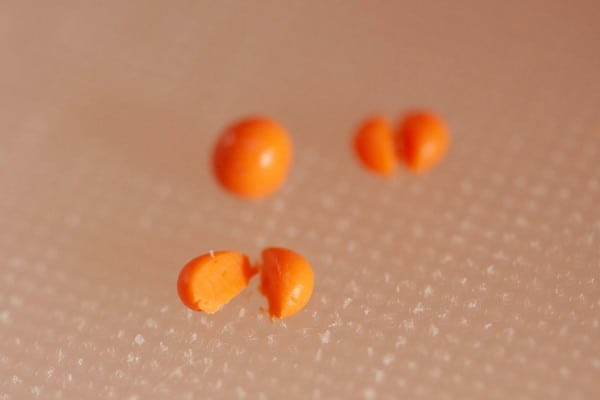
I planned to have two jars with canned fruit – apricots and cherries. To make the apricots I made 3 mm balls and cut them in half, to make the cherries I made even smaller red balls which I didn’t cut. Then the process was the same.
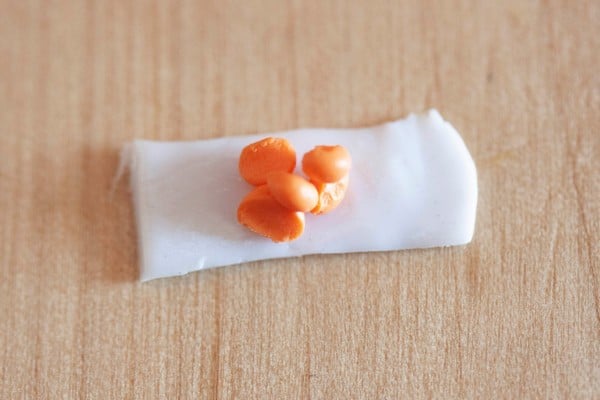
I rolled out a slice of translucent clay as thin as possible and then cut an 8 mm wide stripe from it. I placed the apricots on it.
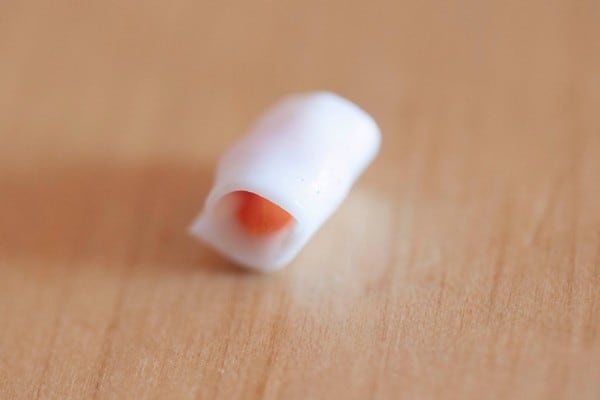
Then I rolled the stripe and cut off the excess clay.
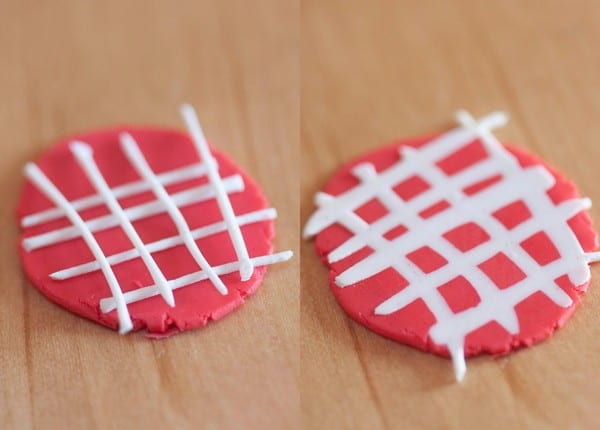
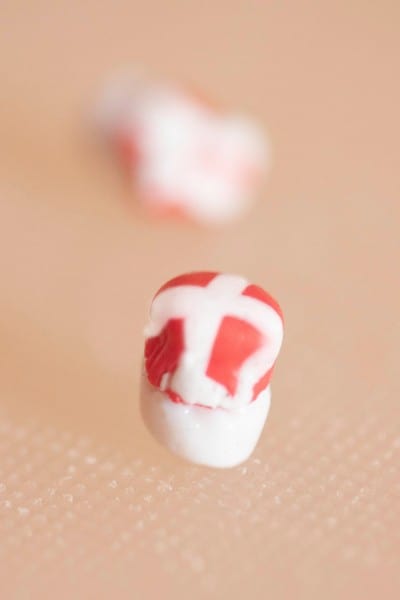
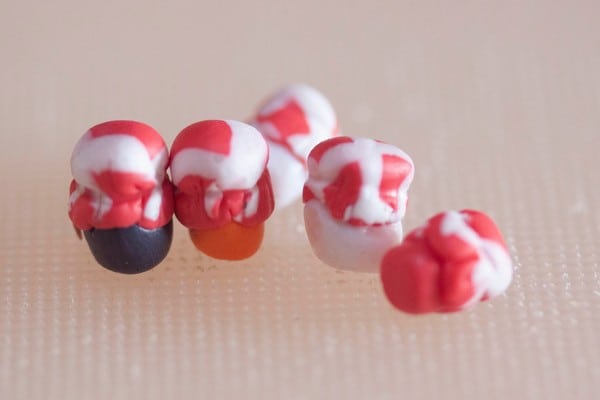
To make the lid I rolled out some red clay and placed thin white ropes on it in a grid. I rolled the grid a few times with the rolling pin and from this shape I cut out two to three small circles that would be the lids.
I placed the lid on the jar and then gradually folded the edges down and around the jar. By the way, this is the apricot jar before baking so you can’t see the fruit but it will be visible once it’s baked.
I also made apricot, plum a strawberry jam, for these I just rolled out some clay and cut it into small ovals.
Potato sack and flour
I rolled out some brown clay on a board with a tiny square pattern which would give the sack a nice texture. I actually used darker clay later as this one was too light. I rolled out the clay to 1 mm and cut a 3 x 1 cm stripe.
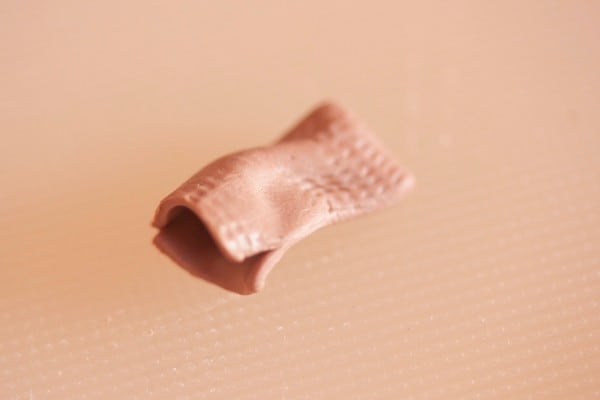
I folded it in half and pressed it around the edges (except for about 2 mm). Then I shaped it a little with my fingers so the sack wouldn’t be too straight.
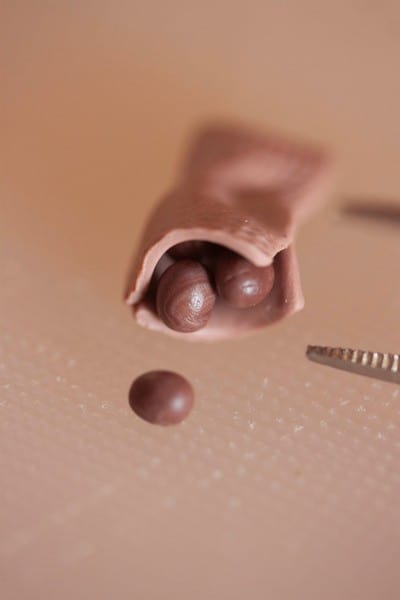
I made some potatoes from brown clay, put some of them in the sack and let other to be loosely arranged.
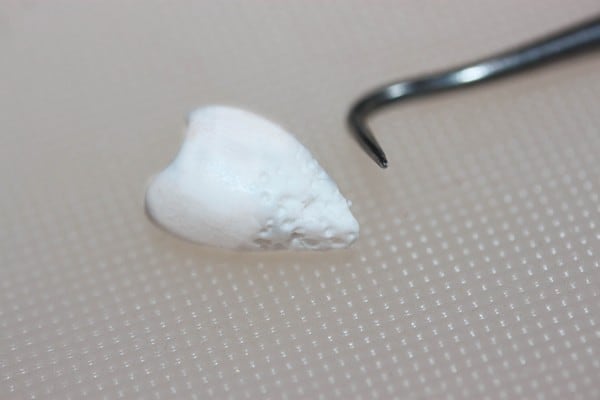
As for the flour, I made a kind of cone which I pinched many times with the pointy tool you see in the picture. You can use a toothpick or a needle.
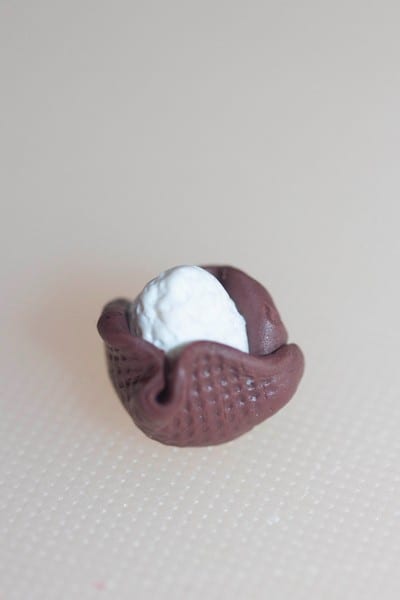
I rolled out some clay for the sack, cut out a 2 cm diameter circle and wrapped it around the cone. Later I put a thin white rope around the flour sack.
Syrup
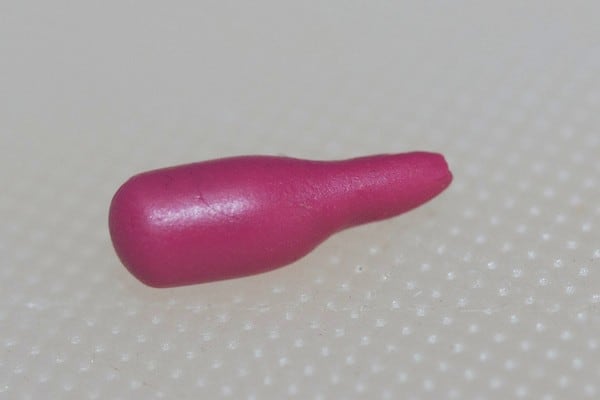
The syrup bottle is a pink oval rolled thinner towards one end.
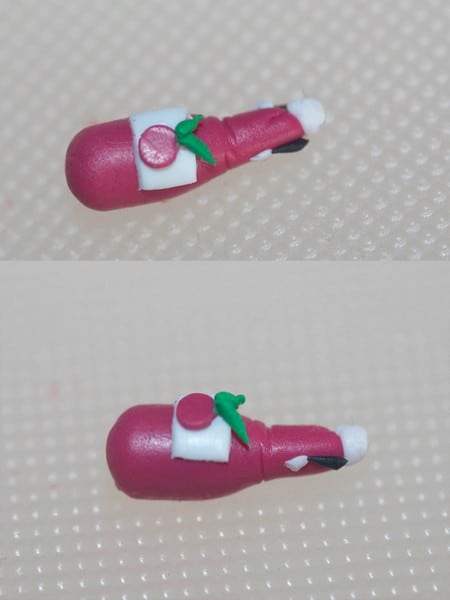
The cap is just a piece of white clay connected to 2 tiny white clay pieces on the sides of the bottle neck by a thin black stripe.
The label is a white rectangle and then I also made a pink circle with two leaves which I pressed onto the label.
Vegetables and fruit
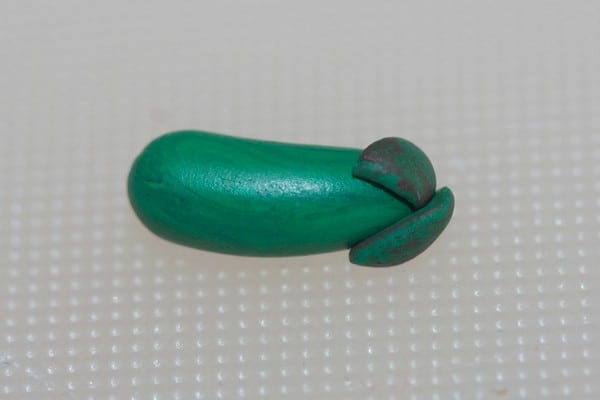
I mixed two shades of green for the green eggplant and it’s basically just curved oval with two leaves.
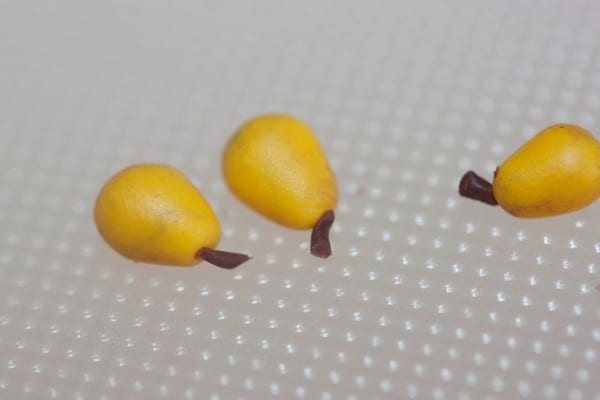
I made the pears from yellow ovals that I rolled slightly thinner towards one end.

And as for the small pumpkin, I made s small ball and flattened a little.
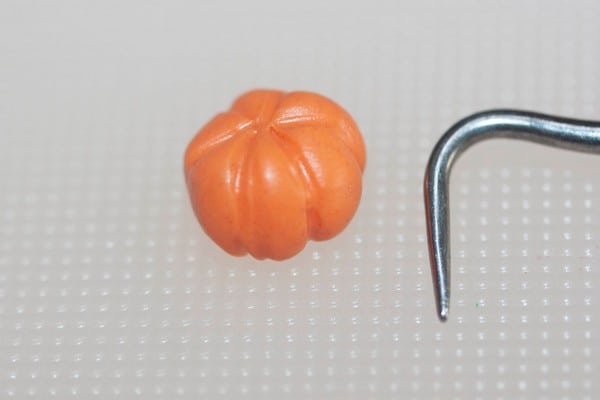
Then I made indentations to create sections.
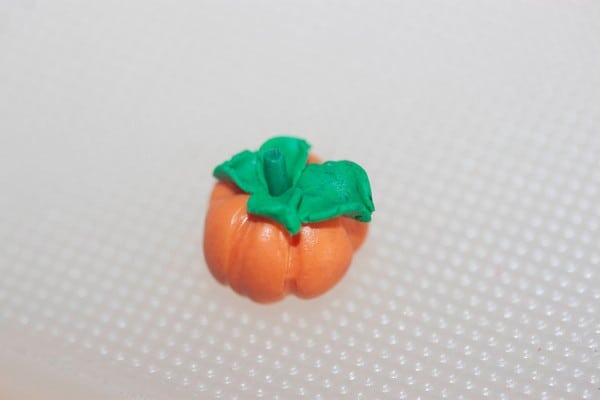
And I placed some leaves and a stem on the top.
Fill and bake the walnut pantry


I used tweezers to place everything inside the pantry. Some potatoes were outside the bag, the pears were also loosely arranged and at the end I decided to make a few nuts because there was still some space. The nuts are just tiny shapes made in hand and with a few indentations.
I preheated the oven on 120°C/248°F and baked the pantry for 30 minutes. I let it cool down. Can you see the fruit in the jars now?
The walnut pantry is done and here are some more shots:


